Showing posts with label adobe photoshop. Show all posts

Thursday, October 6, 2016

Read Optimising Images for the web Now

Optimising an image in Photoshop
In this tutorial you will learn how to change the size by using the crop tool and how to optimise an image for the web in Photoshop. When an image is optimise it helps for a faster download when using the image on the web.

Step One:

In Photoshop, open up an image that you have saved by clicking on open and selecting the image you need.
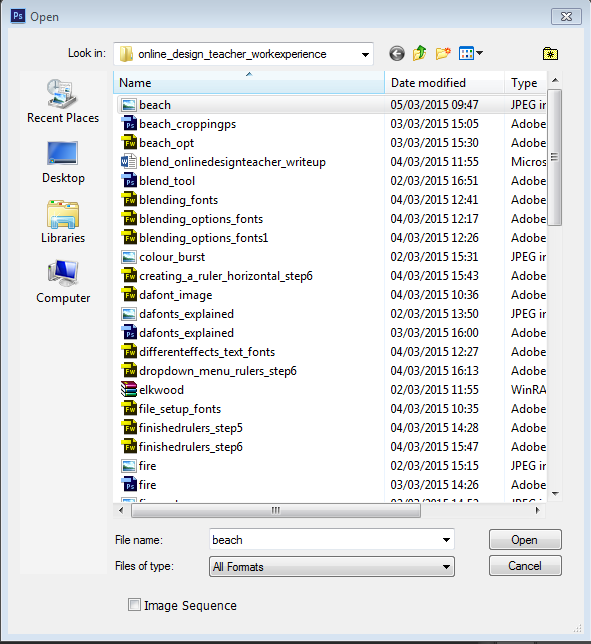
Opening the image to be used in Photoshop


The image I am using the below image for the demo. I downloaded the image from google images. It is a non-copyright image,that means it’s free to use without having to pay any fees. I searched in the “Search Tools” area in google images and selected “Usage Rights” and selected “Labeled for reuse with modification”.
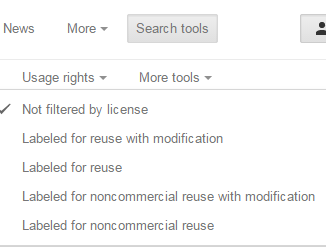
Selecting the usage rights on Google Images

Image used for the demo 

Image used for cropping and optimising in Photoshop

Step Two:

If you would like to get rid of any unwanted area of the image, you can crop the image. You can use the crop tool as show below to get rid of unwanted areas.
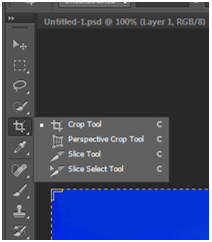
Selecting the Crop Tool in Photoshop


Appearance of the Crop Tool on Photoshop
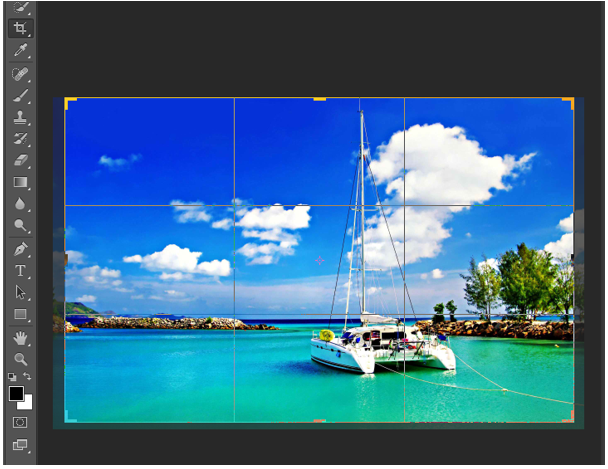
Selection area on the image once the Crop Tool is selected in Photoshop

Step Three:

To save this image to use for the web. Click on file and the selected “saving for the web”.
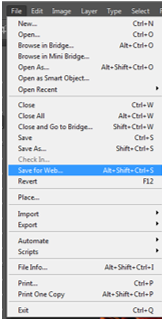
Selecting  "Save for Web" in the file area on Photoshop

Step Four:

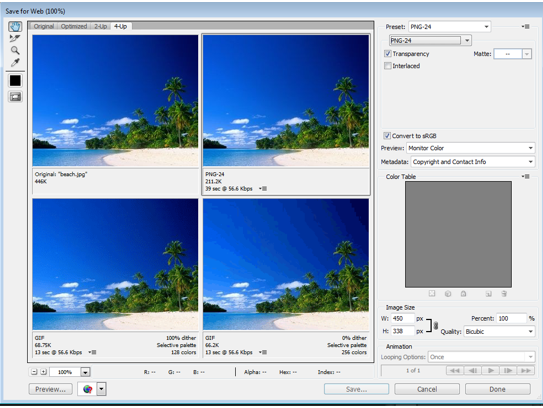
The “Save for web” window will appear. In this window, selected 4-Up, select png-24 for a faster download and for a greater number of colours of the image to be displayed when using it for on the web. 


Pop up menu to help you to select the correct format for your image to use for the web

Then you can save your image as beach_opt.png. 
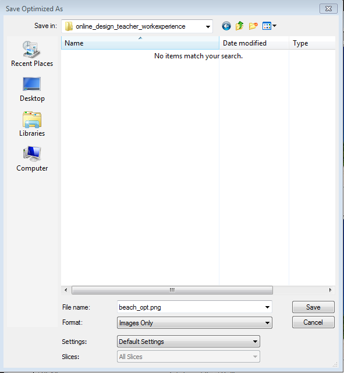
Saving your optimized image 

Read Create A Decal Texture Now


This image shows a finished decal texture.

Steps for Decal

1. You can look for an image that you want to be your decal or you can create decal by yourself by open new Photoshop file in power of 2 for example 512x512 with transparent background and you can unlock the layer.

This image shows the Photoshop settings for the canvas.


This image shows a finished decal texture.
2. You can download a suitable brush in ABR file format if you want to create your own decal from scratch. If you have downloaded an image you can remove parts from the image that you want use for your texture and place them into your canvas prepared in step one.

3. Press Ctrl and hover over your layer until you see the symbol (Thumbnail) hand with square and just press once on the layer.

4. Then press X and D to change front colour to white and background to black

5. Go to channel section.

This image shows Channel panel in Photoshop.
This image shows Where you can create new channel.

6. Add another channel which is an alpha channel.

This image shows Alpha channel added.
7. Select the area of your image than you want to be visible and with the alpha channel still selected use the paint bucket tool to fill that area white. Don't worry it won't damage your image, just set that area as solid and visible in your alpha while at the same time, masking the rest of the image.

https://youtu.be/2pEpg5Mg9t4

This links to a video tutorial about creating a decal texture.


Read Restoring A Damaged Black & White Photograph Now

Black and white photograph for restoring.
In this tutorial, you will learn how to restore a damaged Black and white photograph by using tools you would find in Photoshop.

Step 1

The photograph that was picked

I looked around for an old Photograph with as much damage to it as I could. I settled on this picture of a Man and Women on their wedding day.

Step 2

Touching up using the Clone stamp tool

Using the “Clone stamp tool”. I clicked ALT + left click on the area that had a bit of colour (Note. This should be as close to the rip and tear as possible) and once the colour was selected I stared clicking on the tears and rips, bringing the colour to them.

Step 3

Fixing the big tear.

I picked a part on the photo which was the most damaged, which was the two faces and I planned out what I would have to do and what tools I would have to use.

Step 4

Using the spot healing tool.

I zoomed in on the biggest part of the tear, which was the tear by the lady’s eye and I fixed it up using the spot healing tool and the clone stamp tool. The spot healing tool is for smaller rips and tears. While the spot healing tool is selected find the area you want to fix. Click several times around the rip and tear and the colour should be brought into the rip and tear.

Step 5

The lace shawl

I used the clone stamp on the tears and when I was finished I used the spot healing tool on the patch by the lace on her shawl.

 Step 6

The roof of the car.

I then picked the tear up by the back window of the car and again I used the clone stamp and spot healing tool and I was able to get the tear to look like the roof again

Step 7

The bouquet of flowers  

After that I moved down to the tear just by the bouquet of flowers and zoomed very close to the tear and spot healed it once more.

Step 8

The finished product.

I used a magnetic lasso which is a tool that automatically clicks around the edge of a colour/graphic. I used this tool to circle their faces and I used a noise reduction filter and this is the finished product.


BEFORE
Black and white photograph with rips and tears.
AFTER
Black and white photo after its restoration.


Wednesday, June 8, 2016

Create your own Angry Bird

The Angry Bird Family
Which Angry Bird will you create? 

Following the release of the Angry Birds Movie we thought it might be fun to practice our graphic design skills and make our very own Angry Bird. This tutorial is completed in Illustrator but all the tools and techniques used are also available in Photoshop. The reason I am using Illustrator is that Illustrator is the best program for creating vector graphics using the pen tool. Logos and cartoons are normally made with the pen tool so they are created as vector graphics, allowing them to be resized up or down without loss of quality, therefore this image will be created using the pen tool. If you are not familiar with the pen tool then you can read this guide to using the pen tool before you start.

Now that that is cleared up, let's begin making an Angry Bird!


1. Go to File-> New and create a canvas 700px wide and 500px tall.


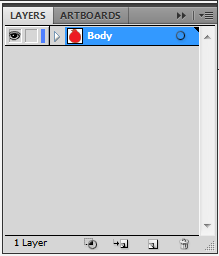
2. Go to the layers window and rename the base layer 'Body'. Select the ellipse shape tool and create a circle, set the colour of the circle to red, as we'll be creating the red Angry Bird, and put a 7px black stroke on the circle.


3. Use the direct selection tool to move the top and left anchor points slightly, as seen in the image below.
The Angry Bird's Body

4. Now use the add anchor point tool (within the pen tool) to add 6 anchor points across the top of the body, don’t be too particular about the placement as we will be moving them soon anyway. See the image below.


5. Next select the direct selection tool and drag the 2nd and 4th anchor points upwards and the use the handles on each anchor point until the shape resembles the image below. (If there are no handles on the anchor points it is possible they are straight line anchor points, use the convert anchor point tool and click and drag slightly on each point to convert them to curved line anchor points.)

The infamous 'quiff' of the red angry bird

6. Now open the layers window and click the button circled in the image below and create a new layer, call it 'belly'.


7. Next, while on the belly layer, use the ellipse shape tool to create the rough shape of the belly, colour the shape in white and set the stroke to 0pt. Then zoom in and use the direct selection tool to move the anchor points and their handles into a shape similar to the image below.


8. Open the layers window again and click the new layer button and create a new layer, call it 'eyes'. If it is not the top layer, move it to the top. Use the ellipse tool to create two circles for the eyes, each circle should be white with a 3pt stroke. To overlap one eye over the other as show in the image below, right click on one eye and select move to front.


9. Next create a new layer, call it 'eyeballs'. Use the ellipse tool to create two small black circles without any stroke. Position the eyeballs as shown in the image below.


10. Again create a new layer, call it 'eyebrow' and ensure it is the top layer. Use the Pen tool and click (do not click and drag) one at a time creating new straight line anchor points in the shape shown below remembering to join the last anchor point to the original point.

The angry bird eyebrow
Getting the mono-brow right is the key to making him look angry
11. The next part of the image is the nose. Create a new layer, call it 'nose' and once again ensure it is the top layer. Use the pen tool to create the rough shape of the nose, remembering to join the last anchor point to the original anchor point. Give the shape a yellow colour and a 3pt stroke. To edit and refine the shape of the nose use the direct selection tool to move the anchor points and their handles around. You may also need to use the convert point tool as the nose shape uses both curved line and straight line anchor points. The image below shows the image alongside the layers used so far to create it.

The angry bird and the layers used so far

12. Finally, create one more layer - call it "tail" and again use the pen tool to create straight line anchor points to make up the tail shape. Position the layer beneath the body layer for best results. If you wish you can use the ellipse shape to create 2 more shapes for the 'freckles' , or whatever they are, on the body.
Red angry bird
The completed angry bird 

TIP: The pen tool can be difficult but remember practice makes perfect so after completing this tutorial perhaps try creating the rest of the angry bird family or other cartoon images.

Tuesday, April 19, 2016

Image inside text using Photoshop

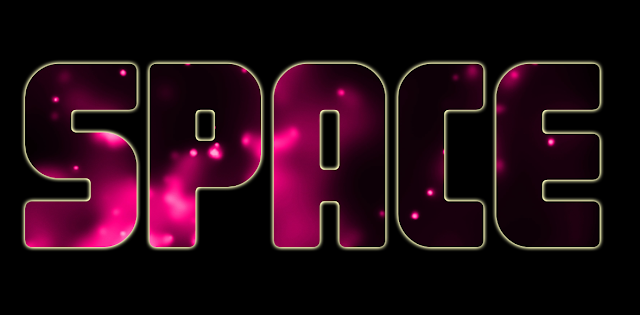
finished piece
Finished piece

Step 1.

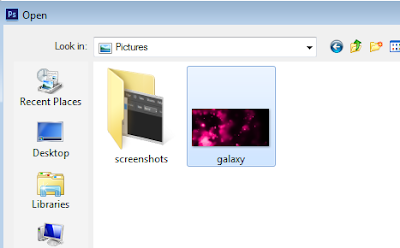
In Photoshop pen up an image you want to be inside the text

open file in Photoshop
Open file in Photoshop


select image
Select image


Step 2.

Create a text layer and add some text to it. In this example, I have typed the word 'Space'.


Step 3.

Right click on your image layer, in my case it is 'pink_gallaxy', and select the 'create clipping mask' option from the list that appears.

create clipping mask
Create clipping mask


Step 4.

Add a background colour (if you want) and that's it, simple as that.

Completed text effect with image inside it

Tip: you can left click inside the text and drag the image around to set it up the way you want.

Tuesday, March 15, 2016

How to use the clone stamp tool (Photoshop)

Before and after the clone stamp tool has been used

The clone stamp tool is a very useful tool in Photoshop. It allows you to clone one area of an image and copy (stamp) it onto another area.

Step 1.

So first, in Photoshop, open any image from your computer by clicking File > Open.

Open file

Select file

The clone stamp tool is located below the brush tool and above history brush tool. You can also use the keyboard short-cut "S"  to use the clone stamp tool.

Clone Stamp Tool

Step 2.

Once we click the Clone Stamp Tool, the options bar at the top of the screen will populate with the associated clone stamp tool options. You can set your clone stamp options for the brush size, type, shape, opacity, flow and blending modes.

Option bar for Clone Stamp Tool

If you only want to copy an exact area of an image you will leave the default settings here but you can also change the brush size and shape.

Image before the clone stamp tool is used

Step 3.

So this is what our image looks like before, let's say that I want to remove the house that's hanging down from the balloons. I hold alt and left click on area I want to copy from, in this case that would be another area of the white cloud. And slowly brush over the house. (You will get a preview of the action by hovering the brush over the area before you click to paint/clone).

Image after some use of the clone stamp tool

Step 4.

You can see that the copied cloud area is now covering the house. Keep repeating until the house is completely gone or you have achieved the desired cloning effect that you want.

The house now covered by 'cloned' clouds using the clone stamp tool

Play around with different brush settings and options and try replacing different areas of your image to practice and get the hang of your Clone Stamp Tool.


close
Banner iklan disini