Showing posts with label text. Show all posts

Tuesday, April 19, 2016

Image inside text using Photoshop

finished piece
Finished piece

Step 1.

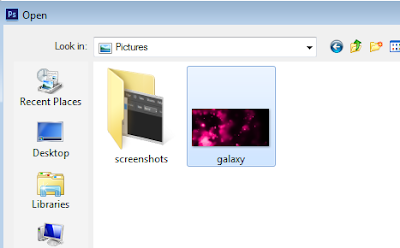
In Photoshop pen up an image you want to be inside the text

open file in Photoshop
Open file in Photoshop


select image
Select image


Step 2.

Create a text layer and add some text to it. In this example, I have typed the word 'Space'.


Step 3.

Right click on your image layer, in my case it is 'pink_gallaxy', and select the 'create clipping mask' option from the list that appears.

create clipping mask
Create clipping mask


Step 4.

Add a background colour (if you want) and that's it, simple as that.
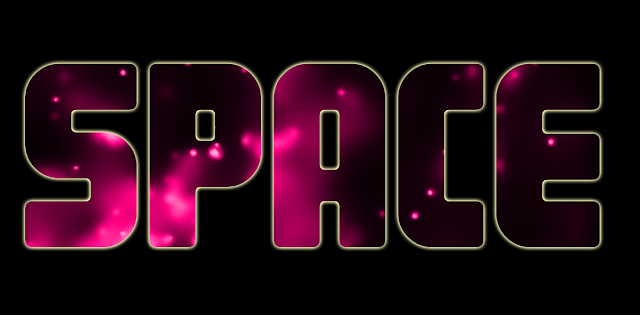
Completed text effect with image inside it

Tip: you can left click inside the text and drag the image around to set it up the way you want.

Tuesday, March 22, 2016

CSS Text

CSS Text and CSS Fonts
This will be funny once you've learned about CSS Text and Fonts

Formatting Text With CSS

Formatting and adding style to text is a key issue for any web designer. In this lesson you will be introduced to the amazing opportunities CSS gives you to add layout to text. The following properties will be explained:
  • text-indent
  • text-align
  • text-decoration
  • letter-spacing
  • text-transform

text-indent

The property text-indent allows you to add an elegant touch to text paragraphs by applying an indent to the first line of the paragraph. In the example below a 30px is applied to all text paragraphs marked with <p>:


The above CSS code will result in all paragraphs being effected like this in the browser...

This is a paragraph of text which has been indented. This is a paragraph of text which has been indented.


text-align

The CSS property text-align corresponds to the attribute align used in old versions of HTML. Text can either be aligned to the left, to the right or centred or you can justify the text, which will stretch each line so that both the right and left margins are straight. In the examples below the text in table headings <th> is aligned to the right while the table data <td> are centred. In addition, normal text paragraphs are justified.


text-decoration

The property text-decoration makes it is possible to add different "decorations" to text.

For example, you can underline the text, have a line through or above the text.

In the following example, <h1> are underlined headlines, <h2> are headlines with a line above the text and <h3> are headlines with a line though the text.


letter-spacing

The spacing between text characters can be specified using the property letter-spacing. The value of the property is simply the desired width. For example, if you want a spacing of 3px between the letters in a text paragraph <p> and 6px between letters in headlines <h1> the code below could be used.


text-transform

The text-transform property controls the capitalization of a text. You can choose to capitalize, use uppercase or lowercase regardless of how the original text is looks in the HTML code. There are four possible values for text-transform...
  • Capitalize: Capitalizes the first letter of each word. For example: "john doe" will be "John Doe".
  • Uppercase: Converts all letters to uppercase. For example: "john doe" will be "JOHN DOE"
  • Lowercase: Converts all letters to lowercase. For example: "JOHN DOE" will be "john doe"
  • None: No transformations - the text is presented as it appears in the HTML code.

As an example, we will use a list of names. The names are all marked with <li> (list-item). Let's say that we want names to be capitalized and headlines to be presented in uppercase letters.


The CSS Code above will result in this...

THIS IS AN UPPERCASE HEADING

  • This Is An Capitalised List Item
  • This Is An Capitalised List Item
  • This Is An Capitalised List Item
  • This Is An Capitalised List Item

Next Up


Wednesday, March 9, 2016

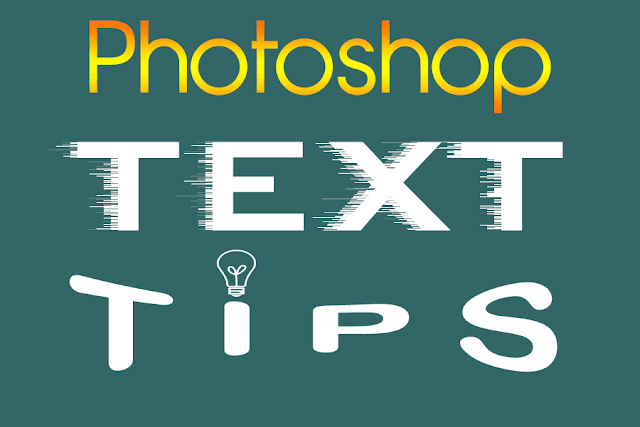
Photoshop Text Tips

You can do a lot with text in Photoshop through both simple and advanced techniques

Photoshop was and still is primarily a photo editing software and always will be but it does have a wide range of text editing tools and capabilities that often go untapped or unnoticed by us. The tips below will help you to make the most of text in Photoshop.

Box Over Point

Always create a text box rather than a text point. Click and drag when using the text tool to create a text box. This gives you more control and options when positioning and formatting the text.

Diagonal Text

You can have text going horizontally or vertically. If you want to put it diagonally, type it horizontally first then use Edit > Transform > Rotate.

Divide and Conquer

Give separate pieces of text, such as paragraphs, a text box of their own. This will maximise your editing opportunities if you want to make major revisions or changes later. This is especially true with posters, magazines or CD/DVD covers.

Quick Access

To return into a text box double click on the ‘T’ beside the text layer. This is the easiest, fastest and most fool proof method. You may think to just double click on the box in the canvas but you need to be using the text tool first to do this while with the other method you don't.

Colouring In

To change the colour of text you must enter into the text box, highlight it and then choose a colour from the text colour picker at the top of the screen, not the colour picker on your tool bar. You never use the paint bucket or paint brush as this will force rasterisation of the layer. A layer style > colour overall will also work but takes longer to add and to edit.

Don't Rasterize

Never rasterize text unless it is totally necessary, read any pop ups that appear and if it says you must rasterize the text cancel it unless you had intended it. The text will no longer be an actual text layer once rasterized so If you rasterize text you will lose all the text editing capabilities like changing the font style or using text warps.

Text Warp

When using text warp you should reduce the text box to snugly fit the text. This is because the text warp actually warps the text box and not the text directly, so a snugger text box gives you more control with the text warp.

Styles before Filters

Layer styles can be applied to text without rasterizing it but filters from the filter gallery cannot be applied to text without rasterizing it.

Customising Letters

To edit the shape of text by editing anchor points you first need to convert it to a shape. To do this, select the layer, go to layer> type> convert to shape. This will turn the text into a shape layer. You can then edit the individual anchor points using the direct selection tool.

Images as Text

You can use the horizontal or vertical type mask tool to “cut” text from an image. It works by selecting part of the image in the shape of the text you have typed. This can be a nice effect to have an image running through your text as opposed to a flat colour or gradient. This tool works like normal text but after you have typed the text you will then need to use the move tool to move the selection to the canvas or canvas area you want it on.

Character and Paragraph

The Character and Paragraph windows give you additional text editing options such as line height, letter spacing, text height, font weight, alignment and much more. Good text is very important in design, spend time working on it and experimenting with the different options that can be achieved.


close
Banner iklan disini