Showing posts with label Unreal. Show all posts

Friday, February 10, 2017

UE4 FPS Video Series

first person shooter game in ue4
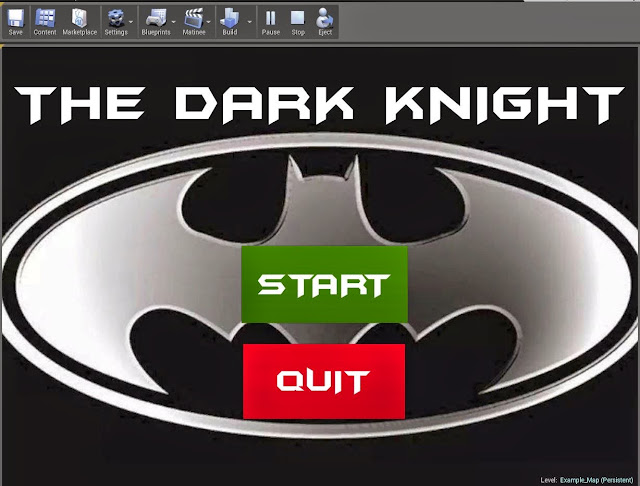
A screen shot from the completed FPS game in UE4

This series aims to guide you through the process of creating a first person shooter game using 10 specifically created tutorials, each focusing on a different aspect of designing and creating the game.

The series was created by Nathan Hill, Dylan McGrath and Philip Evans. The game itself is available for download here

This video series is a follow up and update on our previously created text tutorial series available here.

You can watch all the tutorials in the playlist right here (below) or go to our YouTube channel

Create an FPS game in Unreal Engine (UE4)


Thursday, October 6, 2016

Read How to create Pause Screen in UE4 Now

This image shows a finished Paused screen.

Step 1:

Before you open Unreal Engine go to http://www.dafont.com/ for download a font suitable for your game. One you download extract the file and installed ttf file. Copy the ttf file and paste in C:\Program Files(Program Files (x86))\Unreal Engine(Epic Games)\4.5(engine version)\Engine\Content\Slate\Fonts

After when you installed font open Unreal Engine. Content Browser is located in folder “Game” create new folder for User interface screens call it “UI”. In UI folder press right mouse bottom and select “User Interface” option then select “Widget Blueprint” in order to save press right click on widget blueprint and select save. Then double click on the widget blueprint to enter to edit menu.

This image show where you should create folder for User Interface.

This image shows where you should create Widget Blueprint.


Step 2:

On left top corner of the screen there is a folder called “Palette” expand “Common” select “Text Box” hold and drag on canvas or you can hold and drag on canvas under [Root] but make sure that you put on canvas.

This image shows Pause Screen editor.

This image shows canvas for screen.

Steps 3:

If you select text box then on the top right side of User Interface editor you can see “Details” options. Chose “Layout (Canvas Panel Slot) and press on Anchors and choose the middle. You can mess around and change “Style”, “Appearance” and other options. In “Content” option you can type the heading of your title.

This image shows options for Pause Screen.

This image show Text Block applied on canvas.
This image shows Text Block operation.

This image shows text applied on canvas.
This image shows colour options.
This image shows costumer font style. This is spot where you should put the font name that you want use.

Step 4:

You can add image if you want by dragging image box. To select image that you want to use and drag to “UI” folder. When your Pause screen is finished and you are happy of it than press Compile. Save and close the editor. You can find good image on http://www.freeimages.com/ .

This image shows an image box applied on canvas.


This image shows an image box applied on canvas.
The image that I chose is grunge border from http://vyawie.deviantart.com/art/Border-Black-Grunge-187744467 . You can search in Google Image for grunge border.

This image shows an image that I use for Paused Screen.

Step 5:

Select “Blueprints” then select “Open Level Blueprint”. Press right click and search for letter “P” to pause game and “X” to un paused game and add other important objects that will be needed for “Pause Screen” to work. Create new variable and select and then in variable type change to Boolean. Then create new Variable but this time change to Float.

This image show programmer for Paused screen.

This image shows the program for Paused screen.

Step 6:

If you finish coding press compile and save your Pause screen and you can exit programming. The last thing that is left to test if pause screen is working is to “x” out of programming editor and see if it works.

This image shows a finished Game Paused screen.
You can also watch a video tutorial about how to create a Pause Screen.


Read UE4 Landscape Editor Introduction Now

Landscape editor mode in UE4
In this tutorial I will be showing the basics of the Landscape Tools in Unreal Engine 4 and what they are used for.

Once you create a new level in Unreal Engine 4 you have to choose the landscape's size and material.


Landscape 

For this tutorial I am going to be using the default grass material, witch can be found in the content browser in Unreal Engine 4. After choosing the material and clocking Create you level will be filled in with the material you chose and the size you wanted also.


Landscape after creating


After your landscape has been filled in you can use the selection tool to select certain areas of your level.

The Landscape Tools


The Selection tool, selects Landscape components, one at a time for subsequent use with other tools, such as moving components to streaming levels and deleting components.
Controls- Left mouse click to select components, Right mouse click to de- select components.

The Add tool, adds new components to the landscape one at a time.
Controls- Left mouse click to add new component.


The Delete tool, deletes selected components from the Landscape
Controls- Left mouse click to delete selected components if there are none selected it deletes the components that are highlighted by moving the mouse over it.

The More Level tool, moves the selected components to the current streaming level. This makes it possible to move sections of the Landscape into a streaming level so that will be streamed in and out with that level, optimizing the performance of the Landscape.


The Change Component Size tool, Changes the size of the whole Landscape not individual components. With this tool you can change the size of the Landscape components and adjust how many sections each component has in the Change Component Size.


The Edit Splines tool, Landscape Splines are a flexible system for creating any linear feature that needs conform to a Landscape, and can even push or pull the
terrain to better facilitate building these features. They are created and edited using the spline tool in the Landscape toll.


The next Tab of the Landscape tools are the Sculpt tools.


Inside the Sculpt Tool bar there are a number of different tools, I will be talking about all of them in this tutorial.

The Sculpt tool, Increases or decreases the heightmap height in the shape of the currently selected brush and falloff
Controls- Left mouse click, heightens or increases the selected layers weight.
                Shift + Left mouse click, Lowers or decreases the selected layers weight.

                                        
  Showing Increase
                                     
Showing Decrease

The Smooth tool, Smooths the heightmap. The strength determines the amount of smoothing.
Controls- Left mouse click to Smooth.

                                                                             
 Showing Smoothing tool


The Flatten tool, flattens the Landscape to the level of the Landscape under the mouse cursor when you first activate the tool.
Controls- Left mouse click to Flatten


Showing the Flattening tool


The Ramp tool, enables to select two different locations on your landscape and create a flat ramp between them with a falloff you specify on the sides.
Controls- Ctrl + Left mouse click on two locations marking the start and the end of the ramp.

                                                                                 
 Showing unfinished ramp
                                             
Showing done ramp


The Erosion tool, uses a thermal erosion simulation to adjust the height of the heightmap simulating the transfer of soil from higher elevation to lower elevations. The larger the difference in elevation, the more erosion will occur.


 Showing Erosion

The Hydro Erosion toll, uses a hydraulic erosion simulation to adjust the height of the heightmap. A noise filter is used to determine where the initial rain distributed. The simulation is calculated to determine water flow from that initial rain as well as dissolving water transfer, and evaporation. The result of that calculation provides the actual value used to lower the heightmap.

                                                                                   
Showing HydroErosion

The Noise tool, applies a noise filter to the heightmap or layer weight. The strength determines the
amount of noise. Also the noise filter is related to position and scale, which means if you do not change Noise Scale, the same filter is applied to the same position many times.

                                                                                       
Showing Noise Tool


The Visibility tool, lets you create holes in your ladscape for such things as caves.


The Region tool, selects regions of the landscape using the current brush settings and tool strength to be used to fit a landscape gizmo to a specific area or to act as a mask for copying data to/or pasting data.


 Showing Selection Tool


The Copy/Paster tool, is used to copy height data from one area of the landscape to another through the use of Landscape Gizmo.


I hope this is really helpful for first time users or if anyone wants to brush up on the Landscape Tools.


Read How to make a Start Screen for UE4 Now

Menu
The Completed Start Screen


This tutorial will go through how to create a Start/Main Menu for a game on Unreal Engine. In a previous tutorial we showed that when setting up a level on Unreal Engine, for settings we added With Starter Content.

Starter Content
Starter Content

Getting Started

The first thing you do go to your user interface folder in the Content Browser. When you click into the folder and then right click on a black space anywhere in the folder. A tool bar will then appear. Scroll down and click on the User Interface bar and then select the Widget Blueprints sub bar.  A new widget file will appear and you then name it, for example Start_Screen. You then save it.

Content Browser
UI Folder

Design

With your new User Interface file, you click into it which brings you into widget editor. We will be making the buttons and background image with the designer.

Widget Editor
Widget Editor

Palette
Palette
You first select Button on the Palette. To place it onto the screen. Note: if anything is unable to be dragged onto the screen, you can still drag it onto the Hierarchy, onto the Canvas Panel, it will still appear. A Details Panel will show like in the Level Editor where you can fix anchor points, positioning etc. 

Details
Button Details

Button
Button
Hierachy
Hierarchy

After you place your buttons onto the screen, you bring in a text block for each of your buttons.For the Text that you're going to use for your title and your buttons, have a custom font installed, and have it looking suitable to your game.
Text Block
Text Block
You use the Details Panel to make the colour, font and text content. 

Text Details
Text Details
So for each button we need to give each a name and a background colour. So for this we will name our buttons START and QUIT. 

Buttons
Menu Buttons

After you have your buttons made, bring in your background image. The image that we use is was imported into the UI folder in the Content Browser. From the Palette, drag on IMAGE. In the Details Panel, in Appearances, click into Brush. Here you can select the image you have imported by searching for it. When you have your image, adjust its size so it fills as a background screen.

Image Details
Image Details
Background Image
Background Image

When you have made your background screen, add in another text block to give your add your game name. 
Game Title
Title

Blueprints

After you have your Menu designed, click onto the Blueprints and click on, Open Level Blueprints.

Blueprints Buttton
Blueprints Button
These are the codes for your menu...

Blueprints
Menu Blueprints
After that is done, press play to test out your menu. It should look something like the image below.


Finished Screen
Finished Screen


close
Banner iklan disini