Showing posts with label graphics. Show all posts

Wednesday, November 22, 2017

The Difference Between Vector and Bitmap Graphics


vector or bitmap graphics
Vector or Bitmap? What is the difference?

Bitmap/Raster graphics and vector graphics are the two main types of image files used in the world of graphic design. People often struggle to understand the difference between vector and bitmap graphics despite the fact that they are very different file types. Both of file types have their advantages, and equally they have their disadvantages so it's important to know the difference between the vector and bitmap so you can make an informed decision about which one is best for your design project. Let's start with the definition of each so we know the basics first and your decision of bitmap or vector might be a little bit easier.


Vector v Bitmap - The Definitions...

Bitmap (Raster) Graphics

Bitmap (or raster) graphics are made up of as a series of tiny dots called pixels. Each pixel is actually a very small square that is assigned a color, and then arranged in a pattern to form the image.

Vector Graphics

Vector graphics is the use of polygons to represent images in computer graphics. Vector graphics use mathematical formulas to draw lines and curves that can be combined to create an image. These lines (vectors), lead through locations called control points/nodes/ anchor points.

Vector v Bitmap - The Differences...


difference between vector and bitmap
One of the main differences of vector and bitmap can be seen when you zoom in

So the obvious difference between vector and bitmap graphics is how they are created, as identified in the above definitions. Bitmap are made up of pixels while vector graphics are created using a mathematical formula. But there are numerous other differences between vector and bitmap graphics.

For starters, when you zoom in on a bitmap image you can begin to see the individual pixels that make up that image, most noticeably at the edges of the image. When a vector image is scaled up, the image is redrawn using the mathematical formula and the resulting image is just as smooth as the original.

In terms of file size, vector images tend to be smaller than bitmap images. That’s because bitmap images store color information for each individual pixel that forms the image while a vector image just has to store the mathematical formulas that make up the image, which take up less space. Unfortunately, vector formats have not always been well supported on the web. Currently the most popular image file formats used on the web, GIF, JPEG and PNG, are bitmap formats. Most vector images are first converted into bitmaps images (rasterized) before they are used on the web, although the SVG format is growing popularity due the rise in responsive web design.

In terms of colour, bitmap graphics are best for images that need to have a wide range of color gradations, such as photographs. Vector formats, on the other hand, are better for images that consist of only a few areas of solid color such as logos and type (text). This also means that vectors can't create realistic gradients, and although some vector softwares will allow it, they are actually using raster effects on the vector graphic.

When To Use Vector...

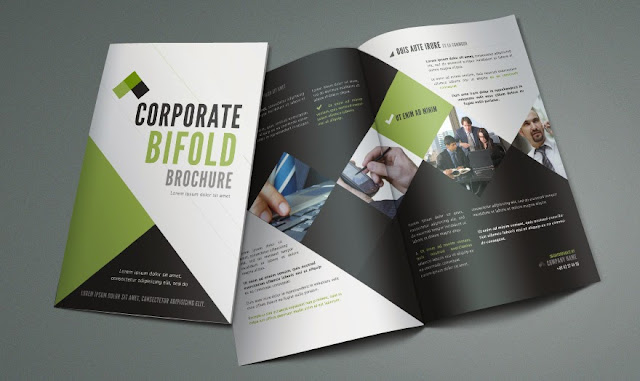
Vector graphics are excellent for graphics that frequently require resizing. A company logo is a prime example of a file that should be created as a vector and saved as a master file so you can use it with smaller items such as your business card, letterhead and brochure, but also on larger surfaces, such as billboards or the corporate jet. Vectors can also be used to create stylized modern graphics as their solid colours and sharp lines help them to appear crisper and with more visual impact that a bitmap image.

When To Use Bitmap...

Bitmap graphics are best used for photographs or other graphics with a wide range of colours such as a movie poster. They are also ideal for graphics with effects such as drop shadows (as they use gradients). Bitmaps can also be used to create realistic graphics and images using image editing or "paint" softwares such as Photoshop or CorelDraw. They are the most common type of graphic used and are supported on all digital systems.


Vector & Bitmap File Types...


vector and raster file types
Vector and Raster Graphics can come in different file types

Vector File Types

  • .ps (Adobe PostScript) 
  • .eps (Encapsulated PostScript)
  • .svf (Simple Vector Format)
  • .ai (Adobe Illustrator)
  • .cdr (Corel Draw)
  • .svg (Scalable Vector Graphic)

EPS, PDF (for transferring vcector files) and SVG (responsive web design) are the best file types in which to save your vector graphics outside of the editing software you are using.

Bitmap (Rater) File Types

  • .jpg (Joint Photographic Experts Group) 
  • .gif (GIF transparent file) 
  • .png (Portanble Network Graphic Transparent file)
  • .tiff or .tif (Tag Interleave Format)
  • .psd (Photoshop Document)

The best file types in which to save your bitmap graphics are JPG (for photos), GIF (for basic images like cartoons) and PNG (for images with transparency).

Vector and Bitmap File Types

Encapsulated PostScript files (.eps) are self-contained files that are the same mathematically as vector files, though they can be created from raster images as well. The format is one of the most compatible and portable because they are supported by almost all graphics software.

Then there is the Adobe Portable Document Format (.pdf) files in which files render as they were created thus using (potentially) a combination of vector and raster images.In a PDF file vector images are rendered as such as and be scaled and extracted. Fonts are embedded within a file and are rendered as type, not flattened as an image element. Raster images, such as photos, will appear as intended at 100 percent but, being bitmap graphics, they will still lose quality if they are over-enlarged.


Vector v Bitmap - Web or Print?


vector or bitmap for web or print
Which graphic format is suited for web or print or both?

This questions is much more relevant to bitmap graphics due the fact that they can lose quality when scaled up. Units of measurement such as dpi (dots per inch) or ppi (pixels per inch) refer to the number of pixels in one inch of the image. To determine whether your bitmap images are a suitable resolution for a specific situation (poster/business card/web banner etc.), you should first need to check their pixel density. 

As mentioned earlier, vector graphics have not always been well supported on the web and currently the most popular image file formats used on the web are bitmap formats such as .jpg or .png. The web displays 72 dpi, a relatively low pixel density, so raster images with a low dpi (such as 72 dpi) look nice and crisp on the web but this same image may not be suitable for printing on a brochure, poster or packaging which require a higher pixel density to maintain quality when printed. 

Why is this relevant you ask? Well to correctly print an image, it should be at least 300dpi, a much higher pixel density than the web displays so if you try to resize a low dpi image pulled from the web to use for your high dpi print project it won’t work because the image still has the same amunt of pixels and will distort (pixelate) when you try to scale it up. For example, if have a 72 dpi .jpg of an image it will need to be “stretched” to more than 3 times it's size to get it up to 300dpi. So that 72dpi image will look fine on your computer monitor, but when it prints at 300dpi it will look pixilated.

In this situation you should use a vector image (.EPS or .AI format) or create a bitmap/raster (.JPG or PNG or GIF) in the exact final print dimensions and at 300dpi.


Vector v Bitmap - Conclusion...

So after all that what we can say is that neither vector or bitmap is a better format than the other but rather that each format has it's advantages and disadvantages. The main thing is that once you know what these advantages and disadvantages are you can make an informed decision on which format is the right one for your design project. Vector or Bitmap... it's your call!


Friday, June 23, 2017

How To Colourise A Black & White Photo

black and white photo colourised before and after
The photo before and after it is colourised

This article will teach you how to colourise a black and white photo using Photoshop in 7 simple steps. Some amazing results can be achieved using this relatively simple colourisation process. You can turn relatively dull black and white photographs into stunning full colour images in just a few minutes.

So let's get started colorising your black and white photos now!


Step 1: Open your black and white photo or image in Photoshop

Ok, so this is a nice and obvious first step. Simply open Photoshop then click on File in the top left corner of the screen and on the drop down click on Open. Then in the window that opens, navigate your way to your chosen image, select it and open it in Photoshop.

Step 2: Convert the image mode to CMYK

How to colourise a black and white photo
Convert the image to CMYK Color Mode

This process can be done in RGB but as the image you are editing likely started out as a print and in case you want to print it out after it is colourised it is best to edit in CMYK mode. So just click on Image > Mode > CMYK Color and Click OK to Confirm Conversion if prompted.

Step 3: Duplicate the layer

How to colourise a black and white photo
Duplicating the layer

This is just a precautionary step in case you accidentally make a mess of your image! This way we will be editing the duplicate layer and your original black and white image is safe and sound. There are numerous ways to duplicate a layer in Photoshop, the most obvious being the one shown above - click on Layer > Duplicate Layer, then name the layer in the pop up window. Crtl + J is the keyboard shortcut for duplicating a layer in Photoshop.

Step 4: Taking a snapshot via the history window

How to colourise a black and white photo
Taking a history state snapshot

The process of taking snapshots will be key to this process. If you are not familiar with this process, it simply involves clicking the little camera icon on the history window in Photoshop. What this does is take a digital "snapshot" of the current history state of the layer, we will use this to store different colours which we will then use to "paint in " the original black and white image using the history brush.

This first snapshot,shown above, is another precautionary step here, really a bit of practice as we won't actually use this particular snapshot later on. However you may use it for your own image, especially if you want to retain some areas of black and white.

Step 5: Creating the skin colour snapshot...

So we'll start with creating the colour for the skin. As explained already, we will be creating a colour, storing it in a snapshot then using the history brush to paint it on the relevant areas later on.

How To Colourise A Black and White Photo
Select the Cyan layer in the channels window then edit the brightness and contrast as shown

First of go to Channels and select just the cyan layer as shown above.

Then in the top menu bar click Image > Image adjustments > Brightness/Contrast and input a value of  85 Brightness and 25 Contrast. Obviously you can use different values to achieve different skin tones.

Then, back in the channels window select the CMYK layer to see the skin colour, as shown below. If you are not happy just select the Cyan layer again and edit the values until you are happy.

Now, most importantly, we store this colour for later use by taking a new shapshot from the history window, rename the snapshot "Skin" so we know what we want it for later on.

How To Colourise A Black and White Photo
The colour which we will use for the skin tone

Step 6: Create the other colour snapshots...

The process for creating the colours for the other areas we want to colour is slightly different but even easier. The areas we need different colours for are Hair, Background, Lips (nail polish too), Eyes, Jumper and Skirt.

For each area we want to colour in we will go to Image > Image Adjustments > Hue & Saturation and edit the values to achieve the colour we want. Then save that colour in a snapshot.

Feel free to use different values to the ones I outline below but be aware that each colour change is an edit of the one before so if you change one then all will require different values.

For the hair go to Image > Image Adjustments > Hue & Saturation and choose the following values hue of -43, saturation of 61 and lightness -5.

Then take a new snapshot in the history window and rename it hair.

For the background go to Image > Image Adjustments > Hue & Saturation and choose the following values  hue of -20, saturation of 15 and lightness of  -15

Then take a new snapshot and call it background

How To Colourise A Black and White Photo
Keep building up the snapshots of the different colours making sure to name each snapshot as you go along


For her lips values of hue -15, saturation 72 and lightness 10. Which should create a rosy red/pink.

Take a new snapshot, call it lips. We will use the same colour for her nail polish.

For her eyes values of  hue -155, saturation 70 and lightness 5. Which should create a nice sea blue.

Take a new snapshot, call it eyes.

For her jumper values of hue -20, saturation 100 and lightness 20. Which should create a navy blue.

Take a new snapshot, call it jumper

And finally for the skirt values of hue 0 saturation -50 and lightness 0. Which is just a plain white.

Take a new snapshot, call it skirt

How To Colourise A Black and White Photo
All the snapshots have now been taken

Step 7: Colourising...

OK, so that's all the preparation done, now for the fun part, coloring in! You can do this in any order really but I prefer to start from the bottom and work up.

Select the last screenshot layer (skirt) then click the checkbox in front of the layer above (jumper), which will show the history brush icon, as shown in the image below. This will allow us to paint the colours saved from the jumper snapshot layer onto the skirt layer (which we'll use as our base).

How To Colourise A Black and White Photo
It helps to select the area you want to colour in first, in this case the jumper.
For accuracy you can use the magic wand selection tool to select the jumper area and use then use the history brush tool to colour it in as shown above. Cool, right!

We will repeat this process now for the other areas of the image.

Now click in the box in front of the eyes layer, again select the area you want to colour using an appropriate selection tool and then use the history brush to colour it in.

How To Colourise A Black and White Photo
Colourising the eyes in the black and white photo


Next the lips, once again select the box on the relevant snapshot, select the area to be coloured in then use the history brush to colour it in.

How To Colourise A Black and White Photo
Adding colour to the lips in the black and white photo


Now the background...

How To Colourise A Black and White Photo
Our black and white photo is no mainly colour

Finally the hair and the skin...

How To Colourise A Black and White Photo
The black and white image is now full colour


You can go back through the snapshot layers again in any order to tidy up or re-colourise any areas which require it.  You can also edit the image overall using any image adjustment technique you want, or use an adjustment layer to test out a variety of edits. In the final image below I used brightness and contrast to lighten the image overall. That's it, all done. You are now ready to start colourising your own black and white photos.

How To Colourise A Black and White Photo
The completed colourised image

Saturday, October 22, 2016

Top 10 Brochure Design Tips

Sample Brochure Design
Sample Brochure Design 

Brochures are a classic advertising and marketing tool for businesses. A good brochure needs to not only advertise your company and it's products/services but also portray your company image and brand in a way that is attractive to your target audience. They say don't judge a book by it's cover but when it comes to a brochures, people always will. So if you or your business are currently designing a brochure or booklet here are 10 easy to follow steps to help you along the way to a successful brochure design.

1. Research

Collect and study brochures from around your community. What is the acceptable industry standard for brochures? What makes one brochure design more appealing than another? You can develop your sense of good design by carefully studying existing designs in the marketplace and deciding for yourself what works best. You can also learn from the mistakes of other btrochures and see what design styles or errors to avoid. The brochures of your competitors should also be carefully assessed to see where you outdo them.

TIP: Take note of your research findings and create a design proposal based around them.

2. Keep it Simple

What is the purpose of your brochure? Create a 'Brochure Checklist' to decide what information you want to cover, and arrange these components in order of importance. The clearer you are about the order of importance within your information, the better your brochure will be. Don't try to write a novel when a poem will do. Select one or two main messages that you wish to convey through the brochure and keep your message in mind throughout and include only those ingredients necessary to communicate the message. 

TIP: If you are using graphic elements to ornament your brochure, ask yourself whether they help to direct the reader’s attention, or simply create distraction.

3. Prioritize Content

Once you have determined the relative importance and sequence of the particular components in your message, you will be ready to consider how to treat each of them. The most important items should obviously receive more of your reader’s attention. They should be larger, bolder, brighter, or in some other way made to stand out. Make sketches and move the various elements around. Try re-positioning one or more elements to see how your design is affected.

TIP: Using block quotes within body text is a great way to highlight important content.

4. Choose your Words Carefully

Try to include some of the twelve most powerful words in the English language, while also avoiding clichés, slang or any currently trendy jargon. The twelve most powerful words, according to advertisers and marketers are...

  1. You
  2. Money
  3. Save
  4. New
  5. Easy
  6. Love
  7. Discovery
  8. Results
  9. Health
  10. Proven
  11. Guarantee
  12. Free


5. Select Appropriate Fonts

sample font for a brochure design

Choose a font that will express the style you desire (professional, humorous, casual…) while still keeping your message clear. Use a minimum of two font styles (to avoid being plain or boring) but also use a maximum of three font styles (to avoid clutter and inconsistency). These fonts can still be varied in size, weighting or colour in the individual parts of the design according to their importance. Read more on fonts styles here. In general a clean and simple font is best.

TIP: You can find the best free font websites at www.freedesignstuff.net

6. Utilise Bars & Boxes

Boxes, borders and bars work well for directing the readers' attention and separating busy areas. They achieve this through creating a contrast with the background so always aim for light on dark or dark on light in terms of the colours.


However, don't overuse them as too many can make your brochure design look cluttered and the desired contrast will be lost if everything is 'boxed off'. Instead explore other options for grouping and separating, such as the use of negative space as explained below.


7. Embrace White Space

OK, so maybe not this much white space but it is important!

You can use empty space to create a relationship between the contents and the page while bringing specific information into focus on the page by adjusting the space around it. The amount of empty space in a design affects its overall tone of lightness or heaviness. Empty space can also be used to frame or align the content without the need for boxes or borders. Read more about how best to utilise white space.


8. Consider Colour Theory

Whatever colour scheme you choose be sure to look into colour theory to ensure the right message about your product, service or company is being sent out. Different colours evoke different emotions in viewers and each colours has attached connotations that we subconsciously associate with it.

Your colour scheme can be applied as ink on paper or as the paper itself. There are hundreds of paper colours available, yet some of the most effective brochures are done in only one or two colours. Black and white brochures can often be more dramatic than colour.

TIP: Carefully selected images can be used to inject colour into your brochure and allow you to use simple black text on a white background without it looking too plain.

9. Paper Selection

Paper comes in all sizes, colours, and textures. The ISO (international Standards Organisation) 'A' Series of paper sizes, has become the global standard for document sizes and your brochure should be based of one of those. See the common document sizes table for more details.

TIP: Using recycled paper can add an interesting flair to your brochure design, and it helps reduce the impact we make on our natural resources.

10. Proofread & Test

You should proofread your final design several times before having it printed. Once printed, it’s too late to fix an error that you didn't spot, without incurring extra costs. It will also make your business look unprofessional and unreliable to potential clients.

You should also step back and look critically at the overall layout asking, can it be read from a distance? Is it interesting enough to grab peoples attention? If the answer to either of these questions is no you may need to tweak your design or possibly consider some attention grabbing techniques.

TIP: Reading lines of text backwards is the best way to spot errors in text. 


Thursday, August 11, 2016

Create A Logo In 10 Easy Steps

This tutorial is completed in Illustrator but all the tools and techniques used are also available in Photoshop. The reason I am using Illustrator is that Illustrator is the best program (in my opinion) for creating vector graphics using the pen tool. Professional Logos are made as vector graphics, allowing them to be resized up or down without loss of quality.

Logo Design
The Logo we will be making in this tutorial

Although this tutorial focuses on the actual production stage of the logo it is important to remember that the graphic design process should always be used. Therefore this stage should be preceded by analysis of any brief, research, brainstorming, and idea development (ideally through sketching). Alongside these design process stages you should also be considering the logo design principles.

Ideally read the article in full before completing your own logo design but to recap quickly the principles state the logo should be...

  • Simple 
  • Versatile 
  • Timeless 
  • Memorable 
  • Appropriate 

For the purposes of this tutorial we will be creating a logo for a design company called 'Cut & Paste'. The design aims to reference the company name within the text styles and shapes used. Now lets begin.

Logo - Step 1

Go to File-> New and create a canvas 700px wide and 500px tall. This is not a mandatory size, as the logo (once completed and exported) can be scaled up or down to any size. However, if you want to follow the tutorial exactly using the font sizes and other dimensions used then keep to 700px X 500px.

Logo - Step 2

Open the layers window and rename the layer 'Shape 1'. Now use the rectangle shape tool to create a shape 610px x 125px. With the shape selected (with the path selection tool) open the stroke window and add a 5pt white stroke using the settings shown in the image below. Depending on how you clicked and dragged to create the shape the scissors arrow head on the stroke may appear in a different corner. To set the scissors to the position shown, go to Object-> Transform -> Reflect and edit the settings until you get it into the position shown.

Logo Design Stage 1

Logo - Step 3

Now, press the new layer button in the layers window and name the layer 'Shape 2'. With the new layer selected use the rectangle shape tool to create a shape 600px x 115px. Set the shape colour to white and add a uniform stroke of 5pt with the scissors arrowhead (the 5pt stroke all around should make the shape the same size as the previous shape). Position the shape directly on top of the first shape getting the scissors arrowheads to overlap as shown below. Once again go to Object-> Transform -> Reflect and edit the settings until you get the arrowheads into the position shown.

Logo Design Stage 2

Logo - Step 4

For the next shape we will once again create a new layer, call it 'Shape 3'. Use the pen tool to create a black coloured shape similar to the one shown below, remember to complete the shape by joining the last anchor point to the initial anchor point. Once completed you can move the anchor points of the shape into the exact form you want using the direct selection tool. Once again set a 5pt white stroke with a scissors arrowhead, the settings are shown alongside the shapes in the image below. That completes our work on the shapes.

Logo Design Stage 3

Logo - Step 5

Now we will add the text. You can add the text all on one layer but as we will be using 4 different fonts in 4 separate text boxes it is easier to create a new layer for each piece of text too.

TIP: For maximum flexibility in graphic design always create a new layer each time you add a new piece of text.

Logo - Step 6

Firstly we will add the 'CUT' text. Create a new layer call it 'CUT' and use the text tool to click and drag out a text box roughly to size you want (you can resize it afterwards if needed) and type the word CUT in Arial Bold and with a font size 110pt.

Logo Design Stage 4

Logo - Step 7

Highlight the text with the text tool and change the text colour to white and add a 2pt black stroke. Open the stroke window and tick the dashed line box and set the values to those shown in the image above.


Logo - Step 8

Next, we will add the ampersand. Create a new layer for the ampersand, and create a text box on that layer. Type '&' in font style Arial Bold, in a font size of 72pt and set the text colour to white.


Logo - Step 9

Now the 'Paste' text. Once again create and name a new layer, use the text tool to create a text box and type 'Paste'. The font used for the paste text is called 'Cut It Out' and is a free to download font available HERE. Set the font colour to Black and the font size to 90pt as shown in the image of the font settings tab below. Use the path selection tool to position the text as shown.
Logo Design Stage 5

Logo - Step 10

Finally the 'Design Company' text. As before, create and name a new layer, add a text box and type in 'Design Company'. The image below shows the text settings used.


The completed logo should now resemble the image below. You can continue to develop the logo by editing the colours of the text or shapes, trying out different font styles or adding effects from the 'Effect' tab in the top menu.
The completed logo design
The completed logo design 

You can easily create your own logo for new your company or a class project using the tools and techniques explained here but always remember to follow the previous steps of the design process as it is always easier and quicker to create the logo once you have a design sketch to follow. Trust me on that, you don't want to have to learn the hard way!

If you are still struggling or feel you need a detailed vector that your skill set isn't capable (yet) of creating you can find free vector graphics that you can then edit tot suit your needs.


Tuesday, May 31, 2016

Graphic Design History Timeline

History of Graphic Design
The Graphic Design Timeline - Click to enlarge

The Graphic Design Timeline above ranges from 1830 to the Present Day and outlines 14 different styles throughout the history of graphic design. It is important to note that not every graphic design style is included (there are lots) but all the important and seminal periods of graphic design are touched upon. Click on the timeline to view it full screen.

The timeline includes the following graphic design periods...

  • Victorian Graphic Design Style: 1837 - 1901
  • Arts & Crafts Graphic Design Style:1880 - 1910
  • Art Nouveau Graphic Design Style: 1890 - 1920
  • Futurism Graphic Design Style: 1900 - 1930's
  • Art Deco Graphic Design Style: 1920 -1940's
  • Heroic Realism Graphic Design Style: 1900 - 1940's
  • Early Modern Graphic Design Style: 1910 - 1935
  • Late Modern Graphic Design Style: 1945 - 1960
  • American Kitsch Graphic Design Style: 1950's
  • Swiss/International Graphic Design Style: 1940's - 1980's
  • Psychedelic Graphic Design Style: 1960's
  • Post Modern Graphic Design Style: 1970's - 1980's
  • Grunge Graphic Design Style: 2000 - 2010's
  • Flat Graphic Design Style: 2010 - Present


At the start of any graphic design project I'm sure you have found yourself wondering what style should I choose? what style do I like? what style will look good for that project? what style can I accomplish with my level of skills? This timeline is designed to be a quick overview guide to help you decide but if you can click on the link to read more about the different graphic design styles and graphic design history .

Monday, May 30, 2016

How To Become A Graphic Designer

graphic designer
How To Be A Graphic Designer

What is the job?

Graphic designers produce visual design solutions using images and lettering to get across information and communicate a message with high visual impact. Graphic design solutions are required for a wide variety of products and publications, such as websites, advertising, books, magazines, posters, brochures, booklets, magazines, computer games, product packaging, exhibitions and displays, logos, business cards and more. Graphic designers are normally based in a studio or office, but may also spend some time visiting and receiving clients and dealing with printers.

A graphic designer normally works to a brief (set of instructions) set by the client. They develop creative ideas and concepts choosing the appropriate media and style to meet the client's requirements. Graphic design requires creativity, knowledge of industry standard design software and a practiced approach to managing time and costs and meeting deadlines.

The Skills Of A Graphic Designer


A graphic designer may often manage more than one design brief at a time and must allocate the relevant amount of time according to the value of the job. The typical activities of a graphic designer are listed below, use the links to access additional information about an activity.
  • Meeting clients to discuss the business objectives and requirements of the job.
  • Interpreting the client's needs and developing a concept to suit their purpose.
  • Estimating the time required to complete the work and providing quotes for clients.
  • Developing design briefs by gathering information and data through research.
  • Thinking creatively and brainstorming to produce new ideas and concepts.
  • Developing ideas through drawing and sketching.
  • 'Pitching' ideas to managers or clients.
  • Working with a wide range of multimedia, like Photoshop, to produce quality designs.
  • Proofreading all work to ensure accurate and high-quality work.
  • Presenting finalised ideas and concepts to clients.
  • Keeping up to date with emerging technologies in new media as most graphic design work is now completed on a computer.
  • Working as part of a team with printers, copywriters, photographers, other designers, web developers and marketing specialists.

Graphic Designer Career Path

graphic designer career path

Graphic designers are normally employed based on the strength of their skills as opposed to their qualifications. However, most professional graphic designers have an ordinary degree or honours degree in graphic design, art or other creative, design based area.

Talent and contacts are the key to getting work as a designer, and you will need to keep an up-to-date portfolio of your work to show to potential employers or clients. Competition for jobs is strong and not all jobs are advertised, so it is a good idea to network and make contacts within the industry, and to approach companies and agencies directly. Unpaid work experience is an opportunity many designers take up in order to help develop their portfolios, make new contacts and impress potential employers. Joining professional bodies such as CSD and D&AD will also give you the opportunity to make contacts in the industry. It is also common practice for designers to create a website to showcase their work.

There is no upper age limit for entry to this occupation. You may be able to enter relevant training through universities or colleges that relax normal academic entrance requirements for suitable mature applicants. Most academic institutions define people aged 23 years or over as mature candidates.

Once a designer has completed their college studies they will still need to keep their skills up to date throughout their career. You may be able to attend short courses, for example in computer packages such as the Adobe Creative Suite, which is the industry standard package for all things design and multimedia related.


Wednesday, May 25, 2016

Graphic Design Styles

Graphic Design Styles
Which Graphic Design Style Is Right For Your Project?

At the start of any graphic design project, you wonder what style should I choose? what style do I like? what style is best for the topic? what style will I feel comfortable with? Whether you're designing a single image or a full house style / company brand the style you use will be dependant on the what is most appropriate for it.

The following list of graphic design styles is not a definitive list but rather a selection of some of the most common or popular graphic design styles, more styles exist and more are being created all the time. You should use this list to gain a basic understanding of common graphic design styles and what is involved in each of them, how they differ and how to create them.

This Article Discusses The Following  List Of Different Graphic Design Styles...


Victorian Style Graphic Design:


Victorian style graphic design
Samples of Victorian Style Graphic Design

The Victorian era of Britain was the period of Queen Victoria’s reign which ran from 1837 to 1901 and was a time of strong moral and religious beliefs. The Victorians loved complex and ornate objects and this influence filtered through to all areas of design including architecture, furniture, interiors, fashion, typography and commercial art. 

The Victorian style was deeply influenced by their nostalgia for objects from the past. The Victorian design style almost always filled the entire page with images and type. Typical design elements of early Victorian style were the use of outer decorative borders and elaborate typography. Symmetry was also used heavily in layout and design.

Later Victorian style tended to use the decorative borders less but still used ornate type and romantic imagery. Typography through the Victorian era generally appeared in a curve or wave and was commonly encompassed in a banner.

To Recap, the main characteristics of the Victorian graphic design style are...

  • decorative outer borders
  • elaborate typography
  • symmetry
  • highly ornate and 'busy' imagery
  • very few straight lines or edges

Arts & Crafts Style Graphic Design:


Arts and Crafts Style Graphic Design
Samples of Arts and Crafts Style Graphic Design

The Arts and Crafts movement was an international movement in decorative and fine arts that began in Britain and then flourished in Europe and North America between 1880 and 1910, later re-emerging in Japan in the 1920s. It stood for traditional craftsmanship using simple forms, and often featured medieval, romantic, or folk styles of decoration with heavy use of textures and illustrated initials.

Arts & Crafts advocated economic and social reform and was essentially anti-industrial. It had a strong influence on the arts in Europe until it was replaced by Art Nouveau and Art Deco before being eventually displaced by Modernism in the 1930s.

To Recap, the main characteristics of the Arts & Crafts graphic design style are... 

  • reused traditional/older style features
  • simple forms
  • illustrated typography
  • lots of textures

Art Nouveau Style Graphic Design:


Art Nouveau Style Graphic Design
Sample of Art Nouveau Style Graphic Design

Art Nouveau is a style of decorative art, architecture, and design prominent in western Europe and the USA from about 1890 until about 1920 and was characterised by intricate linear designs and flowing curves based on natural forms and an 'earthy' colour palette.

These identifiable flat, outlined illustrations and hand-drawn typefaces leads to Art Nouveau sometimes being confused with Art Deco, but there is a clear distinction between the two. Art Nouveau looks hand drawn and prefers natural lines and shapes to the highly geometric shapes that define the Art Deco style.

To Recap, the main characteristics of the Art Nouveau graphic design style are... 

  • intricate hand drawn style
  • linear based designs
  • use of natural forms
  • regularly features female form

Futurism Style Graphic Design:


Futurism Style Graphic Design
Samples of Futurism Style Graphic Design

Futurism was not only an art movement but also a social movement that developed in Italy in the early 20th century. Although it was largely an Italian phenomenon, there were parallel movements in Russia, England and elsewhere. It emphasized speed, technology, youth, and violence, and objects such as the car, the aeroplane, and the industrial city. It was a movement that particularly despised not just certain aspects of classical antiquity, but everything that was not totally new - the antithesis of Arts & Crafts 

The painters of Futurism were particularly successful and they often broke light and color down into a series of dots or geometric forms through a process called divisionism. Futurism influenced many modern art movements of the 20th century which in turn influenced the development of contemporary graphic design.

To Recap, the main characteristics of the Futurism graphic design style are... 

  • eclectic style
  • featuring or using new technology
  • offset text
  • some cubist influences
  • no traditional features

Art Deco Style Graphic Design:


Art Deco Style Graphic Design
Samples of Art Deco Style Graphic Design

Art Deco had it's heyday in the 1920's and 30's but, as a term, it was not coined until 1925. Art Deco uses sharp, aero-dynamic shapes, Egyptian zigzags, motion lines and, in more modern times, an airbrushed / grainy look. Perfect examples of the Art Deco graphic design style can be found in period comic books, old car show posters, book covers and movie posters.

These images are defined by geometric shapes, bold curves, strong vertical lines, aerodynamic forms, motion lines, airbrushing and sunbursts  Unlike the Early Modern style, Art Deco highly exercises its use of illustrations and graphic representations of everyday objects. But these features do not do justice to the spirit of the Art Deco style which was bold, positive, industrial and often futuristic and one which emerged from a world rising from the ashes of WW1.

The Art Deco style itself has also seen a rebirth in recent years, having become increasingly popular over the last decade.

To Recap, the main characteristics of the Art Deco graphic design style are... 

  • bold geometric shapes
  • use of motion lines and sunbursts
  • high contrast in colours
  • flat (in terms of depth)

Heroic Realism Style Graphic Design:


Heroic Realism Style Graphic Design
Samples of Heroic Realism Style Graphic Design

Heroic realism is a term which describes art and graphic design used as propaganda. Examples include the Socialist realism style associated with Communist regimes, and the very similar art style associated with Fascism. Its characteristics are easily identifiable from the name; realism and the depiction of figures as ideal types, heroes or symbols, often with explicit rejection of modernism.

Heroic realism designs were used to propagate the revolution in the Soviet Union during Lenin's time. Both socialist art and Nazi art were explicitly ordered to be heroic and romantic, and were in consequence idealistic rather than realistic in form and style.

To Recap, the main characteristics of the Heroic Realism graphic design style are...

  • realistic imagery 
  • usually featuring one person
  • promoting an ideal
  • strong message in the text
  • clear, bold font

Early Modern Style Graphic Design:


Early Modern Style Graphic Design
Samples of Early Modern Style Graphic Design

Early modernism was a time when artists and designers broke from tradition to create a new style of design which would influence all artists and designers around the world. Early modern artists were described as new or experimental, as they changed the way others saw design and art.

Following on from some of the ideals of the Italian Futurists the Bauhaus was creating a new design philosophy, putting a design's function before its form and rebelling against tradition in preference of anything new and different. This style became known as "modern" and was the start of the rebelling against tradition that has carried through time influencing all the other art and design styles of the world.

To Recap, the main characteristics of the Early Modern graphic design style are...

  • geometrically based
  • minimalistic approach
  • clean type
  • more photos, less illustrations

American Kitsch Style Graphic Design:


American Kitsch Style Graphic Design
Samples of American Kitsch Style Graphic Design

The Art Deco influence of rounded streamlined forms and enthusiasm for modern ideas continued to inspire design of all kinds for many years after the 1930s and American Kitsch design of the 1950s took futuristic styles even further with dramatic curves and space-age forms. Kitsch design was also characterized by its script fonts, informal shapes, and cartoon-like illustrations.

Kitsch is a German word meaning "in bad taste". In design, kitsch had been used to describe art or design that is pretentious, vulgar and displays a complete lack of sophistication. On the other hand, the idea that something is so bad that it’s good is how "kitsch" became a term ironically embraced by the American designers using that style.

To Recap, the main characteristics of the American Kitsch graphic design style are...

  • contrasting imagery and fonts
  • bold, vibrant colours
  • aerodynamic shapes
  • people in dramatic poses

Late Modern Style Graphic Design:


Late Modern Style Graphic Design
Samples of Late Modern Style Graphic Design

Late modernism encompasses the overall production of most recent art made between the aftermath of World War II and the early years of the 21st century. The terminology often points to similarities between late modernism and post-modernism although there are differences while the predominant term for artwork produced since the 1950's is Contemporary Art.

Known for, distorted geometric shapes, and informal layouts. The only aspect of this style that isn't informal is the type, which was devoid of decoration.

To Recap, the main characteristics of the Late Modern graphic design style are...

  • distorted geometric shapes
  • informal structural layout
  • plain, simple, non decorative type

Swiss/International Style Graphic Design:


Swiss International Style Graphic Design
Samples of Swiss Style Graphic Design

Often referred to as the International Typographic Style or the International Style, the style of design that originated in Switzerland in the 1940s was the basis of much of the development of graphic design during the mid to late 20th century. Led by designers at the Zurich School of Arts and Krafts and the Basel School of Design, the style favoured simplicity, legibility and objectivity.

Of the many contributions to develop from the two schools were the use of, sans-serif typography, grids and asymmetrical layouts. Also stressed was the combination of typography and photography as a means of visual communication. The primary influential works were developed as posters, which were seen to be the most effective means of communication.

To Recap, the main characteristics of the International graphic design style are...

  • use of negative space
  • very 'clean' and simple
  • sans serif fonts favoured
  • asymmetrical layouts

 Psychedelic Style Graphic Design:

Psychedelic Style Graphic Design
Samples of  Psychedelic Style Graphic Design

The psychedelic movement began in the mid 1960’s and had an effect on many aspects of popular culture. This included style of dress, art, literature and philosophy. The name “psychedelic” refers to drugs that were popular with the youth culture of the time. Posters for rock concerts tried to visually express the feeling of tripping out. The visual motifs of psychedelic art include Art Nouveau-inspired curvilinear shapes, illegible hand-drawn type, and intense optical colour vibration inspired by the pop art movement.

Use of abstracted curvilinear shapes, clashing colours, hard-to-read fonts. Rarely used in today’s designs, the trippy posters of the 60's are the most easily recognizable contribution of the Psychedelic style.

To Recap, the main characteristics of the Psychedelic graphic design style are...

  • influenced by the prevalence of hallucinatory drugs 
  • featuring abstract swirls of intense color 
  • curvilinear calligraphy reminiscent of Art Nouveau. 
  • intense optical colour vibration

Post-Modern Style Graphic Design:


Post Modern Style Graphic Design
Samples of Post Modern Style Graphic Design

Post-modernism didn't have much impact on graphic design until the middle of the 1980's. Initially, many designers thought it was just undisciplined self-indulgence. A hodgepodge of styles, with no unifying ideals or formal vocabularies, dreamed up by students in the new graduate programs. But in fact it was a new way of thinking about design, one that instigated a new way of designing. This mixed up style is characterized by a tilted axis, collage-like illustrations, overlying figures, and impulsive decoration. This style has been used in varying degrees since its first uses and, if used correctly, can give projects a unique expression.

They created works beginning in the 1970s without any set adherence to rational order and formal organization. They also seemed to entirely pay no attention to traditional conventions such as legibility. Yet, while post-modern design did not consist of one unified graphic style, the movement was an expressive and playful time for designers who searched for more and more ways to go against the system.

To Recap, the main characteristics of the Post Modern graphic design style are...

  • collage like illustrations
  • overlapping elements
  • impulsive and playful
  • tilted axis

Grunge Style Graphic Design:


Grunge Style Graphic Design
Samples of Grunge Style Graphic Design

A recent design evolution, this emerged post millennium and is easily recognized by its extensive use of distressed textures, unrefined edges, and a seemingly nonsensical approach to layout.

In such grunge designs dirty stains, torn images, 'broken' icons and creased pieces of paper are as popular as hand-drawn elements and dirty textures. The main purpose of hand-drawn elements lies in their ability to convey a personality and an individual note. And dirty textures are often used as background images for navigation menus, photos and overall layouts. Usually these elements are regular objects from our daily life, replicated in their real form without any glossy effects.

To Recap, the main characteristics of the Grunge graphic design style are...

  • Dirty textures and background images
  • irregular lines and frames
  • coffee rings, spilled out liquids and dirty stains
  • torn paper and dirty edges
  • hand-written elements

Flat Style Graphic Design:


Flat Style Graphic Design
Samples of Flat Style Graphic Design

Flat design is a current design style and trend, minimalist in nature, it was initially used in graphical user interfaces such as websites, web applications and mobile apps. The flat design style is now also commonly seen in graphical materials as posters, arts, guide documents, publishing products.

Flat design is primarily influenced by the International Typographic Style (also known as Swiss Style), Text User Interface, Modernism, and the styles emerging from Bauhaus. The International Typographic style is often considered the most substantial influence on flat design and is regarded as the starting point of flat design, although the flat design style itself would not make an appearance until the dawn of the digital age

To Recap, the main characteristics of the Flat graphic design style are...

  • minimalist
  • no depth
  • neutral tones
  • straight lines
  • use of negative space

Quick Overview...

The Graphic Design Timeline - Click to enlarge

Back To Top

*Having read this you also find our Furniture Design Styles or Interior Design Styles articles useful.


close
Banner iklan disini