 |
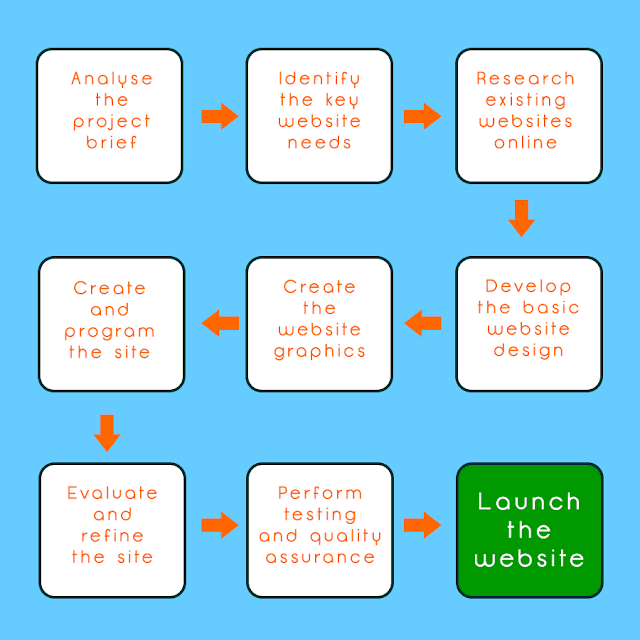
| The Web Design Process |
1. The project brief
It is very important to meet with the client, either in person, over the phone or through e-mail or Skype in order to create the project brief for the website or so you can analyse and discuss the brief the client had already created. The brief should be detailed and specific and must be documented and agreed upon in order to allow it to be referred to later in the process. As a web designer you can also state your price and outline a time frame based on the brief. Without a detailed brief these things would not be possible.2. Identify key requirements
Based on the brief and your discussion with the client, you should first identify the key requirements that the website must meet. Is it an e-commerce website? Does the client require a content management system? Does it require special effects? Factors like these would decide the design approach you take and these should be allocated the most time in your time-frame and they should be the central features around which the site is designed.3. Research existing websites
If the website is to be a business venture it is important to first assess the competition. Sometimes a client may request that their new site appears higher in search engine rankings than a competitors or that it have extra or additional features therefore it is important to assess what you are up against, so to speak. It is also important to be aware of what the industry standards are for a particular type of website if you are not familiar with them. As a designer constantly browsing, reviewing and analysing new websites is good practice and can provide a source of inspiration for your future designs.4. Develop the basic website structure
Before you begin the technical design and programming of the website you should first develop ideas for the basic site structure and layout through sketching and drawing. Ideas can be developed quickly and easily in this manner, much quicker than through Dreamweaver or Photoshop, and 'boxing out' the design will make the actual creation of the website a simpler process further down the line. Refer to the web design tips section for guidance in how best to layout your website. At this stage a quick check-in with the client would be recommended before you progress to the next stage.5. Create the website graphics
Once you have identified the layout and style you want for your site you can begin to create the graphics you will need for the website. This may include the website logo, banner, buttons, image maps, resizing and formatting pictures etc. All these should be designed with consideration to the style and colour scheme of the website. There are a variety of file formats you can use for your graphics, the most common being .gif and .jpg. To help you choose the format which is best for you see the common file formats section. For help and assistance with the creating the graphics you may find our Photoshop and illustrator tutorials useful.6. Create and program the website
With the layout decided upon and the graphics ready to be put in place you can now begin creating the basic site structure. Begin with the HTML template and use it to create a site master page which will be the starting point for creating all your web pages. Ideally you you should use CSS media queries to make this template responsive. In most cases the majority of your web pages will have the same basic layout so creating a 'master page' first, which can be the template for all other pages, is an approach which will save you time. Once the template is set the graphics and content created earlier can be inserted into the relevant pages easily and quickly completing the website. Once again this would be a good time to get feedback from the client so they can review the design.7. Refine the website design
Based on the clients feedback and having reflected on the design yourself, make any necessary changes to the website. This may involve subtle changes to the colours, editing or changing images, changing the font style or small layout changes and spacing. Search Engine Optimisation (S.E.O.) should also be part of this process where including certain keywords, tagging images and using meta-tags are all part of the process. For more in depth information see the section on SEO.8. Website testing and QA
This is a simple task that involves proofreading all the website content, testing all the links and any interactive features of the website. It may also be suitable to get feedback from a select group of people matching the demographic of the website's target audience to test the suitability of the website design and functionality.9. Launch the website
Getting the website online is the culmination of the process but the old adage of 'build it and they will come' is certainly not applicable to websites. It is vital to index the website in as many search engine directories as possible to ensure visitors can find the website, advertising the site across a variety of media is also useful. On-line advertising through methods like Google Adwords is a recommended approach as well as using social media like Facebook, twitter, Google+ and others will also increase your websites online presence as well as driving traffic to the site.If you enjoyed this article then perhaps our articles on the graphic, interior, games or furniture design processes may also be of interest.


No comments:
Post a Comment