Showing posts with label 3d modelling. Show all posts

Tuesday, April 24, 2018

Everything You Need To Know About 3D Modelling

These series of updated articles aim to provide you with everything you need to know about on 3D modelling and graphics. In 3D graphics, elements are visualized by creating three-dimensional models out of them. The final image is rendered from a virtual scene that utilizes several elements which are familiar from real life such as lights, materials and cameras. 3D graphics can be seen in multiple different forms such as an image, an animation or real time visualization inside of a computer game. If you are interested in a career in animation or gaming then this series is especially relevant for you!

We recommend reading this articles in the order presented if you are a beginner, however they are designed in such as way as that they are relatively independent of each other.

Select an area of 3D modelling to get started...


The creation of 3D graphics is a complicated process and therefore is, in my opinion, easier to understand when discussed in small pieces, hence this 8 article series. we hope that you find it useful and as always we welcome your feedback.


Tuesday, February 13, 2018

Best Free 3D Modelling Softwares

best free 3d modelling software
The best free 3d modelling softwares available

There are a large selection of quality 3D software packages on the market but unfortunately many of the top applications available cost hundreds or even thousands of dollars.  However, there are also number of free 3D softwares out there for hobbyists, independent filmmakers and animators, freelance designers, architects and game developers who don't have the budget for expensive software.

There are dozens of other free 3D tools available beyond what is mentioned here. However, these are the strongest of the bunch,covering a range of 3D modelling areas such as architecture, engineering, character modelling, animation and more. So here is our top 10 free 3D modelling softwares...


Open SCAD

Rating: 2 star free 3D modeling software

A free 3D-modeling software for Windows, Mac OS, and Linux, Open SCAD focuses more on the CAD aspects of modeling an object rather than the artistic aspect. Unlike many others listed on this page, Open SCAD is not an interactive modeler but a 3D-compiler modeler that reads in the details of the objects to render their 3D models on the screen. This is definitely a novel and interesting approach which may suit those who find it difficult to visualize objects in 3D.

It describes itself as "the programmers Solid 3D CAD modeller". This is great if your a programmer but if you aren't then best stay clear of this option.

Visit Website


Tinkercad

Rating: 3 star free 3D modeling software

Tinkercad can be used as a 3D design platform, or as a 3D printing service. Itis a free web-based app which runs on Windows, Mac and Linux operating systems. Tinkercad’s 3D design tools are accessible to beginners and experienced designers alike. Shapes that you place on a design field are stretched, contorted and combined to make your 3D model. You can group shapes to together to make more detailed designs, or import 2D or 3D vector shapes that can be extruded into 3D models.

If you’re new to 3D design, Tinkercad provides a number of tools and tutorials that enable you to explore and learn about the process. Tinkercad offers step-by-step lessons on the design process to help newcomers get acclimated. It also allows you to browse its library of more than 4 million pre-created designs to get ideas and learn tricks from other designers in the community. The platform also provides 3D printing services, so your models can be printed and shipped straight to your door.

Visit Website


Pixologic Sculptris

Rating: 3 star free 3D modeling software

Sculptris provides an excellent gateway into the exciting world of 3D. Its features are easy to learn, navigate and use, even for someone with no experience in digital art or modeling yet robust enough for creating base models that can then be refined in other applications, such as ZBrush. It will dynamically divide the model, better handling your computer’s resources.

This is certainly an easy to use software but it is geared specifically toward one type of 3d modelling (sculpting) and therefore is restrictive for anyone who needs a software with multiple modelling approaches, animation tools or the accuracy of geometric modelling. In summary it's really only useful for mocking up character models or creating static models for 3D printing.

Visit Website


Wings 3D

Rating: 3 star free 3D modeling software

Wings 3D is an advanced sub-division modeler which offers a wide range of modeling tools and a customizable interface, along with a built-in autoUV mapping tool, vertex colors, materials, and Lighting as well as export facility for common 3D formats  like .obj.

However, despite more awesome features like support for virtual mirroring for symmetric modeling, Wings 3D provides no support for animation for its users. It is also solely a mesh/polygon modelling software so there are no options for sculpting like in Sculptris (above).

Visit Website


PTC Creo

Rating: 3 star free 3D modeling software

Ok, so first off this one is not totally free like the others but it is free for students and teachers while offering the usual 30 day free trial for everyone else. Creo is also a very use friendly software. It's good for handling assembly features and that's why its used in most of the engineering companies in the field of design, assembly and manufacturing.

Creo is a comprehensive system for mechanical engineers and product designers who create using the direct modeling approach of 3D CAD. Direct modeling allows the creation of designs by existing designs or fresh ideas. Hence, the changes to the geometry of an object can be made quickly and easily.

Not for architects, game developers, animators or hobby modelers.

Visit Website


FreeCAD

Rating: 4 star free 3D modeling software

FreeCAD is a parametric 3D modeler made primarily to design real-life objects of any size. Targeted at architects, engineers and product designers. The program is a multi-platform (Windows, Mac OS, and Linux) tool, and reads and writes various open file formats.

FreeCAD is easy to use with no previous CAD experience required and the online community will help you get the hang of it quickly if you do need help. If you use commercial CAD or BIM modeling software at work, you will find similar tools and workflow among the many workbenches.

Almost all of FreeCAD's functionality is accessible to Python s if you know Python you can extend FreeCAD's functionality, automatize it with scripts, build your own modules or even embed into your own application.

Visit Website

Vectary

Rating: 4 star free 3D modeling software

Vectary is an online 3D modeling tool with which you can create, share and customize 3D designs. It is a combination of standard mesh modeling, subdivision modeling and parametric plugins. It was built from scratch to make 3D modeling easy-to-use for beginners, and is also useful to pros. You can export your models to standard 3D files, print them or continue your work in a compatible software. You can also choose from a growing list of parametric plugins that do the work for you.

The user interface is beautifully simple with integrated tutorials for beginners which speed up the learning process. Being an online editor is both an advantage and disadvantage as you can acces files from your account anywhere while also meaning you can't use it if you don't have internet access.

There is currently no animation functionality but it seems to be a fast evolving software so we may see some animation features added in future.

Visit Website


Daz Studio

Rating: 4 star free 3D modeling software

Daz 3D is a versatile and feature-rich suite of 3D figure posing, animation, and rendering applications designed for 3D animators, designers, and illustrators. It is comprised of graphic design software solutions, platforms, and add-ons that enable them to create rigged 3D human models and stunning digital illustrations, animations, and environments. Additionally, the suite provides a user-friendly modeling software that helps in modeling, posing, animating, morphing, and rendering 3D content. It comes with a 3D creation software tool that is equipped with GPU-accelerated real-time rendering capabilities.

The software's animation and rendering tool-set is fairly robust, and in the right hands users can create impressive shots. However, without a full range of modeling, surfacing, or sculpting tools built in, your content can become limited unless you're willing to buy 3D assets in the Daz marketplace or create them yourself with a 3rd party modeling package.

Visit Website


SketchUp Free

Rating: 4 star free 3D modeling software

SketchUp Free is great for planning out a 3D space quickly, ideal for student or freelance architects.Maneuvering around this program is pretty easy thanks to the highly customizable palettes. The program gives you the freedom to add, remove, or rearrange the palettes to appear the way you want. Its large icon replaces the feature list of most CAD software thereby allowing the user to easily find the commands. 

Most the features provided by Sketchup are fundamentally focused on 3D designing. However, the program has features and tools that support 2D designing. This makes it an ideal application for beginners looking to plan, visualize, and communicate future construction projects. The SketchUp warehouse is also an amazing extension that allows you to use pre-built assets from other users, speeding up the design process even more.

Visit Website


Blender - Editor's Choice

Rating: 5 star free 3D modeling software

Blender is easily the most versatile and entry on this list, and in many regards, it compares favorably to premium digital content creation tools like Cinema 4D, Maya, and 3ds Max. It is a free and open source 3D creation suite which supports the entirety of the 3D pipeline, offering a complete range of modeling, surfacing, sculpting, painting, animation, and rendering tools.

The software is good enough to have produced numerous impressive short films and is in use by several professional studios. The software was given a thorough overhaul about a year ago and emerged with a fresh interface and a feature set that aims for parity with the best. Blender has steadily carved out a niche in motion graphics and visualization, similar to where Cinema 4D excels.


Thursday, October 6, 2016

Read How to add a texture in Blender Now

rendered result

In this tutorial you will learn how to add a texture in Blender using Cycles render.

Step 1

Using whatever you have made or imported change the default screen layout to compositing for a detailed result.

changing layout to compositing 

Step 2 

Change blender render to cycles render at the top of the screen.
Blender Render

Cycles Render

Step 3

Right click in the plane, click on the material button on the top right corner of the screen, click new.

adding a material

Step 4

If a material is already in place use the subtract button then press new.

subtracting the existing material 

Step 5

Click on the dot right of the white colour.


Step 6


Select image texture, press open and navigate to the image you want to use, once selected open the image/texture.
opening a image texture

Step 7

To map the image on the plane go to edit mode by pressing Tab or changing it from the bar menu.

changing to edit mode

Step 8

Press A to deselect then A again to select everything. go to mesh, UV unwrap, unwrap.

unwrapping the cube

Step 9

On the left side the plane will be unwrapped. Next load the image.

applying the image onto the cube

Step 10 

Switch back to object mode, switch back to the default layout, go to render to see the result.

changing to rendered view


Rendered result 


Read The Blender Interface for Beginners Now

There's no limit to the interface once you know what you're dealing with.


Introduction

If you've seen our tutorial "Blender Basics: The Beginners Guide to Using Blender" and feel less intimidated by this software, but are still wondering what everything outside the 3D View is, and exactly what each part is used for, then this is the next tutorial for you to read. This tutorial is going to name each of the different panels you're given when opening blender, what they're used for, and how you can change them or bring in completely new panels, not seen when you start Blender up, to show you just how much you can do with this programme when you know what you're doing.


The Default Screen

First of all, lets talk about the user interface you're given when you first start up Blender. By default, the interface you are given to work with looks like this: 

default view

Lets break down this default view into sections and talk about each one separately. The image below is each section broken down and colour coded.

colour coded default view

Red - This is the 3D Viewport. Also called the stage. This is the main screen used in Blender to create, edit or remove stuff from your stage. the toolbar on the left is called the tool shelf and has lots of different options to add new stuff in or edit the stuff in your viewport such as smooth the mesh. You can toggle this on or off by pressing the T key. The difference between the 3D view and the stage is that you can view the stage in different types of viewports, and the 3D view is just one viewport.

Green - This is a timeline which is used when animating in Blender. If you don't want to get into animating then you can ignore and even close this tab. If you do see our tutorial on animating.

Blue - This panel is known`as the properties panel. It is used to change the properties of anything on stage. The little tabs at the top are collectively known as the header which is where you choose what type of properties you wish to change. This panel is not to be confused with the Properties Shelf which is hidden but displayed by pressing the N key. 

Orange - This panel is known as an Outliner Window and is used to show the different items that you have on your stage. 

Yellow - This is known as the info window. This window shows some useful information such as the version e.g. 2.72, which type of render you're in and which set of viewports you're using. These things can be changed using the info window. 

Opening New Panels

To open up a new panel look for a little triangle like this:

triangle

normally in the top right of an existing panel. click it, hold and drag. Don't do this more times than you need to as you can create an overwhelming amount of screens without knowing how to get rid of them.

Closing Unwanted Panels

To close an unneeded panel just click the triangle, hold and drag back on the previous panel.

Changing a Panel 

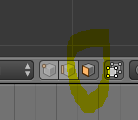
To change a panel to what you need it to be, rather than just the 3D View, click this box:

viewport editor

 in the bottom left hand corner of the viewport you want to change and select the new panel you want it to be. try them all out to see how they look. I hope this tutorial has helped you.

Read How to model and texture a chair in Blender Now

Chair with texture

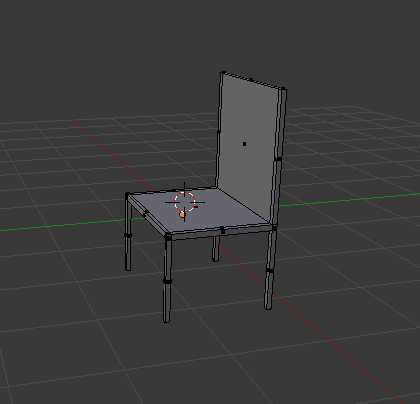
In this tutorial you will learn how to create a basic chair and add a texture onto the chair.


Step 1

Delete the default cube by pressing X and delete.

with no cube 

Step 2

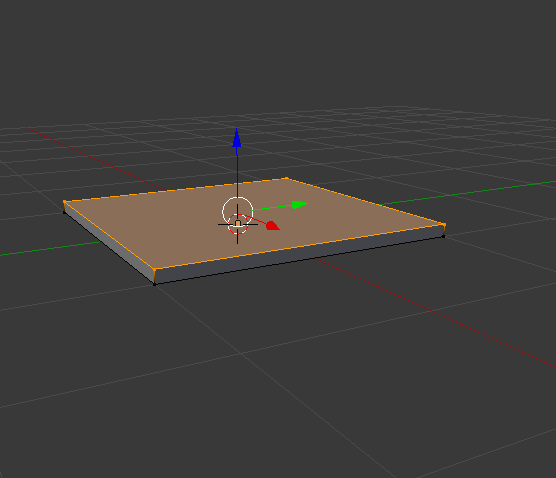
Add mesh plane or shift A mesh and plane.Zoom in with the middle mouse button, or press 1 for a side view, press Tab to go into edit mode it should turn orange. E to extrude.

plane that's extruded


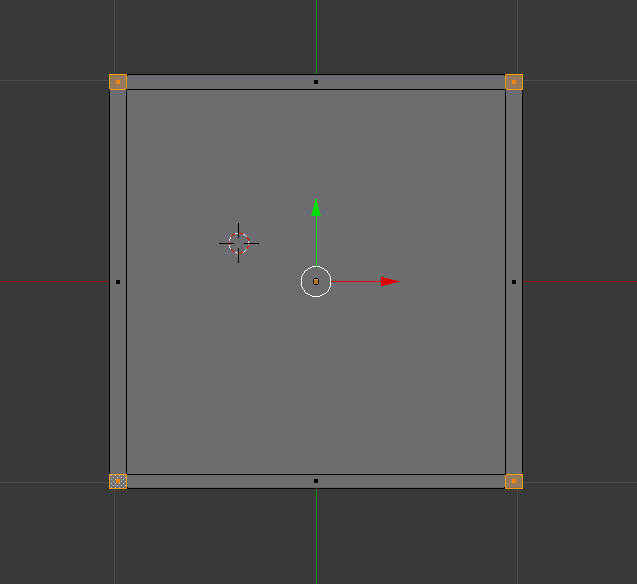
Step 3 

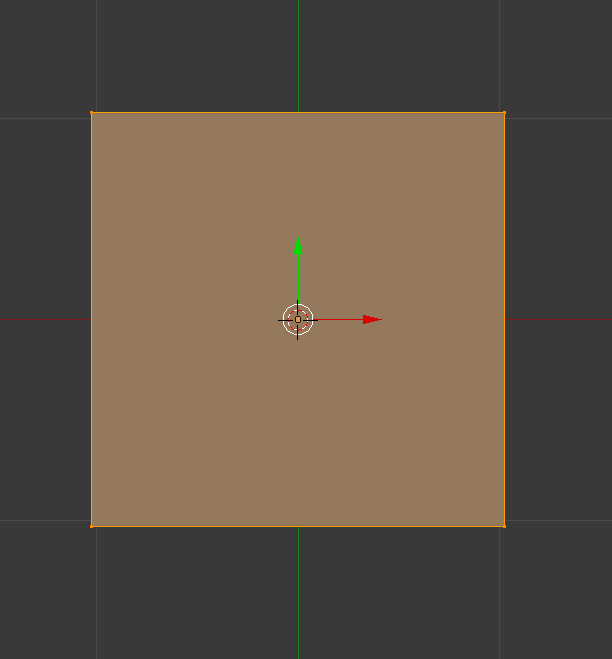
Press 7 on the number pad to get a better view. Use the middle mouse button to zoom in or out.

top down view of the plane in edit mode

Step 4

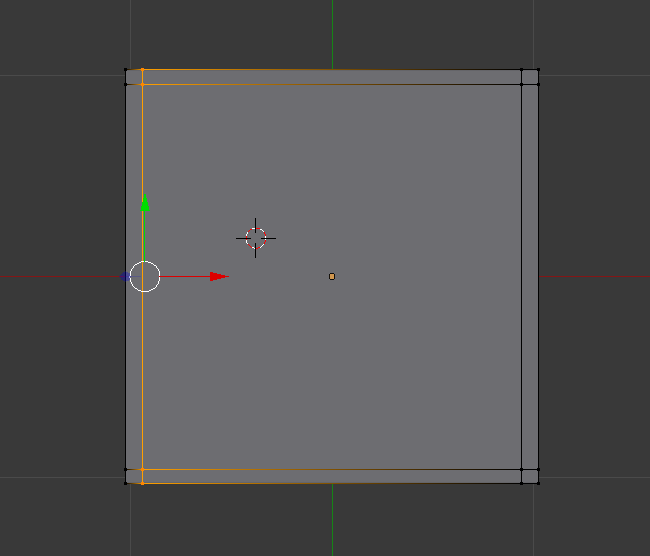
Press ctrl R to create a loop and place a loop at each side. Total of 4 loops.

plane with four loops

Step 5

Select face select. 

face select

Step 6 

Press the number 8 to flip to the opposite side(underneath the plane),Select one box then press Shift and right click on each of the boxes.

plane with all four corners selected

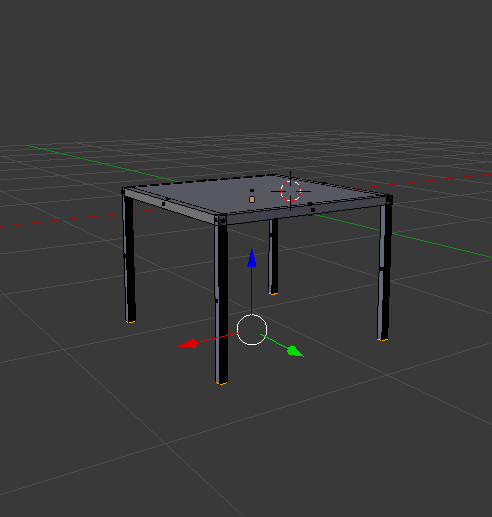
Step 7 

Press number 1, press E to extrude to your desired length. Use the middle mouse button to move around to get different angles.

plane with all legs

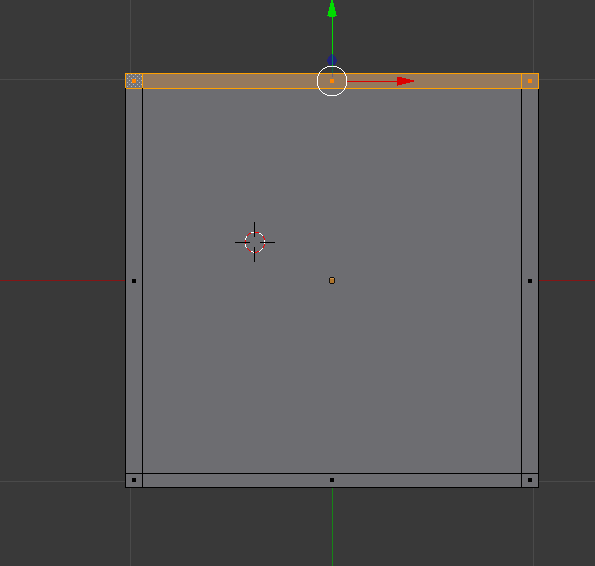
Step 8 

Press A to deselect, select one side and E to extrude. 

top down view with one side selected

basic model of a chair

Step 9 

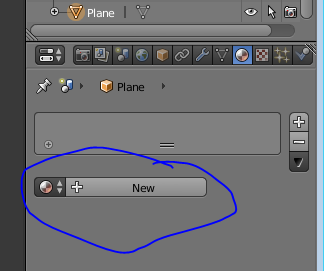
To add a texture onto the chair go to materials bar on the top right corner of the screen, click on new.

adding a new material

Step 10

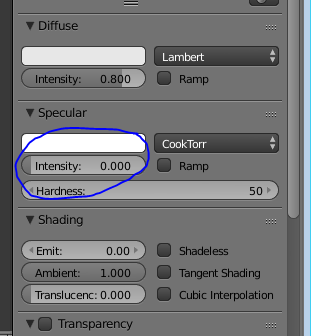
Change the specular to zero so a glossy effect wont appear onto the chair.

lowering the specular

Step 11 

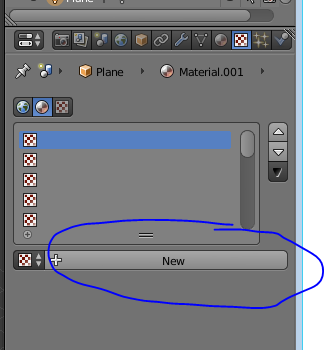
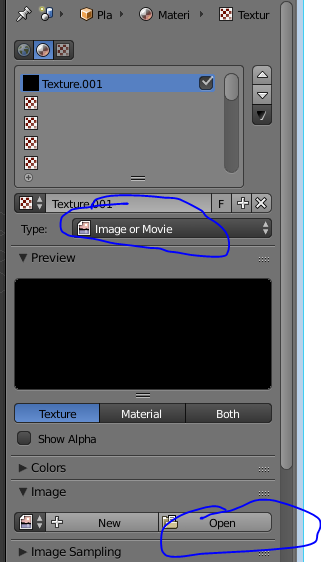
Go to the texture section beside the material on the top right corner, click on new, change the type image to image and movie, click on open and navigate to your texture that you have downloaded.

adding a new texture

importing a texture

Step 12 

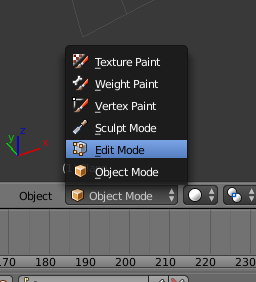
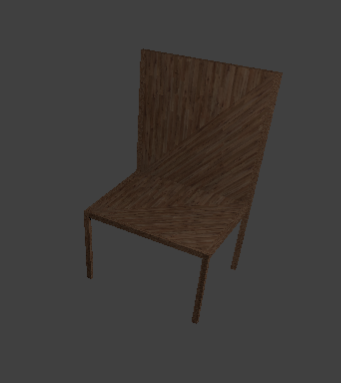
The texture will look like this on the chair, to fix this the texture needs to be unwrapped. Change object mode to edit mode.
changing to edit mode
chair with texture

Step 13 

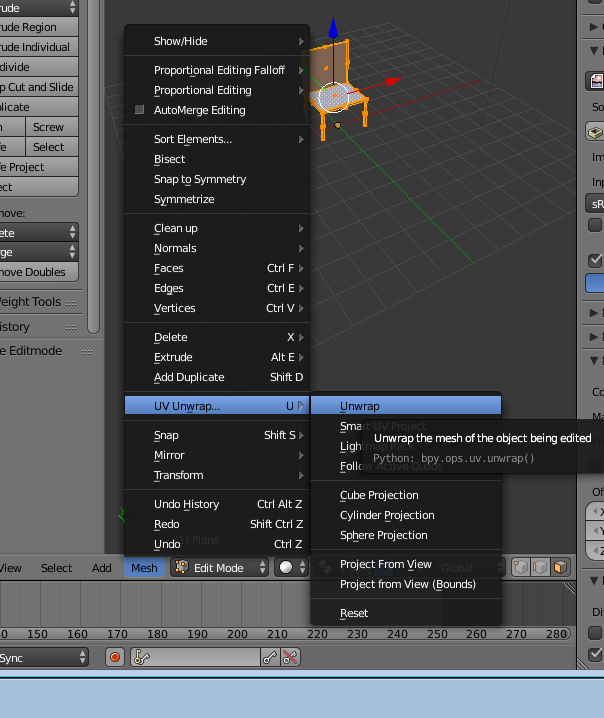
Go to mesh, uv unwrap, unwrap. this will fix the texture on the chair.

unwrapping 


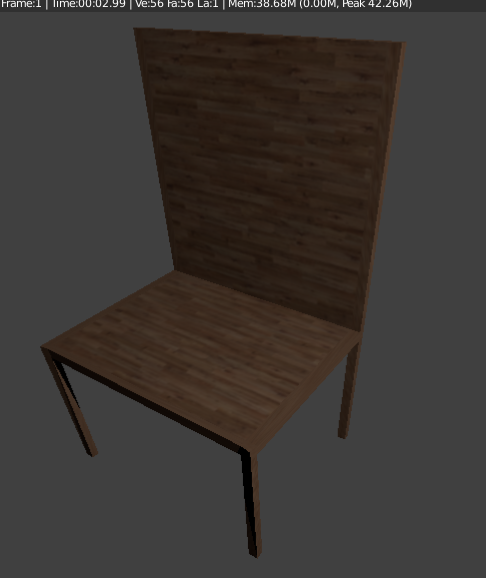
rendered result 

finished chair with a texture

close
Banner iklan disini