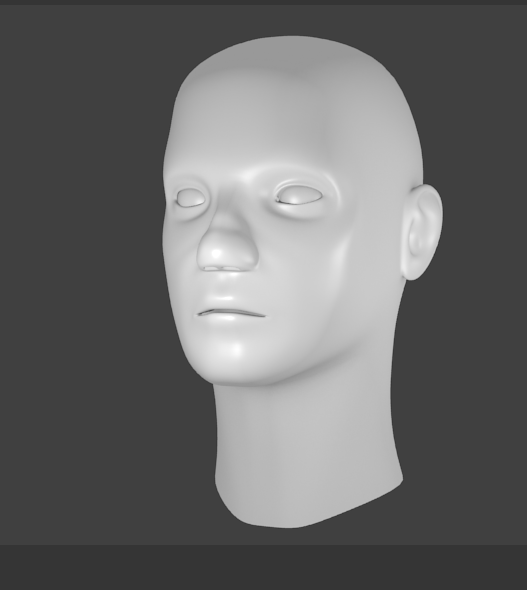
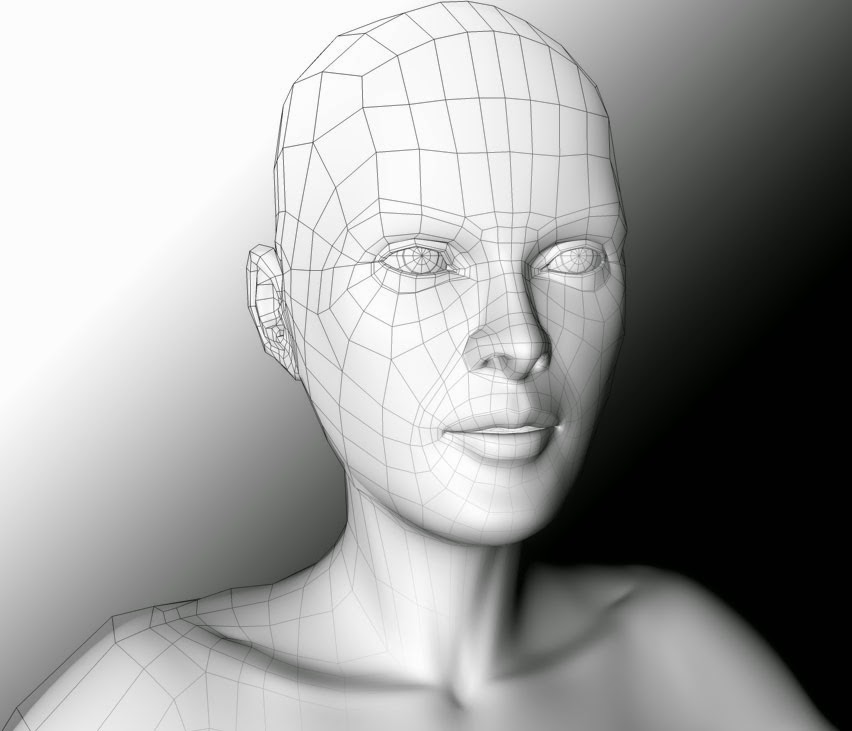
These series of updated articles aim to provide you with everything you need to know about on 3D modelling and graphics. In 3D graphics, elements are visualized by creating three-dimensional models out of them. The final image is rendered from a virtual scene that utilizes several elements which are familiar from real...
Showing posts with label 3D animation. Show all posts
Tuesday, April 24, 2018
Thursday, October 6, 2016
undefined
201
Finished animation |
What is animation in blender?
Animation is making an object move or change shape over time. You would use animation in blender for very obvious reasons such as making a character walk, run, crouch. making an object move around in your scene. Animating a scene so it becomes entertaining...etc. Objects can be animated in many ways.Moving as a whole object
Changing their position, orientation or size in time.
Deforming them
Animating their vertices or control points.
Character Animation via Armature
Animated to deform by the movement of bones inside the mesh if you use a human model, a very complex and flexible interaction that makes character-shaped objects appear to walk and jump.
In this chapter we will cover the first two, but the basics given here are actually vital for understanding the following chapters as well. Three methods are normally used in animation software to make a 3D object move:
Key frames
Complete positions are saved for units of time (frames). An animation is created by interpolating an object fluidly through the frames. The advantage of this method is that it allows you to work with clearly visualized units. The animator can work from one position to the next and can change previously created positions, or move them in time.
Animation Curves
Curves are interpolated from keyframes, and can be drawn for each XYZ component for location, rotation, and size, as well as any other attribute in Blender. These form the graphs for the movement, with time set out horizontally and the value set out vertically. The advantage of this method is that it gives you precise control over the results of the movement.
Path
A curve is drawn in 3D space, and the Object is constrained to follow it according to a given time function of the position along the path.
The first two systems in Blender are completely integrated in a single one, the F-Curve system.
In Blender 2.5x, everything can now be animated. Previously, only certain datablock had the ability to be keyframed. Now users have the ability to animate nearly any type of data that can be changed to multiple values.
How to animate in blender
Go to scene editor and select animation. This is located at the top of the screen.
layout of animation |
2. Find any free space and press "I" then select LocRotScale and this should open up a tab that looks like this. We use this as it allows us to move the object more easily.
LocRotScale |
3. Next go to your timeline and select frame 10
timeline ten frames |
Then move your object along the axis by pressing G + Y then move it to your desired location
moving object frame 10 |
Then press I and this will complete your keyframe
4. Now select frame 20 and move your object further down the axis rotate it as well by pressing "R" and moving it
moving object 20 frames |
timeline 20 |
5. Continue these steps until you have at least 100 frames then move the amount of frames down to 100
6. Next you go to the render tab and select render animation
7. Next press Ctrl +F11 and that will play your animation. That is your animation completed.
Sample Animation
Lighting is a very important topic in rendering, standing equal to modelling, materials and textures. The most accurately modelled and textured scene will yield poor results without a proper lighting scheme, while a simple model can become very realistic if skilfully lit.
Why would you use it?
People use lighting in order to make their object more realistic and easier to see. It also makes your object better looking in general. You also need lighting in your scene if you wish to create a rendered video or image.
Different types of lighting
Point light:
1. In order to do this you must press shift + A and select lamp then select point then place this light somewhere on your scene
point lamp |
Sun light:
1. Repeat the same process that you did for point but this time select sun, you should try place this light up high and at an angle to your object in order to get a good effectsun lamp |
Spot light:
1. Again, repeat the same process except select spot, you should place this above your object in order to get the desired effect. This light emits light in a cone like direction
spot lamp |
Hemi light:
1. Same again, repeat the process and select hemi. This is a 180® directional light which emits light downwardshemi lamp |
Area light:
1. Same steps again just select area instead. This is an upward light that emits light from the plane.area lamp |
How to effectively light an object in blender
1. Press F12 for camera perspective
2. Then open up the world tab and tick ambient occlusion
camera perspective |
2. Then open up the world tab and tick ambient occlusion
world tab |
3. Turn ambient occlusion to full
5. Go to the Gather column in World tab
gather column |
6. Adjust samples to preferred amount of samples. This makes the picture more realistic but my recommendation is not to go over 10 as it may crash your computer
samples human head |
gather sample 10 |
7. Press 7 for top view
8. Then duplicate the lamp by pressing Shift + D and place lamps at the front, the back, and the side
top view |
8. Then duplicate the lamp by pressing Shift + D and place lamps at the front, the back, and the side
3 point lamp |
9. Then adjust the energy on both duplicate lamps. To do this you have to go to the object data tab and adjust the energy settings
![]() |
energy settings |
energy settings 2 |
finished lighting |
Wednesday, July 13, 2016
![]() |
3D Modelling Software Screenshot |
The creation of 3D graphics is a complicated process and therefore is, in my opinion, easier to understand when discussed in small pieces, hence the 5 article series. First up it's 3D Modelling which refers to the creation of the 3D model itself.
3D Modelling - The Parts...
A 3D model is a mathematical representation of an object. 3D modelling can be compared to sculpting. Artist builds or moulds a 3D object by taking into account all different sides and angles. 3D models consist of smaller elements (vertex, edge, face, polygon) which can be manipulated individually in whatever software you are using to model your 3D object, such as Blender, Maya or 3D Studio Max.
Vertex:
![]() |
vertex |
Edge:
![]() |
edge |
Face:
![]() |
face |
Face is a triangle. Face is a surface between three corner vertices and three surrounding edges. Transforming a face affects all connected vertices, edges and polygons.
Polygon:
![]() |
polygon |
Polygon is an even surface which has four or more corners and is made of two or more faces. A polygon is surrounded by edges and has a vertex in each corner. Animated high quality 3D characters are often made mostly of four-sided polygons. Polygons with 5 or more sides can cause problems in deforming surfaces such as a human face.
3D Modelling - The Techniques...
Standard Primitives and Modifiers:
![]() |
Primitives and Modifiers |
Many 3D software packages include tools for creating standard objects such as boxes and spheres easily. One of the simplest 3D modelling techniques is to combine these standard objects to create complex 3D models. 3D Studio MAX includes standard objects such as sphere, cube and tube. These standard objects can be modified through their parameters (radius, height etc.) or through special modifiers (stretch, bend etc.). By combining several different standard objects and by modifying them, one can create complex 3D models.
Polygon Modelling:
![]() |
Stages of Polygon Modelling |
Complex objects are often modeled polygon by polygon. 3D software packages include many efficient tools for creating and manipulating polygons.
Subdivision surface means a surface which is created by dividing the original 3D model into smaller polygons. At the same time 3D model's corners become rounder and the surface becomes smoother. Subdivision surfaces is a very popular modelling technique. The advantage of a subdivision surface is the fact that one can create a coarse 3D model which is then automatically subdivided into a smoother surface.
![]() |
A Polygon Model Before and After Subdivision |
Boolean Operations:
![]() |
The 4 Possible Outcomes of a Boolean Operation |
- Union: Two 3D models are combined and the unnecessary geometry inside of the Models is removed.
- Intersection: Overlapping a part of the two 3D objects.
- Subtraction (A-B): Object A is subtracted from object B.
- Subtraction (B-A): Object B is subtracted from object A.
NURBS:
Solid of Revolution:
![]() |
A cross section and the object created by a solid of revolution |
Lines:
![]() |
A 3D object and the cage of lines used to create it |
Label:
3d,
3D animation,
3d modelling,
blender,
edges,
faces,
modelling,
parametric primitives,
polygon,
shapes,
theory,
vertex