Showing posts with label UI. Show all posts

Thursday, October 6, 2016

Read The Blender Interface for Beginners Now

There's no limit to the interface once you know what you're dealing with.


Introduction

If you've seen our tutorial "Blender Basics: The Beginners Guide to Using Blender" and feel less intimidated by this software, but are still wondering what everything outside the 3D View is, and exactly what each part is used for, then this is the next tutorial for you to read. This tutorial is going to name each of the different panels you're given when opening blender, what they're used for, and how you can change them or bring in completely new panels, not seen when you start Blender up, to show you just how much you can do with this programme when you know what you're doing.


The Default Screen

First of all, lets talk about the user interface you're given when you first start up Blender. By default, the interface you are given to work with looks like this: 

default view

Lets break down this default view into sections and talk about each one separately. The image below is each section broken down and colour coded.

colour coded default view

Red - This is the 3D Viewport. Also called the stage. This is the main screen used in Blender to create, edit or remove stuff from your stage. the toolbar on the left is called the tool shelf and has lots of different options to add new stuff in or edit the stuff in your viewport such as smooth the mesh. You can toggle this on or off by pressing the T key. The difference between the 3D view and the stage is that you can view the stage in different types of viewports, and the 3D view is just one viewport.

Green - This is a timeline which is used when animating in Blender. If you don't want to get into animating then you can ignore and even close this tab. If you do see our tutorial on animating.

Blue - This panel is known`as the properties panel. It is used to change the properties of anything on stage. The little tabs at the top are collectively known as the header which is where you choose what type of properties you wish to change. This panel is not to be confused with the Properties Shelf which is hidden but displayed by pressing the N key. 

Orange - This panel is known as an Outliner Window and is used to show the different items that you have on your stage. 

Yellow - This is known as the info window. This window shows some useful information such as the version e.g. 2.72, which type of render you're in and which set of viewports you're using. These things can be changed using the info window. 

Opening New Panels

To open up a new panel look for a little triangle like this:

triangle

normally in the top right of an existing panel. click it, hold and drag. Don't do this more times than you need to as you can create an overwhelming amount of screens without knowing how to get rid of them.

Closing Unwanted Panels

To close an unneeded panel just click the triangle, hold and drag back on the previous panel.

Changing a Panel 

To change a panel to what you need it to be, rather than just the 3D View, click this box:

viewport editor

 in the bottom left hand corner of the viewport you want to change and select the new panel you want it to be. try them all out to see how they look. I hope this tutorial has helped you.


Read Introduction to Unreal Engine 4 Now


In this tutorial I am going to give you a basic run down of the the user interface in Unreal Engine 4. After reading this tutorial you will be able to start your own Unreal Engine 4 project and know your way around the interface you are given to create a game.

Getting started

Create an account with unreal engine. Sign in.

Sign in screen.
Sign in screen.

When you sign in, you see the menu screen.


Menu screen.
Menu screen.

From the Marketplace, you can download different free useful packages including characters.  From there you can add these to your project.

Marketplace.
Marketplace.

All downloaded packages can be found in the library.

Launch button and Library location.

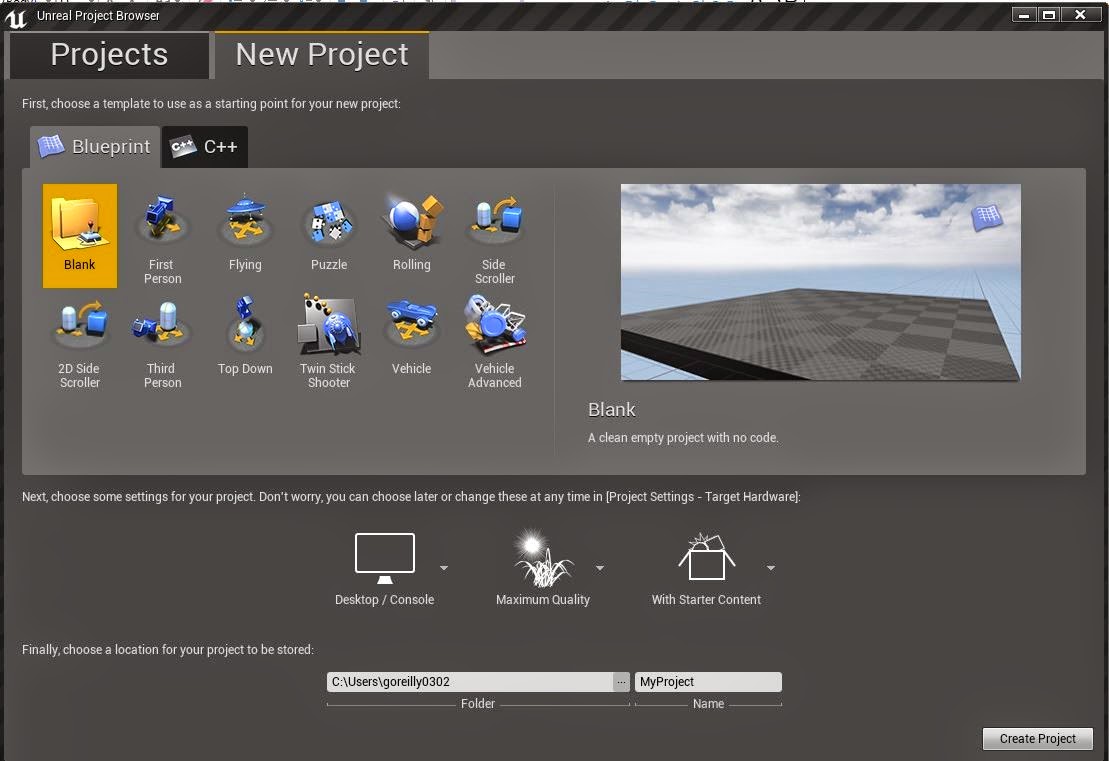
First time you launch the engine, you will see the unreal engine project browser.


Unreal project browser.

From here, you can create a new project or go on to the Marketplace and load an existing project. When creating a new project, there are a variety of different genres and also a choice of project type’s, blueprint or code.


New project.
New project.

Blueprint and C++ options.

 When making settings, we recommend the following. 

Recommend setting.
Recommend setting.

You then choose an appropriate location to save it and you give it a project name.
 
Choose location to save your project and name it.

Note: when naming, do not use spaces, use an underscore. Then you save and click CREATE PROJECT.
 
Create project.
Create project.

User Interface

Main menu bar


Menu bar location
Menu bar location

Menu bar zoomed in.
Menu bar zoomed in.

Pretty much any menu bar you see in computer applications, file menu, edit menu, window menu and the help menu.

File -   Here you can save what you are working on, create new projects, import and export.
Edit – You can find the standard Undo, redo, cut, copy, paste. Also here you can find editor preference and your project settings.
Window – This is where you can show and hide parts of the interface that are not shown by default
Help – Direct link to the documentation, link to initial tutorials to help get you started 

On your view port here are meshes already in place because you chose to include starter content. These meshes are not permanent and can be edited, as shown in a later tutorial. 


3D viewport.
3D viewport.

Mode panel 

Mode panel, this allows us to change the mode the editor is currently in. You can select modes place mode, landscape, paint, foliage and geometry editing mode.


Mode panel.
Mode panel.
Zoomed into modes.
Modes - Zoomed in.

Content Browser

Allow you access to any exterior generated content and special content like materials and blueprints you may have created.


Content browser.
Content browser.
Here you can create new folders and import different meshes, sound and textures/materials.

Scene Outliner

The scene outliner panel, shows everything that is in your level at that time. Main use is to see all the objects in your screen and select them.


Scene outliner.
Scene outliner.

It has some other functionality like here you can select, edit, parent together, hide and delete objects/actors.


Details panel

The details panel shows all editing details on a selected item.

Details panel.
Details panel.

Tool bar

Tool bar.
Tool bar.

Quick and easy one click access to common tasks that you will be performing
you have your save button (but generally you can just hit ctrl+s), content to open the content browser if you don’t already have one opened. Marketplace. Your settings, control various things that you can show and hide inside of your view port and overall environment. 


When editing, make sure you save your work frequently and build when progress is made.
When you press the play button a character will appear, this gives you a good idea of how your level will look and function.

Character on screen.

To escape play mode press eject. The short cut for this on your keyboard is ESC.

Viewport navigation

Mouse navigation

If you drag with the left click, to go forward you drag up and to go backwards you drag down. Move the mouse left to right while still holding down the left of the mouse to look left and right. Right click is just looking around, you can look left, right, up and down by dragging the mouse up, down, left and right. If you click the mouse wheel you can track the camera in all directions by sliding up and down, left and right. Click the left and right of the mouse at the same time does the same thing.

You can change the speed of the camera in the upper right corner of the viewport.


Camera speed options.

Camera speed option zoomed in.

WSAD keys

While holding down the right side of the mouse:
 W – To fly forwards
 S – To fly backwards
 A – Straight left
 D – Straight right
 E – Straight up into the air
 Q - Down
 C – zoom camera in
 Z – zoom camera out

Note: as soon as you release the right mouse it snaps back to where you were

MIYA style navigation

Hold down alt to use this style of navigation.
Alt+left mouse click is going to tumble the view around.
To change pivot of the tumble you can select any object in your scene and hit “f” on your keyboard.
Now when you hold down alt and drag with the left mouse you are tumbling around the object.
alt+right mouse to dolly the camera

When duplicating an object hold down the alt+click the direction you want to go in on the anchor + hold down shift. 


You can also look at your level through different viewpoints. You can find the option to change views in the top left hand corner of your  3D viewport.


Viewpoint section location.
Viewpoint selection zoomed in.

In the dropdown, there are a variety of different views including perspective, top, side, and front.


Perspective.
Perspective.


Top.
Top.


Side.
Side.

Front.
Front.

Saturday, February 13, 2016

UE4 Start Screen UI

This tutorial is the ninth in the 10 part series on how to create a first person shooter game using Unreal Engine 4. We recommend you read the previous articles first to get the maximum benefit from this tutorial. This tutorial will go through all the steps required to create the Start Screen for our FPS Game

Creating The UI Widget Blueprint

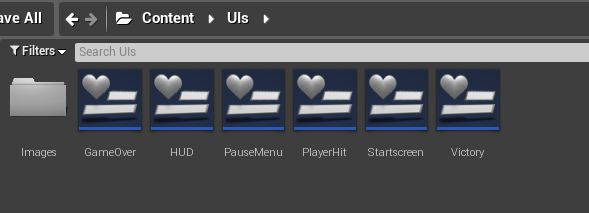
In your Content Browser in the Content folder create a folder called "UIs". This will be useful as you will likely want to create multiple other UI screens such as a pause screen or in game HUD.


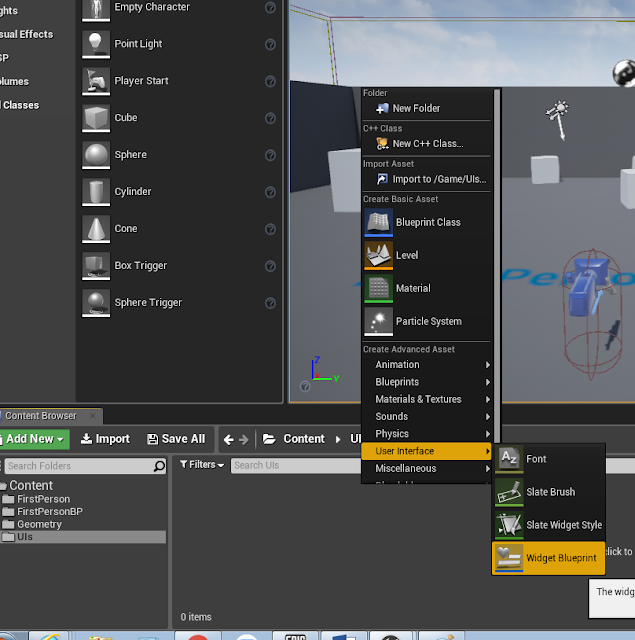
In your newly created UIs folder right click and in the "Create Advanced Asset" section go to User Interfaces and create a Widget Blueprint and call it "Startscreen" or something similar so it's easily identifiable later.


There will be a little asterisk on the Blueprint, this means that it hasn't been saved yet, so click the save all button just above it. You can create as many more of these widget blueprints that you think you will need and name them something appropriate to their purpose, see the example below. As before be sure to select save all.


The Widget Blueprint Editor

Double click your startscreen UI and you should be presented with a screen like this. This is Unreal Engine's UMG Widget Editor.

The UI Widget Blueprint Editor

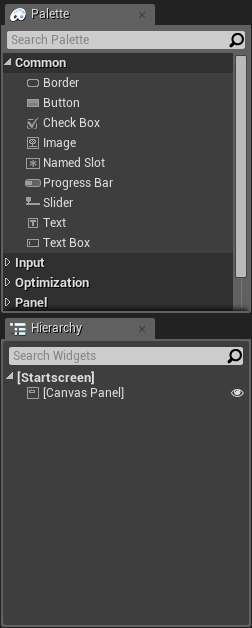
On the left you will see the palette panel. This is where you get the various objects such as images, buttons, text boxes, progress bars etc. that we will use in our UI. Below it is the Hierarchy panel which is where we will add, layer and group any objects from the palette panel that we use.


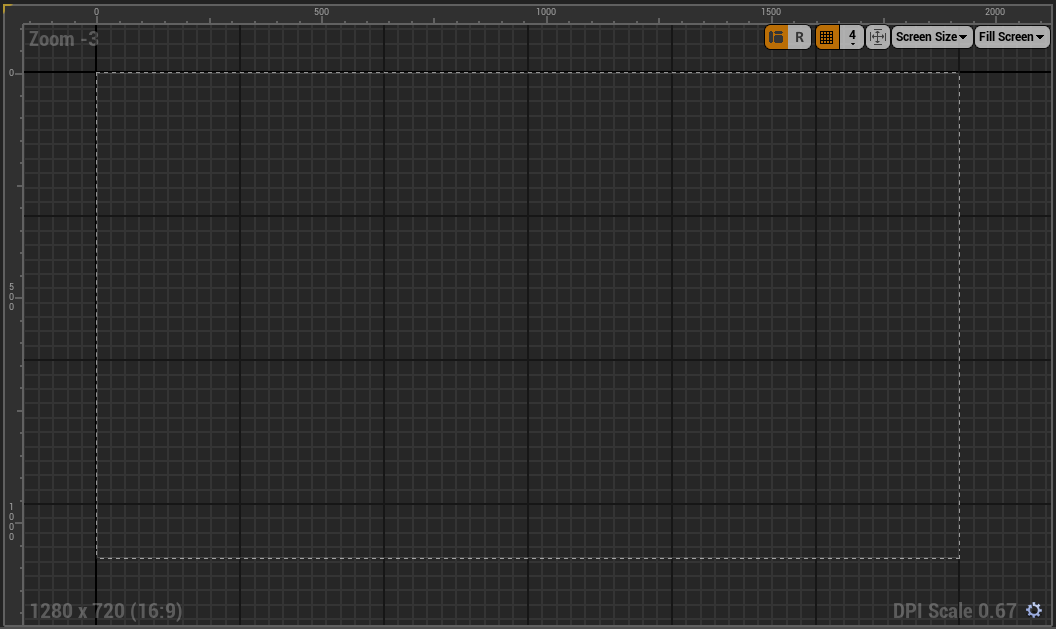
In the middle you have the the viewport. Anything within the dotted line will be displayed on your screen.


On the right you have the details panel (when in designer view) . This is used to change the properties on the various things you have in your viewport. The details panel will change depending on what you have selected, as different things have different properties. It will start off blank because we have yet to add or select any objects. Beside the designer tab is the Graph view which will open up in a separate window if selected. It is also blank to start off with.


Adding The Background Image

In the Palette Panel drag the "Image" widget onto the Canvas Panel in the Hierarchy Panel below the Palette Panel. It is very important you drop into directly onto where it says [Canvas Panel].


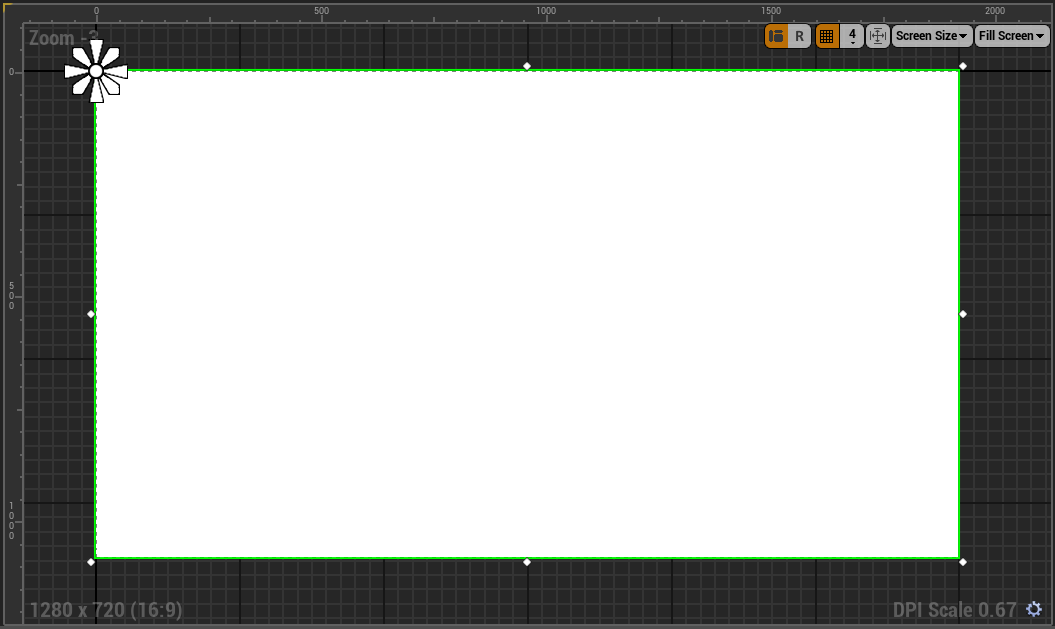
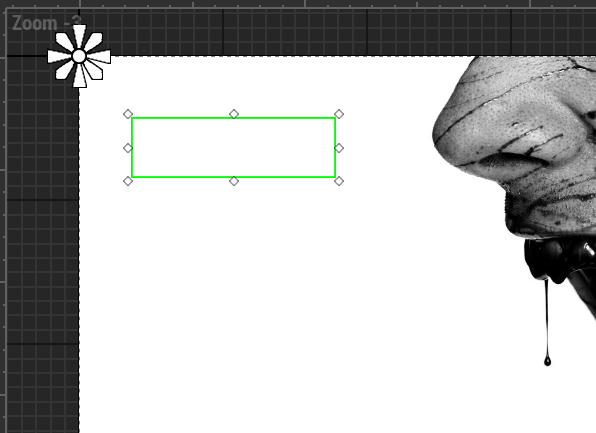
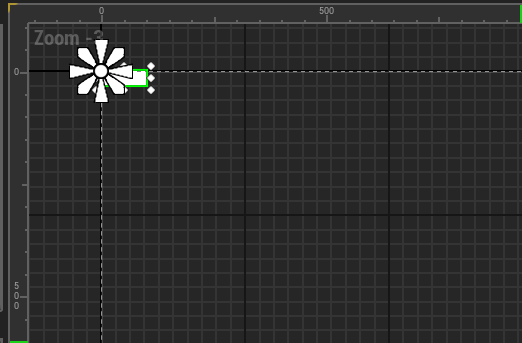
You should now see a small white rectangle in the top left of the viewport. When selected it should get a green outline and you have the ability to drag the various points along the sides in order to re-size it.


Drag the bottom right point so the image widget fills the screen size, indicated by the dotted line inside the viewport.


On the top left of the UMG Editor click compile and then click save. The Yellow/orange question mark on the compile icon should change to a green tick.

You can now minimize the Editor for a moment and go back to the Unreal Editor Content Browser. In your UIs Folder create another folder and call it "Images".


Find or create an image you want to use as the background for your start menu and save it on your computer. Open the newly created images folder in Unreal Engine and drag and drop your chosen image into the folder alternatively you can click the import button in the folder to add the image.


Hit the Save All button again. You can now go back in the StartScreen Blueprint Editor. 

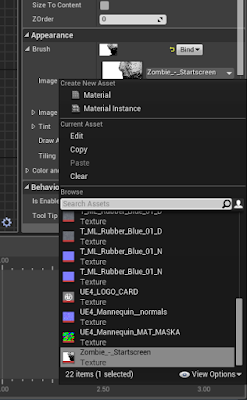
Select the image widget and in the Appearance section of the Details panel find where it says "Brush" and click the little drop down icon.

Select the drop down next to where it says "Image" and scroll through the list until you find the image you just imported.


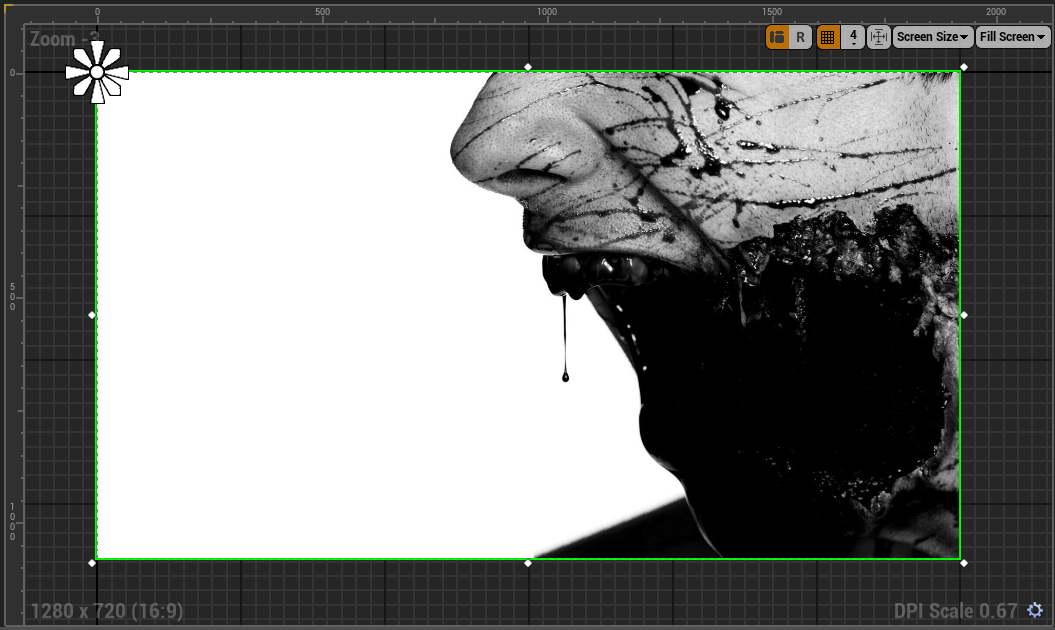
Now the large white image widget in the viewport should change to the image you selected.

The background image added to the StartScreen UI


Adding The Menu Text

In the Palette Panel drag the "Text" widget (not the Text box) on to the [Canvas Panel].


Select the text widget on the top left of the viewport and re-size and move it to your liking.


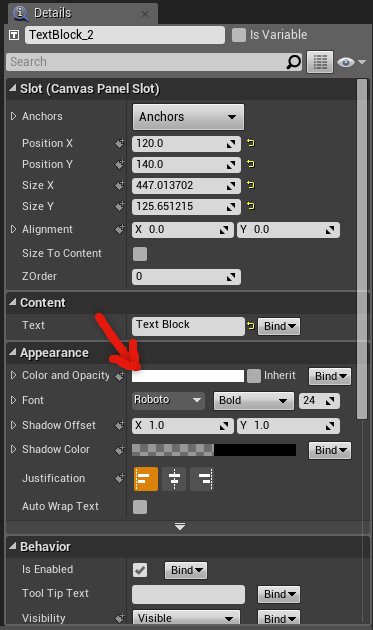
With the text widget selected you can change the colour, font, size etc. in the Details panel. I'm going to change mine to black so we can see the changes. To change the colour click on the white bar next to where it says "Color and Opacity" and it will open a small window where you can change the colour.


I have changed my text colour to black so that you can see it.

                                     
In the Details Panel in the "Content" section there is a white bar that says "Text Block". Erase that and type in whatever you want the text block to say.

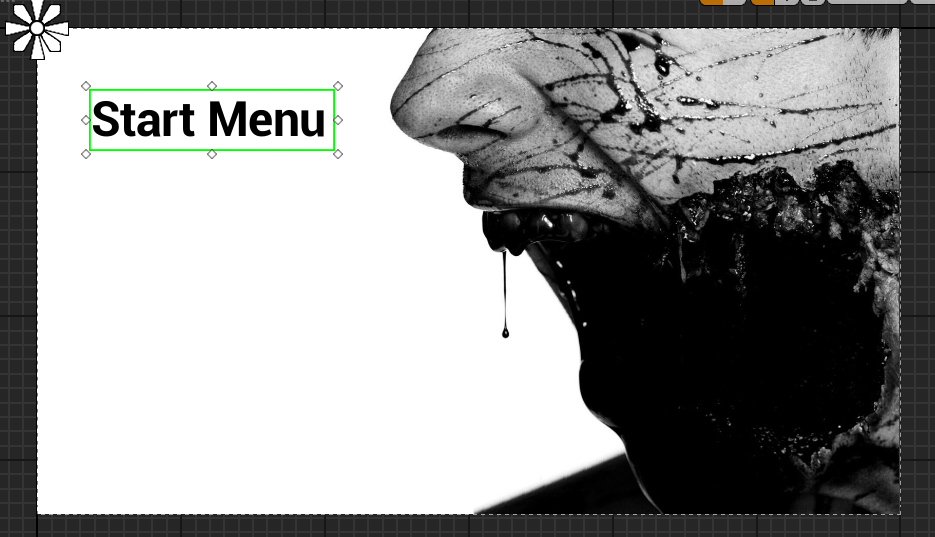
In the appearance section in the Details Panel Find where it says "Font" and to the right of that you'll see the number 24. This is the size of the font, change this to the size you want. I have set it to a size of 80.


The title text added to the StartScreen UI


Adding The Menu Buttons

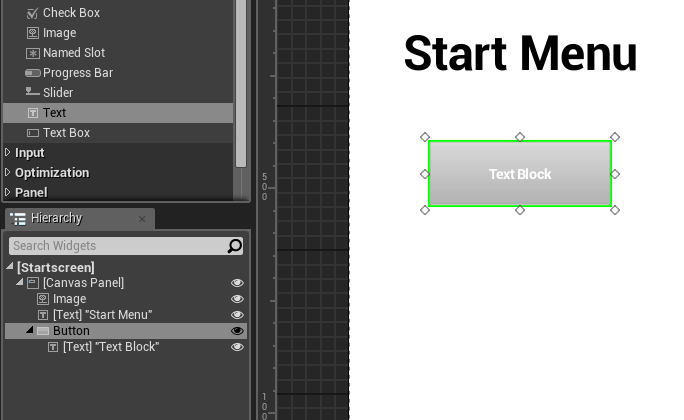
In the Palette Panel drag and drop a "Button" widget onto the [Canvas Panel] in the Hierarchy Panel in the same way as we did with the image and text objects.

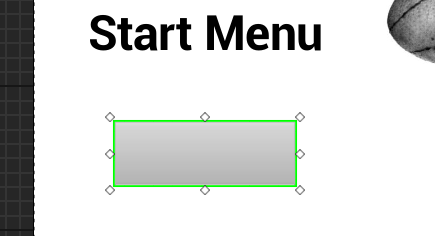
Select the button from the top left of the viewport and re-size and reposition it to your desired location.
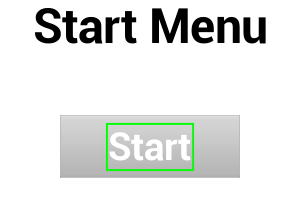
The start button added to the StartScreen UI

                 
In the Details Panel drag and drop the "Text" widget onto the "Button" you just added. This will allow you to put text on the button and keep them grouped together for easier editing. Your Hierarchy Panel and your button should look something like this.


By clicking on the text in the Hierarchy Panel you can edit it in the same way as we did for the "Start Menu" text

                                     
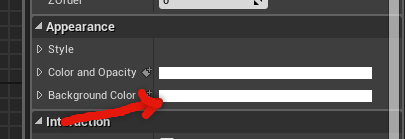
If you select the button, you can change the colour of it in the Details Panel in the appearance section if you click the white bar next to where it says "Background color".


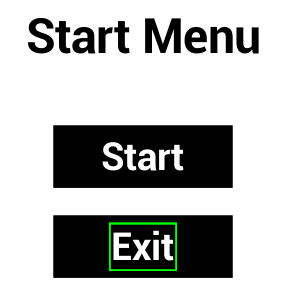
I'm making mine black to keep consistent with the black and white theme going

In the Hierarchy Panel click the button widget you made and copy and paste it onto the [Canvas Panel]. Move it to the desired location. You should now have to identical looking buttons.

Simply change the text on the second button to "Exit".


Programming The Menu

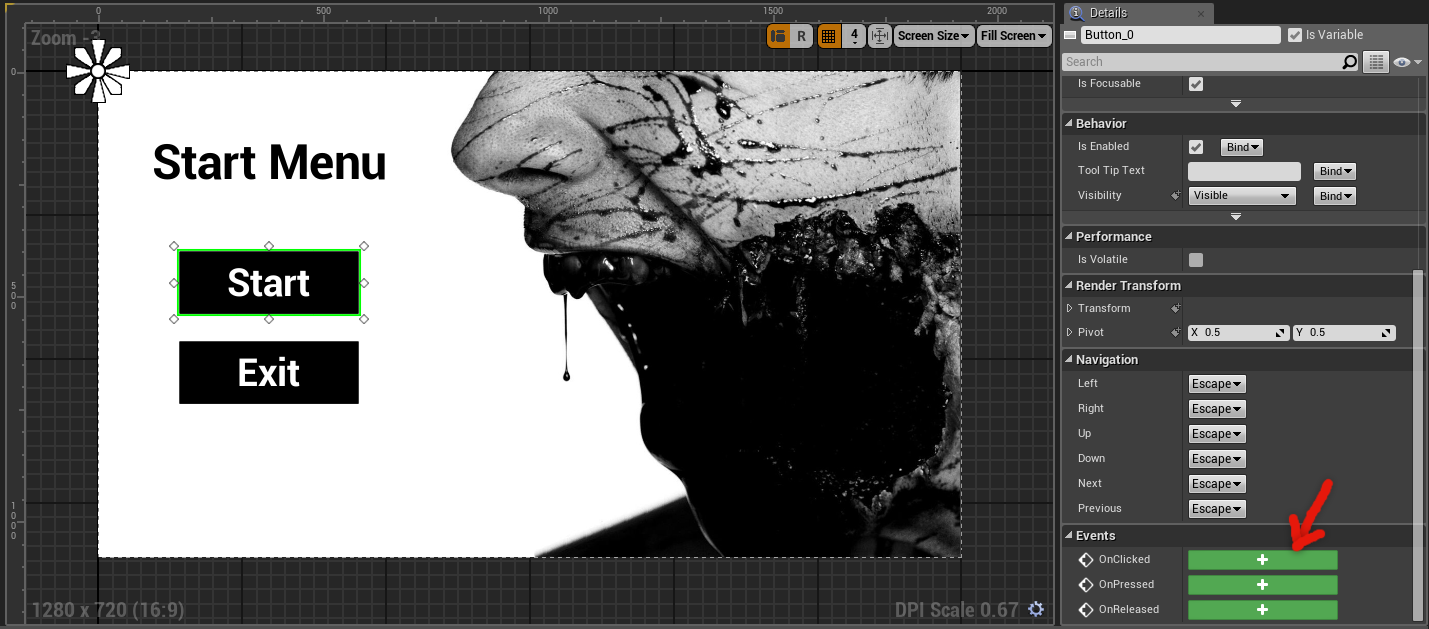
First select your "Start" button and scroll down to the bottom of the Details Panel so you can see the "Events" section and click the green bar next to where it says "OnClicked".


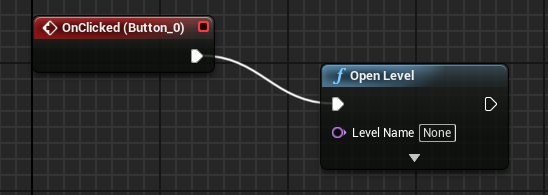
This will automatically open up the graph editor view and create an OnClicked event node for the Start button.

Drag a wire out from the white pin on the OnClicked node and search for "Open level" and select it.


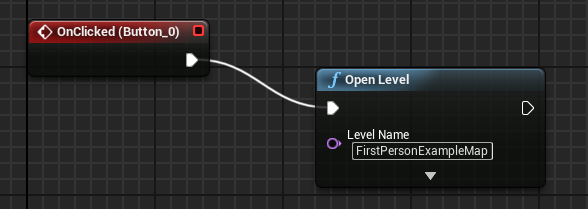
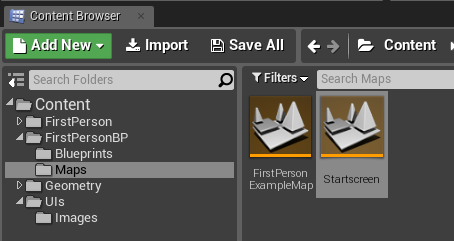
In the text box where it says "none" type in the name of the level for your game. You can find the this level in the content browser Content > FirstPersonBP > Maps. As I am using the First Person Shooter Template my map is called FirstPersonExampleMap, but yours may be different.


Hit compile and save. On the top right of the blueprint editor select "Designer" mode. This will take you back to the widget editor.

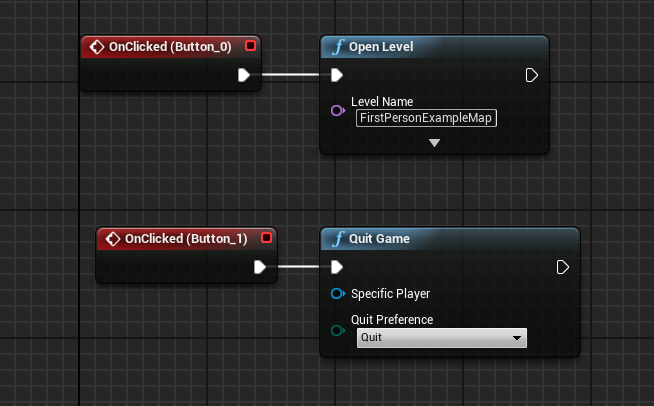
Now select the "Exit" button and again create an "OnClicked" event. Once again you will automatically jump into the Graph editor. Drag a wire out from the new Onclicked event node and search for "Quit Game" and select it. Then hit compile and save.


 Your Graph editor should now look like this.


Creating & Programming The Menu Level

Now that we have the start screen set up it's time to create a level for it to be place on. Compile and save your Start screen then close the editor. Back in Unreal Engine go to the file path: Content > FirstPersonBP > Maps (will be different on different game templates). Here you will find your map. Right click in empty space and create a new level and call it something appropriate like "startscreen".


Double click the new level you just made. When it opens, your preview window should be completely black.


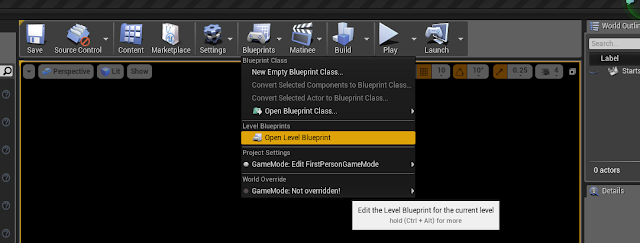
Above the preview window, select the blueprints drop down menu and select "open level blueprints".


You should then be presented with a screen similar to the Graph editor view from the StartScreen blueprint. This is Unreal Engine's Level Blueprint editor.

From the white pin on the Event BeginPlay node drag out a wire and a drop down will appear. Type "create widget" in the search bar and select it.


On this node click the drop down where it says "Select class" and select your start screen from the options.


From the white pin on the widget node drag out a wire and type "add to viewport" and select it. Then drag a wire from the "return value" pin on the widget node and plug it into the "target" pin on the viewport node.


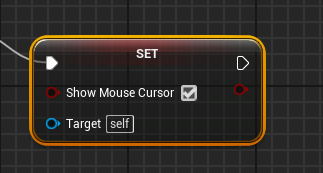
Drag a wire from the whit pin on the viewport node and type "set show mouse cursor". The list should be empty now. Click the little "Context Sensitive" check box to get the node.


On this node make sure to click the check box next to where it says "Show mouse cursor".


Drag out a wire from the "target" pin on the show mouse cursor node. Make sure to turn Context Sensitive back on. Type "get player controller".

You are now finished with this stage of programming so hit compile and save. It should look like this. After compiling and saving your code you can close the Level Blueprint Editor.

The completed menu code on the Level Blueprint of the Startscreen Level

Editing The Project Settings

The final step is to edit the project settings to make the Startscreen Level the game default map. This will ensure when the game is packaged and plays that the menu opens up first, otherwise the player would skip straight into the game and all our hard work in creating a menu would be wasted!


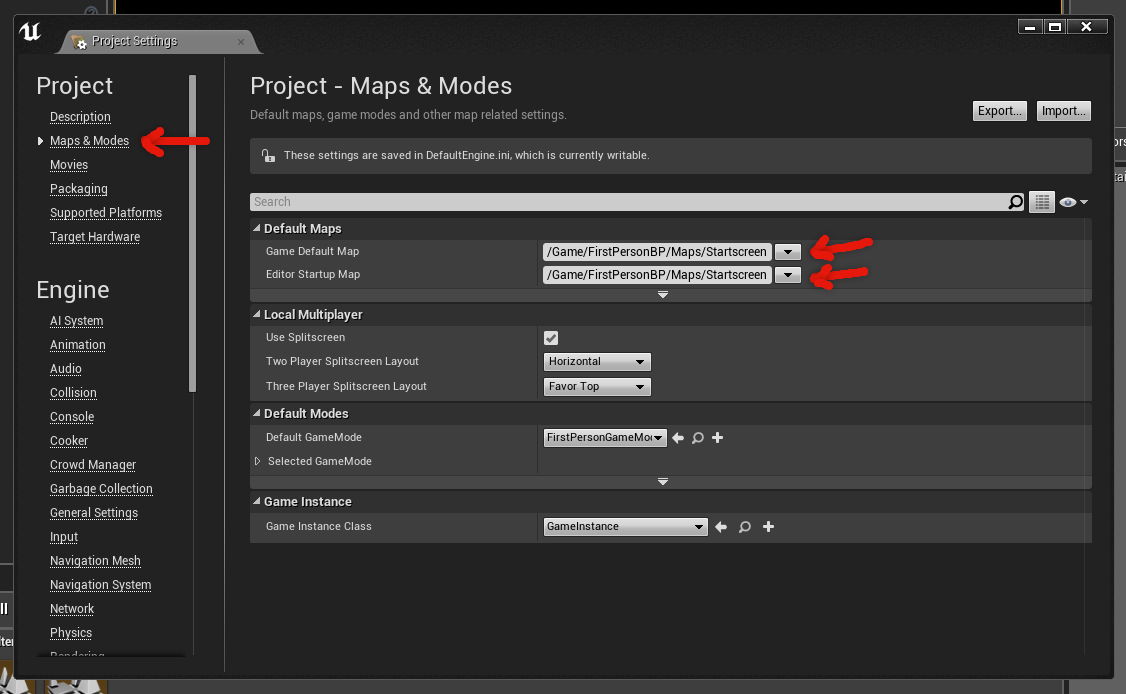
Go to File > Project Settings. In the window that pops up select the Maps & Modes option on the left. 

In the "Default maps" section select the drop down and set them both to your startscreen level.


You can close this window now because it automatically saves. You have now completed the Startscreen UI tutorial, so just save your project and your done!


close
Banner iklan disini