Showing posts with label 3d lighting. Show all posts

Thursday, October 6, 2016

Read Lighting in blender Now


title image
finished lighting result

What is Lighting?

Lighting is a very important topic in rendering, standing equal to modelling, materials and textures. The most accurately modelled and textured scene will yield poor results without a proper lighting scheme, while a simple model can become very realistic if skilfully lit.

Why would you use it? 

People use lighting in order to make their object more realistic and easier to see. It also makes your object better looking in general. You also need lighting in your scene if you wish to create a rendered video or image.


Different types of lighting

Point light:

1. In order to do this you must press shift + A and select lamp then select point then place this light somewhere on your scene
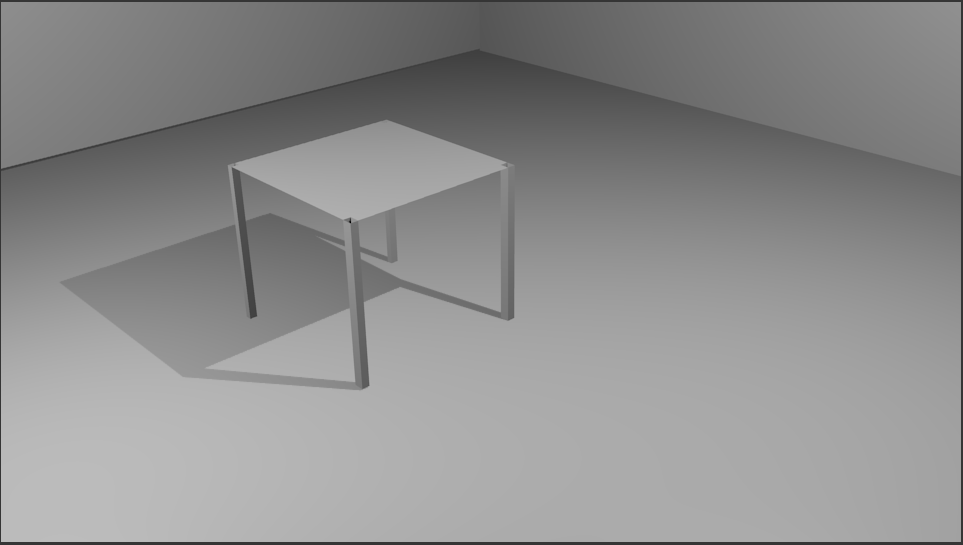
table with a point lamp
point lamp

Sun light:

1. Repeat the same process that you did for point but this time select sun, you should try place this light up high and at an angle to your object in order to get a good effect
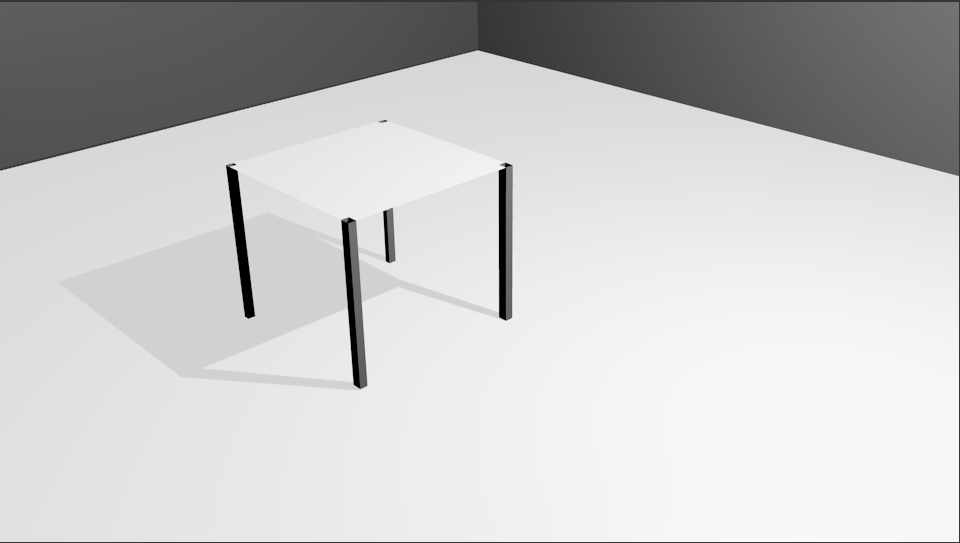
table with a sun lamp
sun lamp


Spot light:


1. Again, repeat the same process except select spot, you should place this above your object in order to get the desired effect. This light emits light in a cone like direction
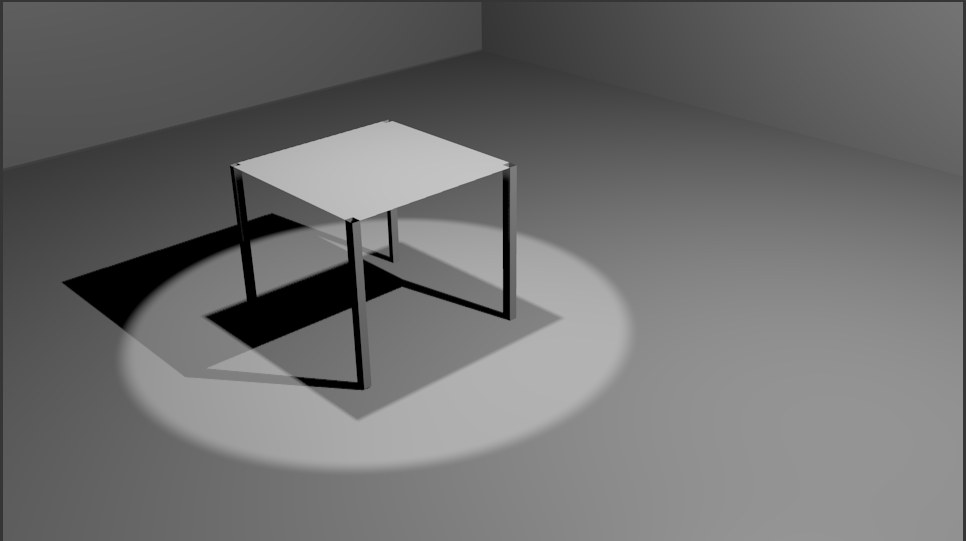
table with a spot lamp
spot lamp


Hemi light:

1. Same again, repeat the process and select hemi. This is a 180® directional light which emits light downwards
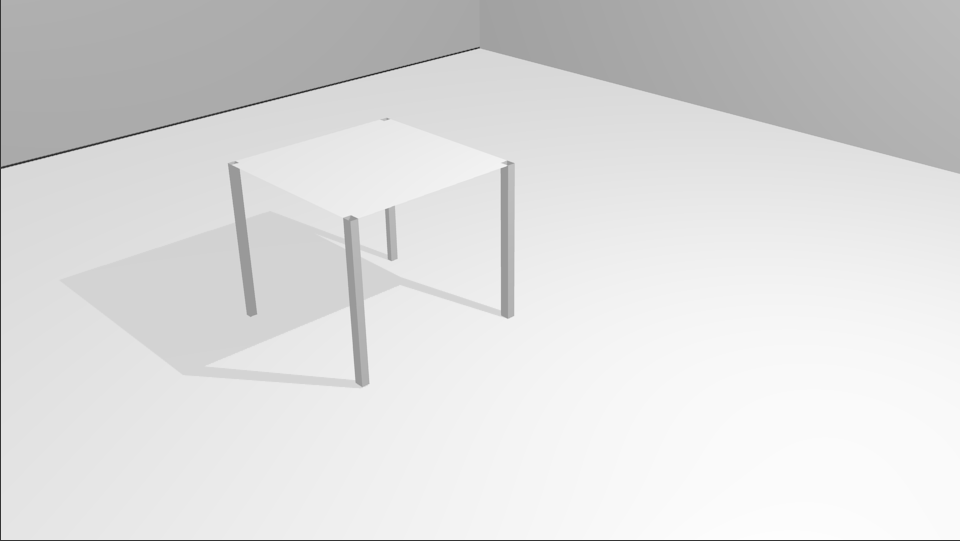
table with a hemi lamp
hemi lamp


Area light:

1. Same steps again just select area instead. This is an upward light that emits light from the plane.

table with an area lamp
area lamp

How to effectively light an object in blender

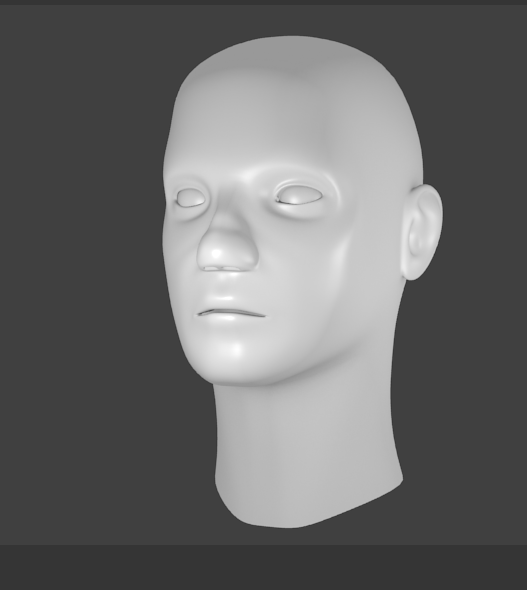
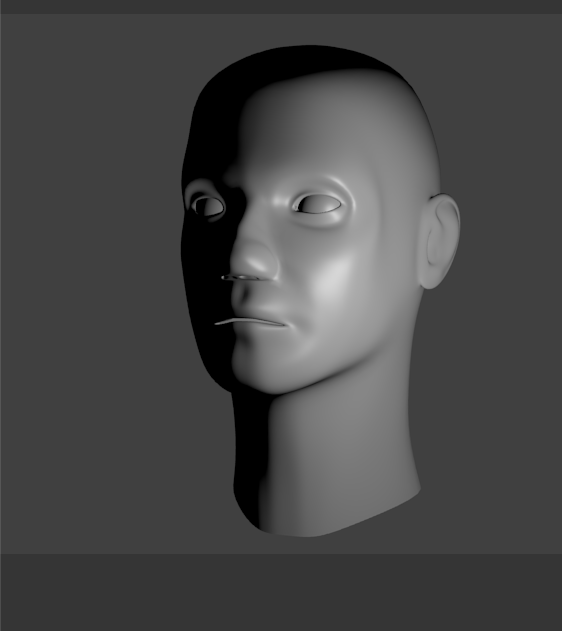
1. Press F12 for camera perspective


camera perspective of human head
camera perspective


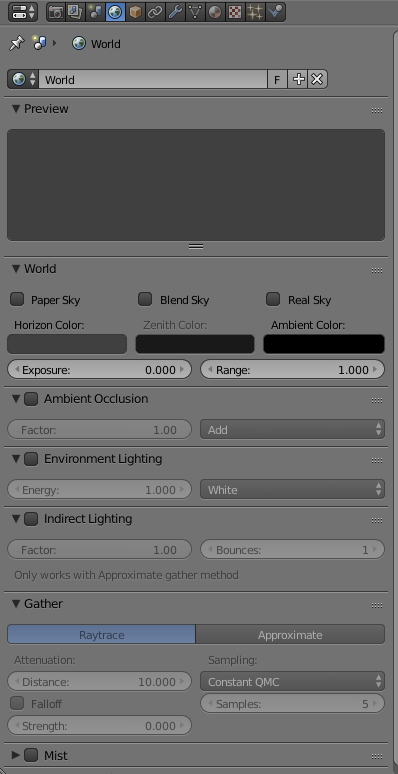
2. Then open up the world tab and tick ambient occlusion

world tab in blender
world tab

3. Turn ambient occlusion to full


full ambient occlusion


4. Reduce ambient occlusion to 0.5

ambient occlusion 0.5
half ambient occlusion


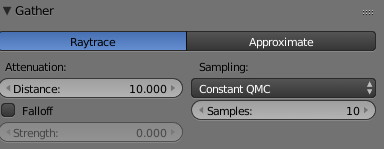
5. Go to the Gather column in World tab
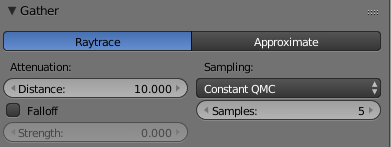
gather in blender
gather column
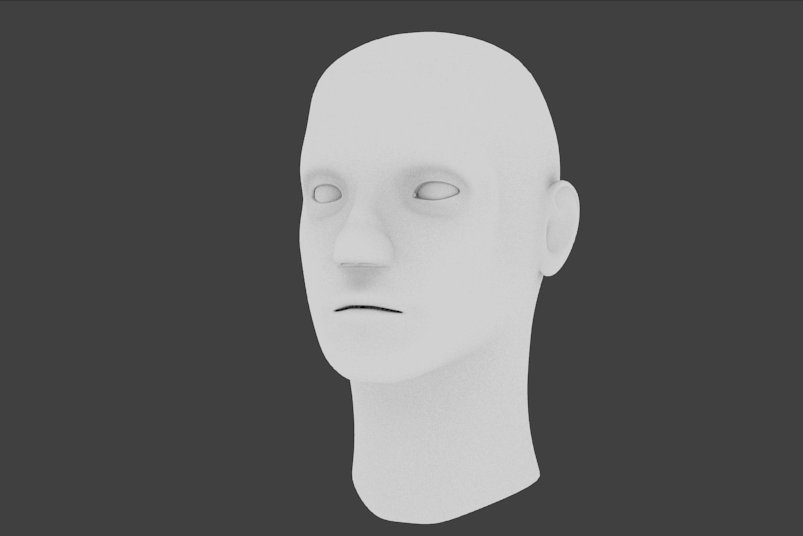
6.  Adjust samples to preferred amount of samples. This makes the picture more realistic but my recommendation is not to go over 10 as it may crash your computer
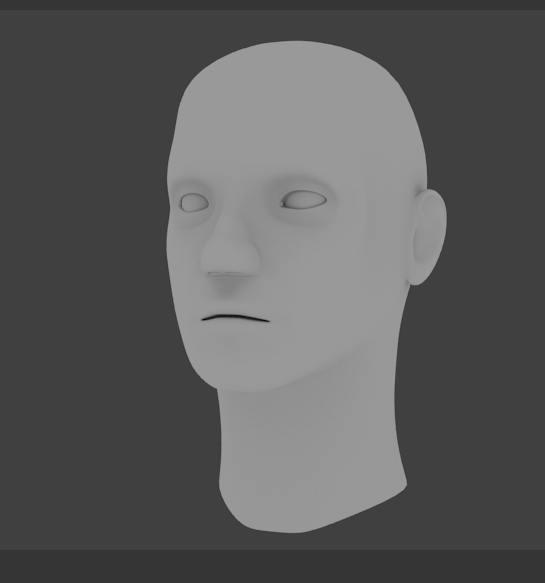

samples - human head
samples human head
sample at 10
gather sample 10
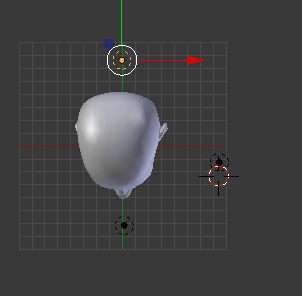
7. Press 7 for top view


top view of human head
top view


8. Then duplicate the lamp by pressing Shift + D and place lamps at the front, the back, and the side
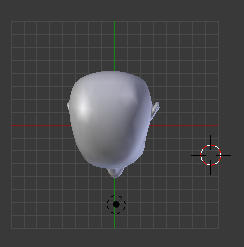

3 point lamp of human head
3 point lamp


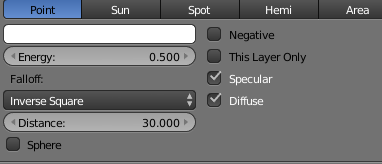
9.  Then adjust the energy on both duplicate lamps. To do this you have to go to the object data tab and adjust the energy settings
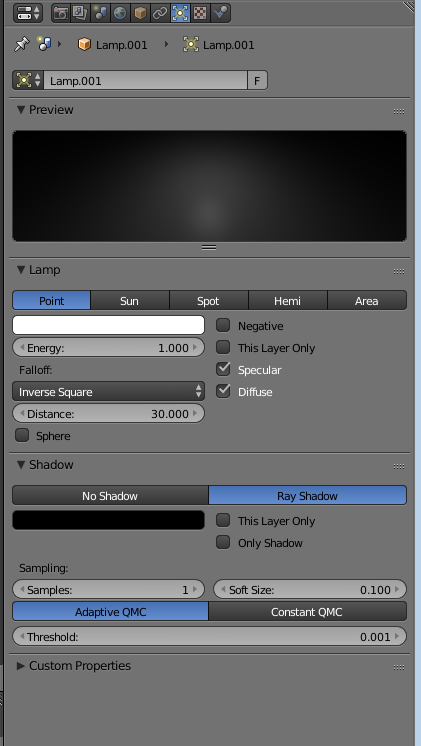
energy settings in blender
energy settings
10. Set the lamp behind the object to 0.8 and the one beside it to 0.5


closer view of energy settings
energy settings 2
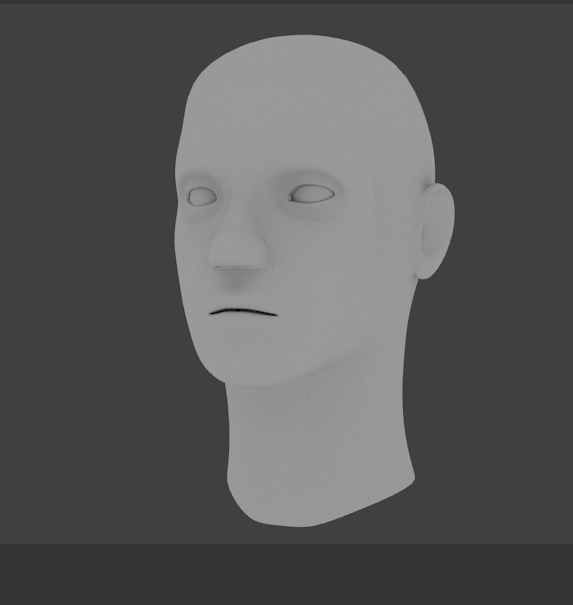
11. Once this is done press F12 and that is the lighting of the object done.


finished image of lighting
finished lighting

Thursday, January 21, 2016

Creating a Room in Blender

Creating a Room in Blender
Final Render of a basic room in blender


In Blender, we use rendering to complete the creation of our 3D scenes and objects. It is used to showcase the scene with all applied textures, materials and lighting, in order to give it the realistic appearance we aim for. We used this process to complete work with the highest standard possible.


In this tutorial, we will be focusing on the actual rendering of the scene. To begin, I will create a room scene, and ensure that the lighting is correctly added, as well as the materials and textures to each object. I will provide a walk-through on how I go about creating this room scene.


Step 1: Making the Tabletop

My scene will mostly be made up of planes, which can be added by pressing shift + A. The plane is located in the ‘Mesh’ dropdown. For this tutorial, I started with a table, and scaled it (S) by 2. Then lift the table on the 'Z' axis, by pressing the 'G' key, then 'Z', then type '2.5'. This will lift the plane higher and give room for the table legs. 

Added Plane
You may want to extrude the tabletop, so as to make it thicker as well. To do this, select the table and enter edit mode (tab). Ensure that Blender is in 'Face Select' (located at the bottom of your screen), and extrude the tabletop (E). You can make it as thick as you want it to be by entering a number after pressing 'E'. My tabletop is '0.1' extruded.


Extruded Tabletop

Step 2: Making the Table Legs

Once we have scaled the plane, go into edit mode (tab) and ensure that the 'Face select' is on (located on the bar at the bottom of the screen). Once you're sure it's on, I would advise using Isometric view by pressing 5, then pres Ctrl+7 to view the bottom of your object, then click subdivide (located on the left in edit mode) three or four times, depending on how wide you want the tables legs to be.


Scaled plane in edit mode

Subdivided plane, with corners selected

Once you have finished subdividing the bottom of your table-top, press shift + right-click each corner face. You can then extrude (E) these faces and in doing so, create your table legs.

Extruded table legs

Step 3: Making the Table Cloth

You can then add a table cloth over the top of the table. In order to do this we must simply add another plane, and scale it up. For this tutorial, I scaled mine by 3. Then grab it (G), and bring it up over the table. You can do this by pulling it up by the blue arrow on screen also.


Cloth plane added
After you have moved the cloth, go into edit mode (tab) and click 'Subdivide' around 5-6 times. This will divide the plane's faces, which will play an important role in giving it the fabric-look we want it to have. Go into the 'Physics' tab on the right hand side of the screen.


Edit Mode Menu
Cloth plane subdivided

Cloth Physics
Add the 'Collision' and 'Cloth' physics to the object. You should then select the table and enable the 'Collision' physics for that as well. These physics allow the cloth to fall onto the table and register the table as something to make contact with in the scene.


Once this is done, select the 'Play Animation' button at the bottom of your screen (or use Alt + A). You should see the table cloth you had previously created drop onto the table and take the appearance of a realistic piece of fabric.


'Play Animation' - Middle-Right play button

You may notice how the cloth may still look slightly unrealistic, as shown below:


Unrealistic Cloth

To fix this, simply select the cloth and select the 'Smooth' button underneath the 'Shading' dropdown on the left hand side of the screen.

Shading Settings
The fabric will then appear as shown below, which is much smoother and realistic:


Realistic, 'Smooth' cloth

Step 4: Making the Floor

Once the physics have been applied to the table cloth and table, you can move onto making the actual room. This requires only three planes, each scaled up to represent the walls and the floor.

Added Floor
Add your first plane. This will be the floor of the room. In my own scene, I scaled it by 10. It's far easier working with even numbers when creating room scenes. 


Scaled Floor

Step 5: Making and Moving the Walls

Once you've scaled the floor, you need to add two more planes for the walls. Again, add a plane from the 'Mesh' menu. Rotate it on the 'X' axis ('R', 'X') by 90 degrees. Then proceed to move the plane along the 'Y' axis by 10. It should appear as follows.

First wall moved
The next step is to scale the wall to fit along the floor, and make it taller. To scale it to fit the floor only, it's important that you only scale it on the 'X' axis. This will increase the length of it only. Do this by pressing the scale key (S), then 'X', and finally scale it by ten. Then proceed to do the same again, except on the 'Y' axis and by 5. You should then grab the wall, and move it up on the 'Z' axis until the bottom of the wall is in line with the floor (follow this sequence for accuracy; 'G', 'Z', 5)

It should appear as follows:

First wall scaled
After you've finished this, you need to repeat the process of creating a wall, only this time, things should be done the other way around. Add your second plane, and rotate it on the 'Y' axis this time. Then move it on the 'X' axis by 10. 
It should appear as follows:

Second wall moved

Then proceed to scale the wall on the 'Y' axis, by 10. Again, you will see that this will make the plane as long as the floor. Make this wall the same height as the other by scaling it on the 'Z' axis, just as you had done before, and move it up on the 'Z' axis by 5.

It should look like this:

All walls added

Step 6: Adding Materials and Textures

Once you've finished the room, you will probably want to add materials and textures. To do this, you must select each object and add a material to each. This can be done in the materials tab on the right hand side of the screen, as shown below:


Materials tab highlighted
Texture Tab highlighted


In this tab, select the 'New' button. This will give the object a material. Materials have to be added to an object in order to use textures to make the object appear more realistic.


After the material has been added, proceed to the Textures tab, which is directly to the right of the materials tab. Then select the 'New' button, and use the 'Open' selection under the 'Image' dropdown to open whichever texture you wish to use from your computer. Do this for each object.

If you were to select the 'Rendered' view now, you would see the room with all it's textures and materials added to each object, however, you may notice that each object may an unrealistic shine to it - depending on where your lamp placement is. If you want to get rid of this and produce a more realistic scene, simply select an object, go onto your 'Materials' tab, and turn the 'Intensity' under 'Specular' down to zero. This reduces the shine of the objects in your scene. You will need to do this for each object.

Specular in Materials Tab

Step 7: Lighting

Before you complete your final render, you may want to change or alter the lighting in the scene. For this tutorial, I used a 'Sun' light, which is a light that does not originate from a certain point, but simply from the sky in Blender. It acts as general sunlight, and can create shadows, which is the reason I did not create a roof on the scene.


Sun Light


You may want to experiment with your own lighting, by selecting the lamp and trying out the different options.

Step 8: Final Render

Finally, we can render our scene. To render the scene, press 'F12' on your keyboard. This will give you a rendered view through the camera on your scene. If the render is not centering at the point in which you want it to, you can move your camera around on the 'X', 'Y' and 'Z' axis'.


Camera selected and moved


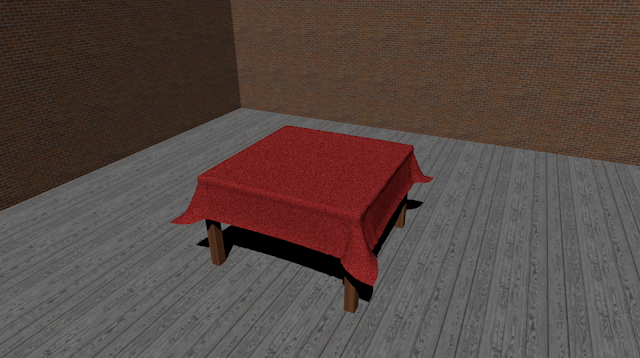
Once you are satisfied with your camera placement, you will end up with a final render that you feel is the best, probably something like the following:


Final Render


Final Render 2


Final Render 3


Wednesday, January 20, 2016

Applying Multiple Materials to Single Objects in Blender

In this tutorial, we will be learning how to apply multiple materials and textures to single objects. In this example, we will be creating a building, using two materials, for the building walls, and the building’s rooftop.


Apply Multiple Materials to Single Objects in Blender
Multiple Materials applied in a Final Render

Step 1: Creating the shapes

Open a new Blender project.


New Project
Rather than the deleting the default cube that appears in new projects, we will be using it. Use scale on Z axis (‘S’, then ‘Z’) to make the cube slightly taller, then grab and move on z axis upwards, so as to sit on the grid.


Scaled cube
Add a plane (shift + A, in the ‘Mesh’ option) and scale wider than the cube, using the ‘S’ key.


Added plane

Step 2: Edit Mode

Enter edit mode (tab) and ensure the ‘Face Select’ option is selected. This button is located along the bar at the bottom of the screen.


Circled selection, click 'Face Selection'
Select each side of the building apart from the top (hold shift and right-click each side). The selected sides will appear orange.


When 'Face Selection' is on, faces should appear as above

Step 3: Adding Materials and Textures

Go to the Materials tab on the right-hand side of the screen and add a new material, then proceed to the textures tab, and add a new texture – ensure that the type is ‘Image or Movie’.


Materials Tab
Textures Tab
Once you have added the texture, click ‘Open’ underneath the ‘Image’ dropdown, and open your texture. You can choose whichever texture you require. Since we’re making a building in this tutorial, I’ll be using a residential building texture. In order to gain a more realistic textured object, you should use seamless textures.


Added Texture
Image dropdown

Step 4: Mapping and Assigning the Walls

Once you have added your texture, you may want to map it in order for it to appear more realistic and neat. In order to do this, remain in the Textures tab, and scroll down until you find the ‘Mapping’ dropdown. Underneath this, change the ‘Coordinates’ to ‘Global’, and the ‘Projection’ to ‘Cube’. If you want to increase or decrease the size of the texture, you can change the ‘X’, ‘Y’, or ‘Z’ sizes.


Image Mapping for Building
Go back into the Materials tab, and select the ‘Assign’ button. This will assign your selected material and texture to the faces you have selected – as long as they are still selected.


Assign button

Step 5: Adding the Second Material

Once you have assigned the material to the walls of your building, select the roof of it by itself, and proceed to add another material. 


Roof Face Selection
Second Material added

With this material selected, go back to the Textures tab and add a texture to it. For this, I’ll be using a concrete texture. Repeat the process of opening the texture underneath the ‘Image’ dropdown.


Add texture to second material

Step 6: Mapping and Assigning the Walls

Once you have opened your texture in the Image dropdown, you may want to map the roof as well. In order to do this, simply scroll down to mapping, just as described beforehand, however, set the ‘Projection’ to ‘Flat’ this time. Keep the ‘Coordinates’ at ‘Global’.


Image Mapping for Roof
Ensure that this texture is assigned to the rooftop. To do this, go back to your Material’s tab and ensure that the roof’s material is selected. Then make sure that your rooftop is still selected on the object onscreen. If both of these are selected, click the ‘Assign’ button again.


Assign button

Step 7: Rendering your Scene

As on now, your building should have two materials assigned to it, each with a different texture. You can view this by changing the object display from ‘Solid’ to ‘Rendered’, or else to get a full rendered view, simply press F12 on your keyboard. This will give you a rendered view through the camera on your screen.


Rendered project
Rendered through camera view

You can use the same technique of applying a material and texture to your roof, as the plane. 


Final Render

Sample Renders:

You could experiment by adding more materials to each surface or the building, or try another shape with more than two materials.
Sample Render - Cylinder

Sample Render - Monkey


close
Banner iklan disini