

 |
| Magazine Cover Design Layout |
Designing a Magazine Cover? Then you need to be aware of these industry standard features, Both from a technical and a design point of view. First the Technical...
TECHNICAL
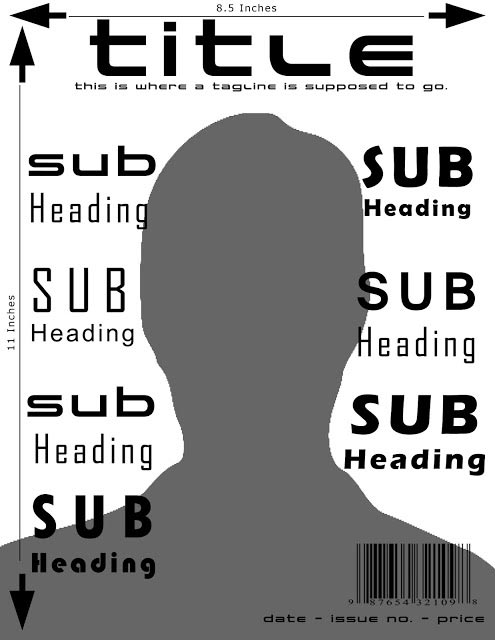
Size:
Professional Magazine Covers (and therefore magazines themselves) are not A4 in size. This is a common misconception. The actual size is similar to A4 though; 8.5 inches x 11 inches is the standard.Text:
Your Magazine Cover should include the magazine name, tagline and selected article headings.Main Image:
You should ideally use just one main image. It should be a high quality image ideally on a plain background.Little Details:
Don't forget the Date, Price, Issue No. and BarcodeSo with all those things in place you will technically have a magazine cover, but how do you make sure it is a good one...? Now lets look at the design.
DESIGN
Main Image:
Your image should be the dominant element on the cover, it should take up at least two thirds of the cover and should contrast with the background, keeping it centrally aligned it also best. It should also utilise at least one of the Attention Grabbing Technique. The most effective being Sexy or Iconic, if you use an attractive celebrity you will be achieving both at the same time, hence the reason they adorn the cover of most magazines. When using people use either head and shoulders or waist up photos for best impact. |
| Magazine Cover Using Iconic Celebrity On The Cover |
The magazine title text is best large and bold old in a sans-serif font. The style of the font should also be appropriate to the style and topic of the magazine.
Sub-Headings are best aligned to the sides, should include a variety of font styles, colours and sizes all still in sans-serif (see the sample below), contrast with the background and use buzz words or better still any of the 12 most powerful words.
 |
| Magazine Cover utilising variety of sub heading styles, colours and sizes |
And not forgetting the little details: They should be kept small, discreet and out of view (unless they are a feature of the sale – e.g. special discounted price)
So if you have taken all this on board are are still interested in creating your own magazine cover design then see our create a magazine cover tutorial. You may also be interested in reading about the most powerful words in the English language, which tend to feature regularly and prominently on magazine covers.


