Showing posts with label Unreal Engine. Show all posts

Friday, February 10, 2017

UE4 FPS Video Series

first person shooter game in ue4
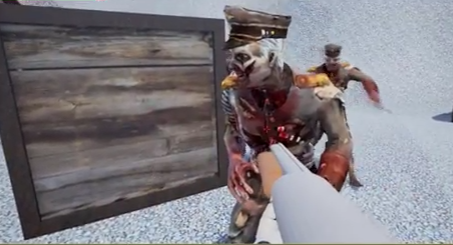
A screen shot from the completed FPS game in UE4

This series aims to guide you through the process of creating a first person shooter game using 10 specifically created tutorials, each focusing on a different aspect of designing and creating the game.

The series was created by Nathan Hill, Dylan McGrath and Philip Evans. The game itself is available for download here

This video series is a follow up and update on our previously created text tutorial series available here.

You can watch all the tutorials in the playlist right here (below) or go to our YouTube channel

Create an FPS game in Unreal Engine (UE4)


Thursday, October 6, 2016

Read Introduction to Unreal Engine 4 Now


In this tutorial I am going to give you a basic run down of the the user interface in Unreal Engine 4. After reading this tutorial you will be able to start your own Unreal Engine 4 project and know your way around the interface you are given to create a game.

Getting started

Create an account with unreal engine. Sign in.

Sign in screen.
Sign in screen.

When you sign in, you see the menu screen.


Menu screen.
Menu screen.

From the Marketplace, you can download different free useful packages including characters.  From there you can add these to your project.

Marketplace.
Marketplace.

All downloaded packages can be found in the library.

Launch button and Library location.

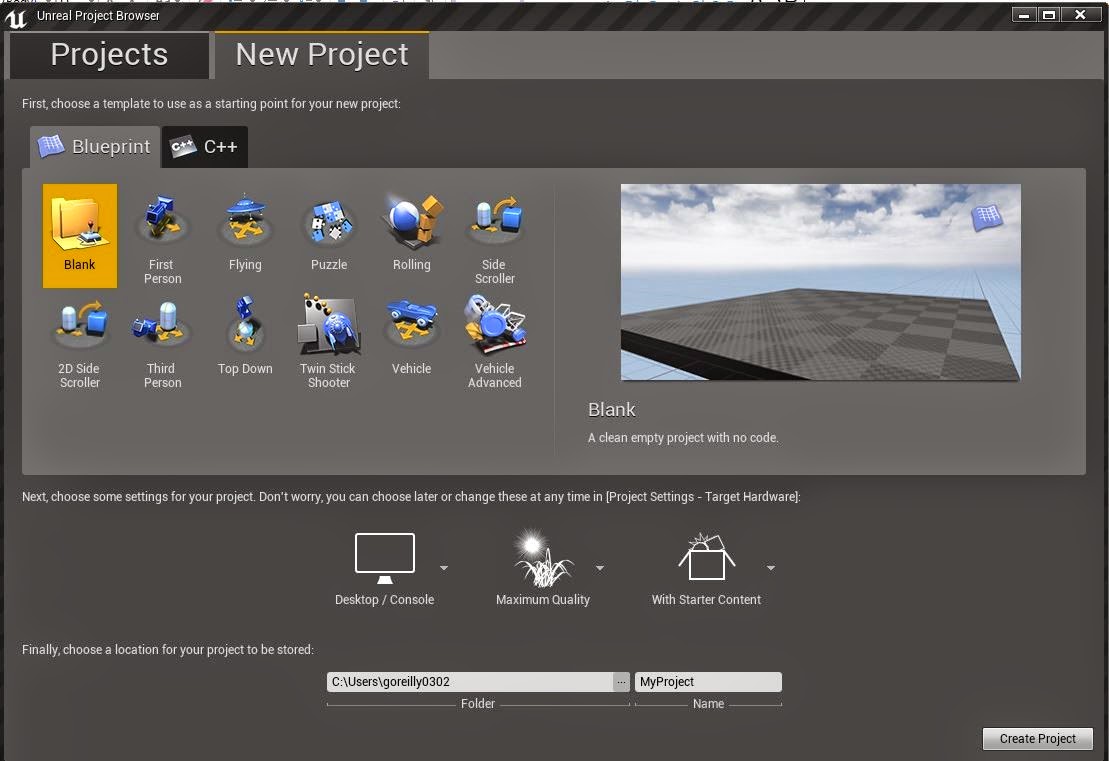
First time you launch the engine, you will see the unreal engine project browser.


Unreal project browser.

From here, you can create a new project or go on to the Marketplace and load an existing project. When creating a new project, there are a variety of different genres and also a choice of project type’s, blueprint or code.


New project.
New project.

Blueprint and C++ options.

 When making settings, we recommend the following. 

Recommend setting.
Recommend setting.

You then choose an appropriate location to save it and you give it a project name.
 
Choose location to save your project and name it.

Note: when naming, do not use spaces, use an underscore. Then you save and click CREATE PROJECT.
 
Create project.
Create project.

User Interface

Main menu bar


Menu bar location
Menu bar location

Menu bar zoomed in.
Menu bar zoomed in.

Pretty much any menu bar you see in computer applications, file menu, edit menu, window menu and the help menu.

File -   Here you can save what you are working on, create new projects, import and export.
Edit – You can find the standard Undo, redo, cut, copy, paste. Also here you can find editor preference and your project settings.
Window – This is where you can show and hide parts of the interface that are not shown by default
Help – Direct link to the documentation, link to initial tutorials to help get you started 

On your view port here are meshes already in place because you chose to include starter content. These meshes are not permanent and can be edited, as shown in a later tutorial. 


3D viewport.
3D viewport.

Mode panel 

Mode panel, this allows us to change the mode the editor is currently in. You can select modes place mode, landscape, paint, foliage and geometry editing mode.


Mode panel.
Mode panel.
Zoomed into modes.
Modes - Zoomed in.

Content Browser

Allow you access to any exterior generated content and special content like materials and blueprints you may have created.


Content browser.
Content browser.
Here you can create new folders and import different meshes, sound and textures/materials.

Scene Outliner

The scene outliner panel, shows everything that is in your level at that time. Main use is to see all the objects in your screen and select them.


Scene outliner.
Scene outliner.

It has some other functionality like here you can select, edit, parent together, hide and delete objects/actors.


Details panel

The details panel shows all editing details on a selected item.

Details panel.
Details panel.

Tool bar

Tool bar.
Tool bar.

Quick and easy one click access to common tasks that you will be performing
you have your save button (but generally you can just hit ctrl+s), content to open the content browser if you don’t already have one opened. Marketplace. Your settings, control various things that you can show and hide inside of your view port and overall environment. 


When editing, make sure you save your work frequently and build when progress is made.
When you press the play button a character will appear, this gives you a good idea of how your level will look and function.

Character on screen.

To escape play mode press eject. The short cut for this on your keyboard is ESC.

Viewport navigation

Mouse navigation

If you drag with the left click, to go forward you drag up and to go backwards you drag down. Move the mouse left to right while still holding down the left of the mouse to look left and right. Right click is just looking around, you can look left, right, up and down by dragging the mouse up, down, left and right. If you click the mouse wheel you can track the camera in all directions by sliding up and down, left and right. Click the left and right of the mouse at the same time does the same thing.

You can change the speed of the camera in the upper right corner of the viewport.


Camera speed options.

Camera speed option zoomed in.

WSAD keys

While holding down the right side of the mouse:
 W – To fly forwards
 S – To fly backwards
 A – Straight left
 D – Straight right
 E – Straight up into the air
 Q - Down
 C – zoom camera in
 Z – zoom camera out

Note: as soon as you release the right mouse it snaps back to where you were

MIYA style navigation

Hold down alt to use this style of navigation.
Alt+left mouse click is going to tumble the view around.
To change pivot of the tumble you can select any object in your scene and hit “f” on your keyboard.
Now when you hold down alt and drag with the left mouse you are tumbling around the object.
alt+right mouse to dolly the camera

When duplicating an object hold down the alt+click the direction you want to go in on the anchor + hold down shift. 


You can also look at your level through different viewpoints. You can find the option to change views in the top left hand corner of your  3D viewport.


Viewpoint section location.
Viewpoint selection zoomed in.

In the dropdown, there are a variety of different views including perspective, top, side, and front.


Perspective.
Perspective.


Top.
Top.


Side.
Side.

Front.
Front.

Wednesday, October 5, 2016

Read Importing Static Meshes into UE4 Now

Final Result

WHAT ARE STATIC MESHES?

Static meshes are polygon meshes which are an important in many game engines including Unreal Engine, Source and Unity. The word static refers to the fact that static meshes can’t be vertex animated as they can be moved around, scaled or reskinned.


WHY USE STATIC MESHES?

Static meshes are very useful for beginners who don’t have a lot of experience. Beginners can use static meshes to help create scenes in their game. There a fast and easy method of creating scenes. You can also use them to try and create your own unique mesh by adding on a new texture or changing the colour.

IMPORTING A STATIC MESH

STEP 1 

The first step is to go on to blendswap and to find a subtle mesh for your game

Make sure to get a static mesh for your game at blendswap. link is available above. 

STEP 2

You will then want to download a static mesh that you plan on using in your game. After the download make sure to extract the file.


When your waiting for your download you should look at different static meshes that you could use in your game. 

STEP 3

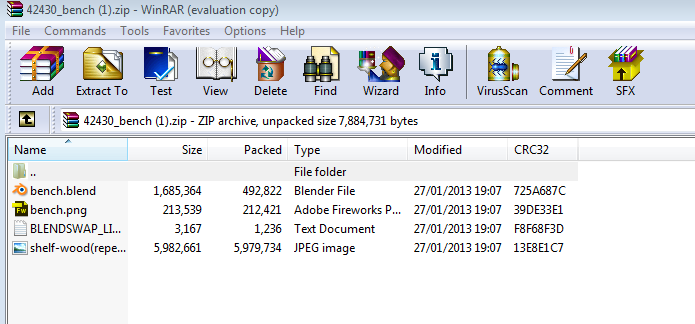
 When its done downloading make sure you extract file by clicking on the extract to.

Make sure you extract your static mesh somewhere thats easy to find.

STEP 4 


 After down loading it you will want to open it up in blender.

When you bring in a static mesh you can scale it to suit your game

STEP 5

After bringing it in you will want to remove the background to your static mesh and change it to suit your game. You can try out putting different textures on your mesh.To delete a background select it by right clicking then press x to delete.

The image above shows the static mesh in blender

STEP 6

Before bringing your static mesh into unreal engine you must export your mesh as an FBX
file.

The image above will help guide you exporting your meshes.

After clicking export you will want to select the mesh option under Export FBX

STEP 7

Import the static mesh into your game and scale it down or up depending on the mesh. To import your static mesh go to your content browser then click the import button to bring in your static mesh. The default import options will suit most meshes but be sure to read through them and make any changes you feel are necessary.

Finished Result


Saturday, February 13, 2016

UE4 Enemy AI

This tutorial is the eight in the 10 part series on how to create a first person shooter game using Unreal Engine 4. We recommend you read the previous articles first to get the maximum benefit from this tutorial. In this tutorial I will be showing you how to make a simple enemy A.I to track and move towards the player.

Step 1

Start unreal engine and open your level right click on your content browser and make a new folder, mine will be called ZombieAI and within that folder right click and create a new blue print, use the search function to type in AIController as the blueprint class and click select it to create the blueprint. Name the blueprint ZombieAI and click 'Save All'.


Step 2

Double click the ZombieAI blueprint and open the event graph tab. You can delete the event tick as we wont be using it. Then right click and search for add custom event once you place it you have to name call it TrackPlayer.


Add a custom event and call it TrackPlayer

Then right click and search for AI move to and connect the white arrows together.


Connect the TrackPlayer event to the AI Move To node

Then right click and search for get controlled pawn connect the blue arrow to the pawn on the AI Move To. Then right click and search for get player character and connect the blue arrow to the Target actor on AI Move To.

Connect up Get Controlled Pawn and Get Player Character to the AI Move To node

Next, beside the Event begin play right click and search for set timer by function name and connect the white arrow of the event begin play to the set timer and in the function name section type in TrackPlayer change the time to 1 and click the looping option then hit compile and save.

Connect EventBeginPlay to a Set Timer by Function Name node

Step 3

Now go back to the ZombieAI folder, right click and create a new blue print this time chose the character class and call it ZombieCharacter. Double click it to open it up and in the class default details section under pawn change the AI Controller to the ZombieAI that we just made.

Change the AI Controller to ZombieAI

Then while in the components window, under the capsule component, click on the mesh and change the skeletal mesh to the zombie mesh we imported in the last tutorial. 

Select the Mesh

Change the skeletal mesh to the zombie mesh imported in the previous tutorial

Be sure to move it down until its feet are at the bottom of the capsule, then double click the capsule and change the height in the settings to 110. Finally, click the rotate tool and rotate the character until it faces the same direction as the blue arrow.

Move the mesh so it's feet line up with the bottom of the capsule

Step 4

Now, in the components window, click on the character movement component and change the max acceleration to 1024 and the max walk speed to 375 as its default speed it way too fast.

Change the settings of the character movement component


Step 5 

Finally under the animation section of the character mesh, select the animation blueprint we made in the last tutorial (ZombieAnimation) and hit compile and save.

Change the animation blueprint

Just one move thing needs to be done so that our AI character will chase after the player and that is to add a Nav mesh. You can find the Nav mesh in the volumes section of the Place tab. 

Find the Nav Mesh in the volumes section of the Place tab

To put it in the level just drag and drop it into the level and re-size it to cover the area you want your AI to move in. You can hit P to highlight the area the nav mesh covers.


The green area shown is the navigable area of the AI created by the Nav Mesh

After you have done all this you can just drag your AI character into the level and when you hit play it will chase after the player.

As you can the zombie was put in the main game and now coming after you. Now its your turn to do this in your game.


Next Up

Now that the enemy AI is set up we can shift our attention to the game UI Screens, starting with the game Start Screen (menu)!


close
Banner iklan disini