Showing posts with label Game. Show all posts

Thursday, October 6, 2016

Read How to create Pause Screen in UE4 Now

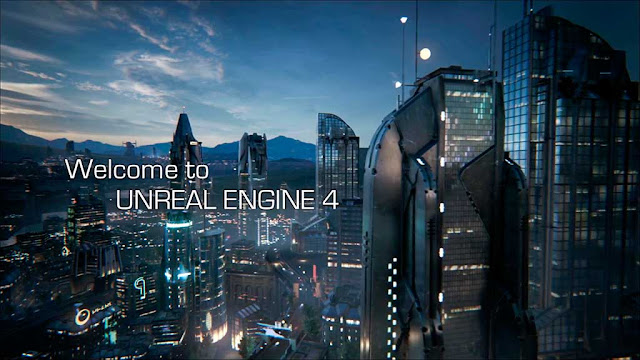
This image shows a finished Paused screen.

Step 1:

Before you open Unreal Engine go to http://www.dafont.com/ for download a font suitable for your game. One you download extract the file and installed ttf file. Copy the ttf file and paste in C:\Program Files(Program Files (x86))\Unreal Engine(Epic Games)\4.5(engine version)\Engine\Content\Slate\Fonts

After when you installed font open Unreal Engine. Content Browser is located in folder “Game” create new folder for User interface screens call it “UI”. In UI folder press right mouse bottom and select “User Interface” option then select “Widget Blueprint” in order to save press right click on widget blueprint and select save. Then double click on the widget blueprint to enter to edit menu.

This image show where you should create folder for User Interface.

This image shows where you should create Widget Blueprint.


Step 2:

On left top corner of the screen there is a folder called “Palette” expand “Common” select “Text Box” hold and drag on canvas or you can hold and drag on canvas under [Root] but make sure that you put on canvas.

This image shows Pause Screen editor.

This image shows canvas for screen.

Steps 3:

If you select text box then on the top right side of User Interface editor you can see “Details” options. Chose “Layout (Canvas Panel Slot) and press on Anchors and choose the middle. You can mess around and change “Style”, “Appearance” and other options. In “Content” option you can type the heading of your title.

This image shows options for Pause Screen.

This image show Text Block applied on canvas.
This image shows Text Block operation.

This image shows text applied on canvas.
This image shows colour options.
This image shows costumer font style. This is spot where you should put the font name that you want use.

Step 4:

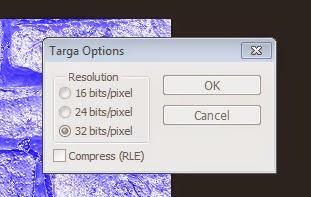
You can add image if you want by dragging image box. To select image that you want to use and drag to “UI” folder. When your Pause screen is finished and you are happy of it than press Compile. Save and close the editor. You can find good image on http://www.freeimages.com/ .

This image shows an image box applied on canvas.


This image shows an image box applied on canvas.
The image that I chose is grunge border from http://vyawie.deviantart.com/art/Border-Black-Grunge-187744467 . You can search in Google Image for grunge border.

This image shows an image that I use for Paused Screen.

Step 5:

Select “Blueprints” then select “Open Level Blueprint”. Press right click and search for letter “P” to pause game and “X” to un paused game and add other important objects that will be needed for “Pause Screen” to work. Create new variable and select and then in variable type change to Boolean. Then create new Variable but this time change to Float.

This image show programmer for Paused screen.

This image shows the program for Paused screen.

Step 6:

If you finish coding press compile and save your Pause screen and you can exit programming. The last thing that is left to test if pause screen is working is to “x” out of programming editor and see if it works.

This image shows a finished Game Paused screen.
You can also watch a video tutorial about how to create a Pause Screen.


Read How To Create A Tileable Texture Now

Tillable Texture
This image shows a finished texture that can be used in a game.

Steps To Create The "Diffuse" Texture


1. Search for an image that will be suitable for your game and an image that you want to be your tileable texture. the best website is http://www.textures.com/

2. Put an image that you want to be your texture in to Photoshop software.

Brick Wall
This image shows the brick wall.

3. Crop the image, removing any potentially troublesome areas.

Crop Image
This image shows Crop tool has taken away part of the image.

4. Then resize image to be power of 2.

Image Resize
This image shows the Image size setting in power of 2.
5. Press filter on top software tool bar than select other option and then select offset.

Offset
This image shows the right setting for offset.

Offset divide image
This image shows an image that is divided into two parts the better one in on top and the bad one is on bottom of the picture. The bottom part will be covered with clone tool.

6. We will use clone tool to copy good parts of image.

Clone
This image shows that the clone tool created a copy of the top part of the image.
7. Use Sharpen tool to get rid of the blur but do not over use Sharpen tool because we get bad effect.

8. Use dodge tool to make shadows lighter and burn tool to make highlights darker.

Dodge
This image shows how you can make image brighter by using Dodge Tool.

Burn
This image shows how you can make image darker by using Burn Tool.

9. On tap bar go to Image\Adjustment\Hue and Saturation.Add Hue and Saturation adjustment the way that you want to make this texture more interesting. Make sure that there is not any defects.

Hue & Saturation
This image shows settings for Hue and Saturation Adjustment.

10. If everything is good and you are happy of effects save as targa file. You should save your targa with a resolution of 32 bits/pixel.

A finished texture
This image shows a finished texture that can be used in a game.

Steps To Create The "Normal" Texture

1. Search in Google for NVIDIA texture tool the best way to find it is: “NVIDIA Texture Tools for Adobe Photoshop”. If you cannot find there is a link for website where you can download NVIDIA plugging tool.

https://developer.nvidia.com/nvidia-texture-tools-adobe-photoshop

2. Press download and chose version of Windows that you work with either 32 bit or 64 bit.

3. When download is finish just install the program.

4. Open Photoshop and check in NVIDIA installed right be pressing filter and down in list should be NVIDIA Tool.

5. Open your texture targa file.

This image shows the file name and format that is saved.
6. Unlock layer so you can work with NVIDIA Tool.

This image shows layer blocked.

This image shows layer unblocked.
7. Go to filter and select NVIDIA Tool and take “NormalMapFilter” option.
This image shows setting of NVIDIA Tool.

This image shows some effect that we can get from NVIDIA Tool.
8. Duplicate the layer until you get effect that you want.

This image shows Duplicate layer which give better effect.

This image shows last step that you should take after last duplicate layer.

9. If you are happy of yours effect save in targa(tga) file.

This image shows saving mode.


This image shows a finished texture that can be used in a game. The texture is in targa(tga) file.


This image shows right format that you can save your targa format and it shows the resolution that you can chose the best options is 16 bits/pixel and 32 bits/pixel because is the power of 2.

This link shows Video Tutorial about how to install NVIDIA Texture tool and how creating Tillable texture.

The Next Step

Now that you have created the texture the next step is to import and add them to whatever software you need them for.


Read Introduction to Unreal Engine 4 Now


In this tutorial I am going to give you a basic run down of the the user interface in Unreal Engine 4. After reading this tutorial you will be able to start your own Unreal Engine 4 project and know your way around the interface you are given to create a game.

Getting started

Create an account with unreal engine. Sign in.

Sign in screen.
Sign in screen.

When you sign in, you see the menu screen.


Menu screen.
Menu screen.

From the Marketplace, you can download different free useful packages including characters.  From there you can add these to your project.

Marketplace.
Marketplace.

All downloaded packages can be found in the library.

Launch button and Library location.

First time you launch the engine, you will see the unreal engine project browser.


Unreal project browser.

From here, you can create a new project or go on to the Marketplace and load an existing project. When creating a new project, there are a variety of different genres and also a choice of project type’s, blueprint or code.


New project.
New project.

Blueprint and C++ options.

 When making settings, we recommend the following. 

Recommend setting.
Recommend setting.

You then choose an appropriate location to save it and you give it a project name.
 
Choose location to save your project and name it.

Note: when naming, do not use spaces, use an underscore. Then you save and click CREATE PROJECT.
 
Create project.
Create project.

User Interface

Main menu bar


Menu bar location
Menu bar location

Menu bar zoomed in.
Menu bar zoomed in.

Pretty much any menu bar you see in computer applications, file menu, edit menu, window menu and the help menu.

File -   Here you can save what you are working on, create new projects, import and export.
Edit – You can find the standard Undo, redo, cut, copy, paste. Also here you can find editor preference and your project settings.
Window – This is where you can show and hide parts of the interface that are not shown by default
Help – Direct link to the documentation, link to initial tutorials to help get you started 

On your view port here are meshes already in place because you chose to include starter content. These meshes are not permanent and can be edited, as shown in a later tutorial. 


3D viewport.
3D viewport.

Mode panel 

Mode panel, this allows us to change the mode the editor is currently in. You can select modes place mode, landscape, paint, foliage and geometry editing mode.


Mode panel.
Mode panel.
Zoomed into modes.
Modes - Zoomed in.

Content Browser

Allow you access to any exterior generated content and special content like materials and blueprints you may have created.


Content browser.
Content browser.
Here you can create new folders and import different meshes, sound and textures/materials.

Scene Outliner

The scene outliner panel, shows everything that is in your level at that time. Main use is to see all the objects in your screen and select them.


Scene outliner.
Scene outliner.

It has some other functionality like here you can select, edit, parent together, hide and delete objects/actors.


Details panel

The details panel shows all editing details on a selected item.

Details panel.
Details panel.

Tool bar

Tool bar.
Tool bar.

Quick and easy one click access to common tasks that you will be performing
you have your save button (but generally you can just hit ctrl+s), content to open the content browser if you don’t already have one opened. Marketplace. Your settings, control various things that you can show and hide inside of your view port and overall environment. 


When editing, make sure you save your work frequently and build when progress is made.
When you press the play button a character will appear, this gives you a good idea of how your level will look and function.

Character on screen.

To escape play mode press eject. The short cut for this on your keyboard is ESC.

Viewport navigation

Mouse navigation

If you drag with the left click, to go forward you drag up and to go backwards you drag down. Move the mouse left to right while still holding down the left of the mouse to look left and right. Right click is just looking around, you can look left, right, up and down by dragging the mouse up, down, left and right. If you click the mouse wheel you can track the camera in all directions by sliding up and down, left and right. Click the left and right of the mouse at the same time does the same thing.

You can change the speed of the camera in the upper right corner of the viewport.


Camera speed options.

Camera speed option zoomed in.

WSAD keys

While holding down the right side of the mouse:
 W – To fly forwards
 S – To fly backwards
 A – Straight left
 D – Straight right
 E – Straight up into the air
 Q - Down
 C – zoom camera in
 Z – zoom camera out

Note: as soon as you release the right mouse it snaps back to where you were

MIYA style navigation

Hold down alt to use this style of navigation.
Alt+left mouse click is going to tumble the view around.
To change pivot of the tumble you can select any object in your scene and hit “f” on your keyboard.
Now when you hold down alt and drag with the left mouse you are tumbling around the object.
alt+right mouse to dolly the camera

When duplicating an object hold down the alt+click the direction you want to go in on the anchor + hold down shift. 


You can also look at your level through different viewpoints. You can find the option to change views in the top left hand corner of your  3D viewport.


Viewpoint section location.
Viewpoint selection zoomed in.

In the dropdown, there are a variety of different views including perspective, top, side, and front.


Perspective.
Perspective.


Top.
Top.


Side.
Side.

Front.
Front.
close
Banner iklan disini