Showing posts with label First Person Shooter. Show all posts

Friday, February 10, 2017

UE4 FPS Video Series

first person shooter game in ue4
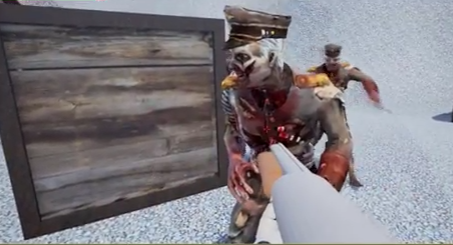
A screen shot from the completed FPS game in UE4

This series aims to guide you through the process of creating a first person shooter game using 10 specifically created tutorials, each focusing on a different aspect of designing and creating the game.

The series was created by Nathan Hill, Dylan McGrath and Philip Evans. The game itself is available for download here

This video series is a follow up and update on our previously created text tutorial series available here.

You can watch all the tutorials in the playlist right here (below) or go to our YouTube channel

Create an FPS game in Unreal Engine (UE4)


Saturday, February 13, 2016

UE4 Custom Textures & Materials

This tutorial is the third in the 10 part series on how to create a first person shooter game using Unreal Engine 4. We recommend you read the previous articles first to get the maximum benefit from this tutorial.

Step 1

Download a Texture from www.textures.com. The texture needs to be a seamless texture.

UE4 Custom Textures & Materials
Sample textures available at www.textures.com

Step 2

Download the Nvidia textures tools plugin for Adobe Photoshop + install. :


Step 3

Open the texture in Photoshop and go to Image > Image Size and scale the texture to 512 x 512


Then go to File > Save As and save as a .Targa file. Give it a name such as "brick_DIFF.tga". Finally you will get a pop up asking about the resolution to save at, choose 32 bit.

Step 4

In Photoshop use the NVIDIA plugin to create the Bump map/normal of the textures. You will find the plugin at Filters > NVIDIA.  In the pop up window that opens choose the "Biased RGB" option and select "Add Height to Normal Map" if not already selected. Then click OK


The NVIDIA texture tools plugin

This will change the look of the texture to a blueish, purple colour like in the image below.


Open the NVIDIA plugin again and this time choose "Normalise only" and click OK.

Next, you can increase the "bumpiness" of the texture normal by unlocking the layer, duplicating the layer and changing the blend mode of the duplicated layer to overlay. You will notice an increase in the bumpiness of the texture. This step can be repeated as many times as you feel is needed.


Finally, go to File > Save As and save as a .TARGA file with a name like "brick_NRM.tga" and a resolution of 32 bits. You can now close the file and close Photoshop.

Step 5

Open up Unreal Engine 4 and in the Content Browser create a new folder, call the folder "Materials". Inside the Materials folder, create a new folder and call it "Brick" or something appropriate to the texture you are using.

Inside the "Brick" folder click import. In the pop up window, navigate to where you saved the textures we created in the previous steps, select them both and click open. This will import them into the "Brick" folder.


Step 6

We now need to create the material itself. To do this click the green Add New button and choose Material. Name the material "Brick_M" or something appropriate to the material you are making.
Double click on the material to open up the material editor. Next drag an drop the textures into the material editor and connect them up as shown in the image below.


Now, save and close the material. It can now be applied to any geometry surface in the level. As in the picture below.


Now that you know how to add textures to the game here are some examples that we have in our game. Some wooden texture and brick textures that we have put on the house.


Next Up

In the next tutorial we will create the main building in the FPS game using BSP brushes and geometry mode.


Friday, January 29, 2016

Introduction to UE4

In this tutorial series we are going to show you how to create a ‘First Person Shooter 3D Game’ using Unreal Engine 4.9 Software. We will be providing you with both video and text tutorials under the following headings, File set-up and management, Landscape, Materials, Meshes, Pickups, Animation, Artificial Intelligence (AI), User Interface (UI).

1.    Download Unreal Engine for free from Unreal Engine 4


2.    When downloaded it will be under the name ‘Epic Games Launcher’, double click on the application and select ‘Create Account’ and enter your details into the following menu and select ‘Sign Up’


3.    When logged into Unreal Engine, select the library and then select ‘Launch’ on the latest version of Unreal Engine.


  •      This is the menu that you should see when you have selected ‘Launch’

4.    Ensure the game option is ‘Blueprint’. Select the option ‘First Person’ and then change the option ‘With Starter Content’ to ‘No Starter Content’. Rename your game with your desired name. Then select ‘Create Project’. 


  •       When the project is created, the following image is what you should see.


OR


1.    There are two options ‘Blueprint’ or ‘C++’. For this tutorial we are choosing ‘Blueprint’ because the ‘C++’ option requires knowledge of programming. Therefore, select the ‘Blueprint’ option and Select ‘Blank’. Rename the project to your desired name and select ‘Create Project’.


  ·         When you have selected ‘Create project’, you should see the following screen:


2.    To open your project, select ‘Library’ in your Unreal Engine home screen and under ‘MyProjects’ your games should be there.


  • Or you can use the ‘Launcher’ screen to open your project. First select ‘Launch’, then select ‘Projects’ and select the project you would like to open. Once the project is selected, press open.


File Management

  • When you log into your Epic Games Launcher (Unreal Engine), your files will be stored in the library:

  • Here you can, open, clone, delete, create shortcut of your project and show in folder.

OR

  • These files will also be stored in your computers File Folders, usually under ‘Documents’ and then under ‘Unreal Projects’.


  • From here you can open your project also:


Navigating Around The UE4 Editor User Interface

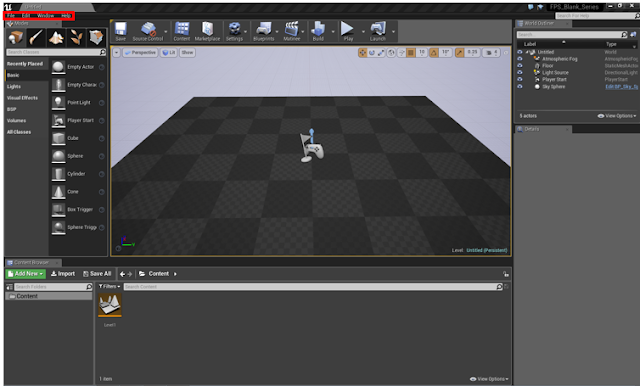
Like every computer based programme, Unreal Engine has a main menu toolbar with four options:


1.    File – Manages your files in Unreal Engine:

  ·         Save your files and/or specific areas of your project

       ·         Open and create new Levels

       ·         Open and create new projects

       ·         Import and export files


2.    Edit – Changes anything that you may have done or want to do to your Unreal Engine open project:

        ·         Undo or Redo

        ·         Cut, copy, paste, duplicate and delete

        ·         Change the editor preference

        ·         Change project settings


3.    Window – Controls the Unreal Engine Editor window view (User Interface):

   ·         Adding/Removing specific toolbars and menus to your view

        ·         Reset your layout to default

        ·         Saving your layout with the changes you made to it


4.    Help – Provides tips and directions to do anything in your Unreal Engine user interface:

  ·         Provides links to online tutorials

       ·         Provides in-window tutorials

       ·         Provides information about Unreal Engine

Content Browser

The UE4 Content Browser


The content browser is the main are of Unreal Editor for:


  •  Create content
  • Importing external content
  • Organize content
  • View content
  • Modify content
  •  Manage content folders
  •  Rename assets
  • Move assets
  • Copy assets
  •  View references 
  • Search for saved/unsaved assets
  • Interact with assets in the game
  • Organize all the assets


World Outliner


The World Outliner panel displays all of the Actors (Light, Mesh, Player, etc.) in a hierarchy view. In the World Outliner panel, each Actor can be directly selected and modified (Edit, parent together, hide and delete objects/actors).


Toolbar

This toolbar appears in a Blueprint file by default. The toolbar contains two sections:
1.    
1. 1. Toolbar options – Tools for working with your blueprint


Save – Saves all changes that were made in the current blueprint.
Source Control – Provides the option to connect to the source control.
Content - Opens the content browser if there isn’t one already open.
Marketplace – Brings you to the Marketplace in your Unreal Engine Window.
Settings – Controls things such as World and Project settings, selection, scalability, audio volume and snapping settings.
Blueprints – Controls the blueprints (bp) of the open project. Create new bp, convert components or actors to bp class, open level bp.
Matinee – Can ‘Add Matinee’ which opens up the matinee window (for animation of an actor).
Build – Builds lighting, reflection, visibility, geometry, navigation paths, hierarchical LODs (level of details).
Play – Starts the game and provides different modes to play in (normal, stimulator, mobile, etc.)
Launch – Provides a list of possible platforms you can launch the current map on.

1.    2. Mode Panel – Buttons that you can use to switch which mode your Blueprint is in

Contains various tool modes for the Unreal Engine Editor that change the primary behaviour of the Level Editor for a specialized task.


The modes represent different editing modes the level editor provides which enable specialized editing interfaces and workflows for editing particular types of actors or geometry.

Place Mode (shift + 1)
Places actors into your viewport


Paint Mode (shift + 2)
Painting vertex colors and textures on Static Mesh Actors directly in the viewport


Landscape Mode (shift + 3)
Edits landscape terrains


Foliage Mode (shift + 4)
Paints instanced foliage


Geometry Editing Mode (shift + 5)
Modifies brushes to geometry


Details Panel

The details panel provides information, utilities and functions specific to the currently selected component/actor in the viewport.


The details panel provides:

 ·         Tools to adjust the location, rotation and scale of the selected actor

      ·         Quick access to additional editing functionality depending on the type of actor that is selected

     ·         Allows the view of materials used by selected actors

     ·         A search filter for the properties displayed


Next Up

Now it's time for the to begin the FPS game by creating the level landscape.


close
Banner iklan disini