Showing posts with label Unreal Engine 4. Show all posts

Thursday, October 6, 2016

Read BSPs - The Building Blocks of UE4 Now

BSP Brushes
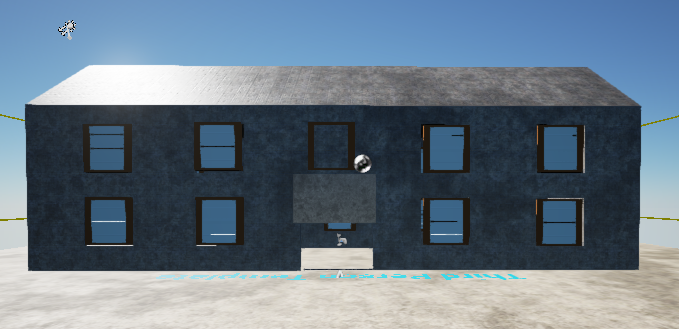
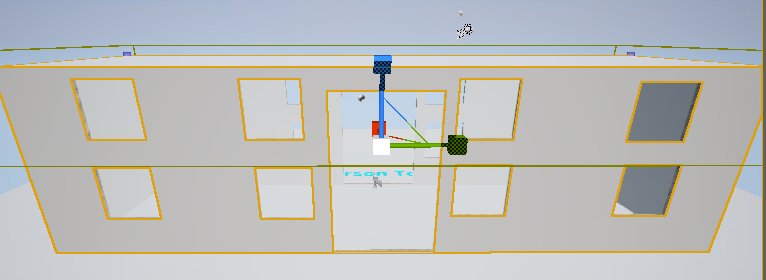
Scene showing BSP Brushes

What is a BSP?

A BSP stands for Binary Space Partition. These are objects that placed onto your level. You find these in the Place Mode. There are a variety of different shapes to use for a BSP including cubes, cylinders and stairs.


Modes
Place Mode

Step 1: Dragging it out

Before we show how to drag in a BSP, we will first get rid of all of the BSPs already in the level. You can either hide or delete these by using the Scene Outliner.

Level
Blank Level

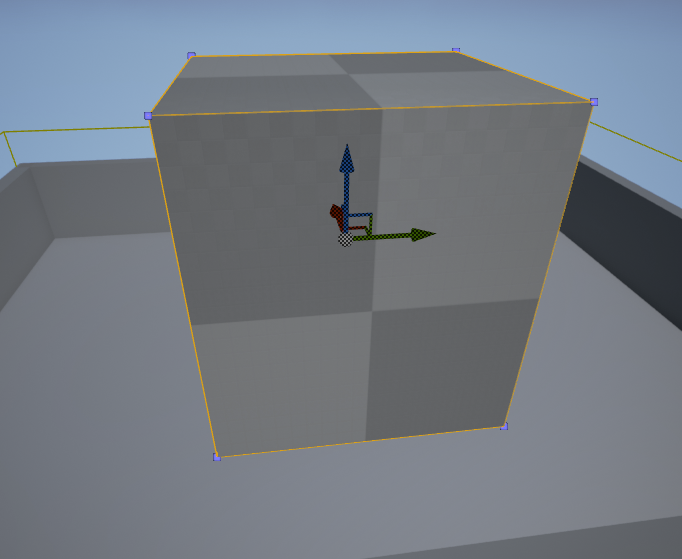
After all of the existing BSPs are removed, you can now drag in your own BSPs. You can start with an easy shape, for example a cube. You drag it out by clicking on to BSPs on the Place Mode, select your shape and drag it on to the level with your mouse.

Block Brush
Block

Cylinder Brush
Cylinder

Cone Brush
Cone

Step 2: Adjustments

When it’s dragged out on screen, you can use the mouse to adjust the camera angles so you know where exactly you want the shape. Also, by pressing the Space Bar, you change what sort of adjustments you want including direction, rotation and size.
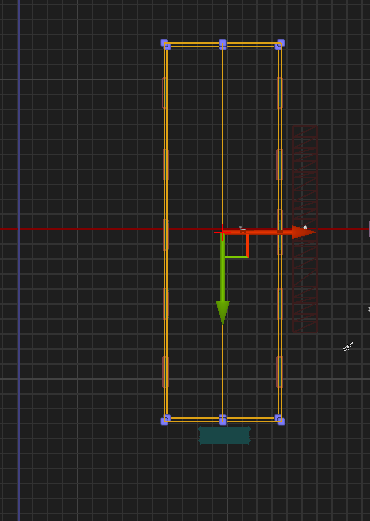
Direction
Direction

Rotation
Rotation

Scale
Scale

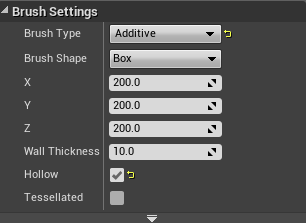
If you ever want to use a BSP to make a building or a lighthouse, you need to make your BSP hollow. You do this by selecting your BSP, going to the Details Panel and ticking where is says HOLLOW.

Hollow Option
Hollow

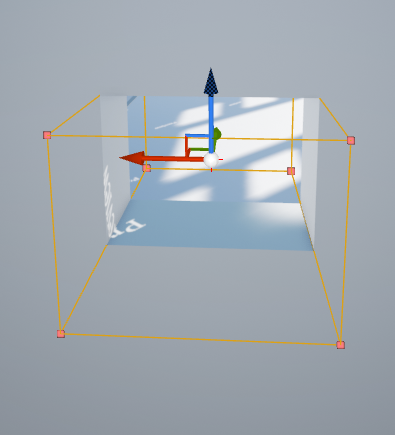
If adjusted the size before you made it hollow, you will notice that it goes back to its original size. If this happens, you can still scale it back to how you had it. When a BSP is hollow, you can view it from the inside, you cannot do this when it’s solid.

Hollow Block
Inside Block

Step 3:Stairs

When you have a hollow cylinder or cube, you can also be able to drag in stairs into them. There are 3 types of stairs curved, linear and spiral. When making adjustments to your stairs, we recommend, using side view.

Curved Stairs
Curved Stairs
Spiral Stairs
Spiral Stairs

Linear Stairs
Linear Stairs
Side View
Side View 
Once you have all of your BSPs dragged onto your level, you can manipulate them for any use for your level that you want.

More Brushes
BSPs


Read How To Create A Tileable Texture Now

Tillable Texture
This image shows a finished texture that can be used in a game.

Steps To Create The "Diffuse" Texture


1. Search for an image that will be suitable for your game and an image that you want to be your tileable texture. the best website is http://www.textures.com/

2. Put an image that you want to be your texture in to Photoshop software.

Brick Wall
This image shows the brick wall.

3. Crop the image, removing any potentially troublesome areas.

Crop Image
This image shows Crop tool has taken away part of the image.

4. Then resize image to be power of 2.

Image Resize
This image shows the Image size setting in power of 2.
5. Press filter on top software tool bar than select other option and then select offset.

Offset
This image shows the right setting for offset.

Offset divide image
This image shows an image that is divided into two parts the better one in on top and the bad one is on bottom of the picture. The bottom part will be covered with clone tool.

6. We will use clone tool to copy good parts of image.

Clone
This image shows that the clone tool created a copy of the top part of the image.
7. Use Sharpen tool to get rid of the blur but do not over use Sharpen tool because we get bad effect.

8. Use dodge tool to make shadows lighter and burn tool to make highlights darker.

Dodge
This image shows how you can make image brighter by using Dodge Tool.

Burn
This image shows how you can make image darker by using Burn Tool.

9. On tap bar go to Image\Adjustment\Hue and Saturation.Add Hue and Saturation adjustment the way that you want to make this texture more interesting. Make sure that there is not any defects.

Hue & Saturation
This image shows settings for Hue and Saturation Adjustment.

10. If everything is good and you are happy of effects save as targa file. You should save your targa with a resolution of 32 bits/pixel.

A finished texture
This image shows a finished texture that can be used in a game.

Steps To Create The "Normal" Texture

1. Search in Google for NVIDIA texture tool the best way to find it is: “NVIDIA Texture Tools for Adobe Photoshop”. If you cannot find there is a link for website where you can download NVIDIA plugging tool.

https://developer.nvidia.com/nvidia-texture-tools-adobe-photoshop

2. Press download and chose version of Windows that you work with either 32 bit or 64 bit.

3. When download is finish just install the program.

4. Open Photoshop and check in NVIDIA installed right be pressing filter and down in list should be NVIDIA Tool.

5. Open your texture targa file.

This image shows the file name and format that is saved.
6. Unlock layer so you can work with NVIDIA Tool.

This image shows layer blocked.

This image shows layer unblocked.
7. Go to filter and select NVIDIA Tool and take “NormalMapFilter” option.
This image shows setting of NVIDIA Tool.

This image shows some effect that we can get from NVIDIA Tool.
8. Duplicate the layer until you get effect that you want.

This image shows Duplicate layer which give better effect.

This image shows last step that you should take after last duplicate layer.

9. If you are happy of yours effect save in targa(tga) file.

This image shows saving mode.


This image shows a finished texture that can be used in a game. The texture is in targa(tga) file.


This image shows right format that you can save your targa format and it shows the resolution that you can chose the best options is 16 bits/pixel and 32 bits/pixel because is the power of 2.

This link shows Video Tutorial about how to install NVIDIA Texture tool and how creating Tillable texture.

The Next Step

Now that you have created the texture the next step is to import and add them to whatever software you need them for.


Read Create a Building in UE4 Now


Finished result


BUILDINGS

Step one

The first thing you need to do when making a building on unreal engine is to delete the default stage you receive. After deleting the default stage you will want to go into your BSP folder select a cube and drag it out into your game. Make sure that you select the hollow option when using the cube.

image above shows a cube you can get in your BSP folder

Make sure you select hollow its on the right side 

Step two

For the next step you will want to change the width and height of the cube. You will have to press the space bar twice and scale your cube to whatever size you want to have your building at.


Make sure you press the space bar to scale

Step three

You will design windows and a door. In order to do this you need to go back into your BSP folder and select and drag out a cube. After bringing your cube into your game you will then want to line it up to the part of the building that you want your window to be at. When you have it lined up you will change the cube to subtractive and this will take a part of the wall out. To create the door just scale your cube to a length and width that suits you then change it to subtractive.


this will allow you to put square holes in the building for your windows

when you select subtractive it will come up like this

Step four

In this step you will be adding a texture to cover your building in. In order to get a texture you will first have to go into your materials folder and search it for a material that suits you.


when the texture is placed down on the object it will look like this
when you select apply your textuyre will change and become more realistic

When you find a texture that you like your have to select your texture and drag it out onto your object. After dropping the texture on to the object you will have to click onto the apply option.

STEP 5

In this step we will be creating the roof of the house. You have to change from perspective view to top view. This will send you into wireframe mode. You will then select the bottom part of the house and then in your options select split. After selecting split you will then see a line going down the centre of your roof you will select this line and bring it up.
when making your roof you should go into wireframe mode as it will make things clearer for you

it is important top note that when you pull the top part of the roof the inside is still flat

STEP 6

In this step you will then go onto blend swap and find a window for your house. In order to search for a particular static mesh you have to select the search option above and then type into the search bar.


go to blend swap to find an ideal mesh


you can search for one by typing it in the search option

STEP 7

When you find a static mesh you like you will then download it. After downloading your static mesh you will then want to extract your files somewhere that will be easy to find. After extracting your file you will then want to go open it up in blender.

when you find an ideal mesh click the orange button to download it 

after downloading it you should extract the files

STEP 8

In this step you will then want to import your static mesh into your game. You will want to go into file then export then select autodesk FBX. After selecting this you will then want to go to your side toolbar and select mesh. You will then want to go into your props folder and select import. After selecting import just find your static mesh and click on it this will bring it into your game.

make sure to select mesh

your mesh will be in the props folder

you will then want to select the import option

STEP 9

In this step you will want to drag out your static mesh onto your game. When you drag your mesh out you might have to scale it depending on how big you might want it. After you have your mesh to the right size you will then want to place your window in the hole you made earlier. The same steps are used for the door.

when you have one window done you can just duplicate it

STEP 10

In this step you will make a door for your building. Since my building is a ware house type of building il be making a garage type door for it. It is important that you scale your door to an ideal size for your building a garage type door might not be suited for your building. In order to make a door you need to go into your BSP  folder and then drag out a cube. After you drag out your cube just scale it to whatever size suits you. 

the last thing to do is make a simply plane that looks like a door


close
Banner iklan disini