Showing posts with label game creation. Show all posts

Thursday, October 6, 2016

Read How to create a Destructible Mesh in UE4. Now

Finished Product

What is a Destructible Mesh?

A Destructible Mesh is a static mesh that can break when it comes into contact with an object.  

Step 1. Finding a Prop

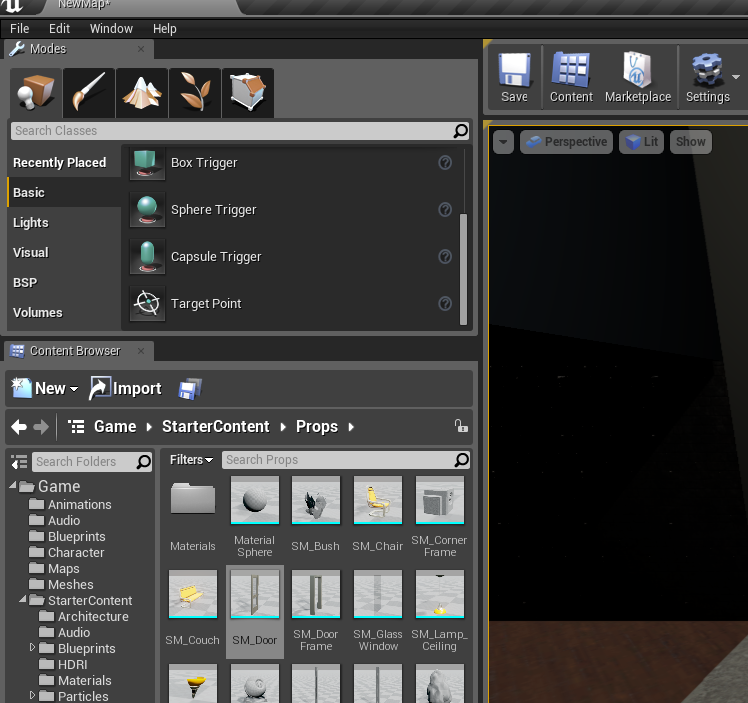
Within your game map open up “Starter Content” then double left click into “Props”. Double click any object in this category. In my case I chose the sphere.

Starter Content
Props

 Step 2. Adding a collision

In the opened window choose the “collision” tab above the “Save” tab. Once clicked choose “Add 26DOP Simplified collision”. Now save and close the window.
Collision

Step 3. Creating the destructible mesh

Right click on the mesh you just edited and choose “Create Destructible Mesh”. Once created a window should open up as shown.
Creating the Destructible Mesh
Fracturing Mesh

Step 4. Fracturing the mesh

Click “Fracture Mesh”. Once clicked you should see your mesh broken up.
Fractured Mesh

Step 5. Making the mesh destructable

Go to "Destructible Mesh" > "Default Destructible" > "Damage Parameters" and change “Impact Damage” to 1.0 and “Default Impact Depth” to 1. Keep the “Cell count” default at 25. Once done Save and close window.
Details

Step 6. Physics

Drag out the new mesh to a suitable area of the map. On the right hand column go down to “Physics” and turn on “Simulate Physics”. In the “Collision Column” below make sure “simulation generate” is ticked/turned on and “Generate Overlap” is un-ticked/turned off.

Physics

Physics details

Step 7. Simulate 

When done, make sure you have a clear view of you object. Once you are happy bring down the arrow beside “Play” and click “Simulate”.

Simulate

Step 8. Finish

Watch the destruction happen.


Read Introduction to Unreal Engine 4 Now


In this tutorial I am going to give you a basic run down of the the user interface in Unreal Engine 4. After reading this tutorial you will be able to start your own Unreal Engine 4 project and know your way around the interface you are given to create a game.

Getting started

Create an account with unreal engine. Sign in.

Sign in screen.
Sign in screen.

When you sign in, you see the menu screen.


Menu screen.
Menu screen.

From the Marketplace, you can download different free useful packages including characters.  From there you can add these to your project.

Marketplace.
Marketplace.

All downloaded packages can be found in the library.

Launch button and Library location.

First time you launch the engine, you will see the unreal engine project browser.


Unreal project browser.

From here, you can create a new project or go on to the Marketplace and load an existing project. When creating a new project, there are a variety of different genres and also a choice of project type’s, blueprint or code.


New project.
New project.

Blueprint and C++ options.

 When making settings, we recommend the following. 

Recommend setting.
Recommend setting.

You then choose an appropriate location to save it and you give it a project name.
 
Choose location to save your project and name it.

Note: when naming, do not use spaces, use an underscore. Then you save and click CREATE PROJECT.
 
Create project.
Create project.

User Interface

Main menu bar


Menu bar location
Menu bar location

Menu bar zoomed in.
Menu bar zoomed in.

Pretty much any menu bar you see in computer applications, file menu, edit menu, window menu and the help menu.

File -   Here you can save what you are working on, create new projects, import and export.
Edit – You can find the standard Undo, redo, cut, copy, paste. Also here you can find editor preference and your project settings.
Window – This is where you can show and hide parts of the interface that are not shown by default
Help – Direct link to the documentation, link to initial tutorials to help get you started 

On your view port here are meshes already in place because you chose to include starter content. These meshes are not permanent and can be edited, as shown in a later tutorial. 


3D viewport.
3D viewport.

Mode panel 

Mode panel, this allows us to change the mode the editor is currently in. You can select modes place mode, landscape, paint, foliage and geometry editing mode.


Mode panel.
Mode panel.
Zoomed into modes.
Modes - Zoomed in.

Content Browser

Allow you access to any exterior generated content and special content like materials and blueprints you may have created.


Content browser.
Content browser.
Here you can create new folders and import different meshes, sound and textures/materials.

Scene Outliner

The scene outliner panel, shows everything that is in your level at that time. Main use is to see all the objects in your screen and select them.


Scene outliner.
Scene outliner.

It has some other functionality like here you can select, edit, parent together, hide and delete objects/actors.


Details panel

The details panel shows all editing details on a selected item.

Details panel.
Details panel.

Tool bar

Tool bar.
Tool bar.

Quick and easy one click access to common tasks that you will be performing
you have your save button (but generally you can just hit ctrl+s), content to open the content browser if you don’t already have one opened. Marketplace. Your settings, control various things that you can show and hide inside of your view port and overall environment. 


When editing, make sure you save your work frequently and build when progress is made.
When you press the play button a character will appear, this gives you a good idea of how your level will look and function.

Character on screen.

To escape play mode press eject. The short cut for this on your keyboard is ESC.

Viewport navigation

Mouse navigation

If you drag with the left click, to go forward you drag up and to go backwards you drag down. Move the mouse left to right while still holding down the left of the mouse to look left and right. Right click is just looking around, you can look left, right, up and down by dragging the mouse up, down, left and right. If you click the mouse wheel you can track the camera in all directions by sliding up and down, left and right. Click the left and right of the mouse at the same time does the same thing.

You can change the speed of the camera in the upper right corner of the viewport.


Camera speed options.

Camera speed option zoomed in.

WSAD keys

While holding down the right side of the mouse:
 W – To fly forwards
 S – To fly backwards
 A – Straight left
 D – Straight right
 E – Straight up into the air
 Q - Down
 C – zoom camera in
 Z – zoom camera out

Note: as soon as you release the right mouse it snaps back to where you were

MIYA style navigation

Hold down alt to use this style of navigation.
Alt+left mouse click is going to tumble the view around.
To change pivot of the tumble you can select any object in your scene and hit “f” on your keyboard.
Now when you hold down alt and drag with the left mouse you are tumbling around the object.
alt+right mouse to dolly the camera

When duplicating an object hold down the alt+click the direction you want to go in on the anchor + hold down shift. 


You can also look at your level through different viewpoints. You can find the option to change views in the top left hand corner of your  3D viewport.


Viewpoint section location.
Viewpoint selection zoomed in.

In the dropdown, there are a variety of different views including perspective, top, side, and front.


Perspective.
Perspective.


Top.
Top.


Side.
Side.

Front.
Front.

Read Create An Automatic Door in UE4 Now

Automatic Door

In this tutorial we will create an automatic door that opens when the player nears, and closes as they leave the sensor area.


The first thing we need to do is open a level in which we can practice this tutorial. I already have a scene set up to use.

Step 1: Adding the doorway

We first need to add a door way for the frame to sit around. To create the door frame we need to add a box from the BSP section and drag it into our level.

Below is a box that I have dragged in and changed to the measurements seen at the side of the screen. Now that the box is the shape of a door, we need to change it from additive to subtractive.


I already had the door frame in but it is unimportant for this part as we are just adding the doorway. I move the box over to the wall after changing the box to subtractive.

With the box being subtractive it takes away from the wall creating the doorway.

Step 2: Adding the door frame

The next step is to add the door frame. This can be found in the content browser on the bottom left of the screen. Look for starter content, then open the props folder. Look for the door frame file, then click and drag this into the scene.


I've dragged the door frame into the scene and placed it over the subtractive box previously added. The only problem was its too small for what I want. In the picture you see the scale widget. This can be accessed by selecting the door frame, then hit the space bar once, to change to the rotate widget, hit the space bar key again, and we have the scale widget.

I clicked the widget arrow to the right and dragged it once. This is the result.


By using the scale widget we have the option to scale our object in three different directions, ideal for what we want.

We can still see the wall in the door frame sticking out so what I am going to do is do the same thing to the subtractive box we added.

Here I have used the scale widget to scale the subtractive box to match the door frame

Step 3: Adding the door

We now have a place to bring in our door. So to add a door we need to access the starter content folder in the bottom left of the screen.

This shows the content browser with no particular folder selected.
From here we have access to a folder called props. Open this folder and look for a door. You can use the search bar if necessary.

These are the options that we have once we have opened the props folder.
We can see the door once we open the props folder. We click and hold on the image of the door so that we can drag it into our scene.

My door has been clicked, and dragged, from the folder straight into the game
The arrowed widget is the tool used to move the door around. Now that the door is in we will use the widget tool to move the door into position in the door frame. 

Check all angles to align properly
Before we go any further we need to change the size of the door to fit the frame, the same way that we changed the size of the door frame. 

The door was scaled using the scale widget

Step 4: Adding Collision to the door

We need to right click on the door in your game, not in the content browser and select edit sm_door near the top of the pop up menu. This will open up this window.

This window is where we will add a collision
This is where we are going to add a collision so that our player can’t walk straight through the door.
To do this you need to go to collision along the same toll bar line as the 'file' option.. From the drop down here select box collision.

The door is now a solid entity and our character will not be able to pass through it

Step 5: Adding a Box Trigger

Now your door is ready for animation. We need to add a box trigger that will cause the door to open once we get close enough. This can be found in the place section of modes under basic.

The box trigger acts like a sensor on an automatic door

To bring the box trigger in is the same as the door, we click and hold as we drag the image into the door itself.

I've placed my box trigger in the centre of the door

Once this is positioned we can change the size by using the scale widget. To get this up select the box trigger so it’s orange then press the space bare key twice. The first time changes the widget to the rotation widget.

Rotation widget allows us to rotate an object so that it is at a different angle

And a second space bar press gets the scale widget, which is what we need.

Scaling the box trigger

From here we can click any of the coloured arrows and drag it out. This will scale the box in that direction. We need it to be similar to this size.

My trigger boxed scaled up

Now that we have all of the necessary meshes for a working door we get to have some fun with animation. At this point hit save to protect our progress.

Step 6: Adding a Matinee


This section will cover animating the door to open and close. Click on the matinee symbol. Then click add matinee.

The matinee section is where we will create the animation

Once you have clicked this icon this window should appear.

This is the matinee editor

This is where things will become a little more detailed. Hit save and then we can proceed.

First thing we are going to do is select the door outside of the matinee actor window. You can move this window to select the door.

I have moved the matinee editor to the right of the screen in order to select the door

Next thing we do is under the orange word ‘all’ we will right click in the grey space and click add new empty group. Name this door.

If the above step was completed correctly this is how your screen will look

The next step is to right click on the orange area and add a new movement track. This is how the completed step should look.

On the movement track  we add a second key frame

We now have our door in the animation sequence and added as a key frame. (The key frame is the red triangle just to the right of the movement track).

For my door sequence I think that having the animation run for 2 seconds is long enough.

In the next step I selected the green triangle below the green rectangles and dragged this upto the two second mark. I then dragged the white line with the red triangle to this point also. Now we need to move the door. We will use the rotate widget to do this.

We have the first key frame inserted already

For this step we need to access the door so if needs be, move the matinee window or minimise it.
Once that is done we need to select the door and have the rotate widget open on it.

At this point we are preparing to rotate the door for the second key frame

Now we open the matinee editor, drag the second green triangle to the two second mark, then we rotate the door 110 degrees. Click on the blue arc and drag the mouse.

The rotate widget will change to yellow when you click and drag on it

Once we get here hit enter in the matinee editor, it will add the second key frame so that we can play the animation.

The second key frame is orange once added

Now when you hit play it will work, as in the door will open and close. In the top right click file and save all. Now we can code the door.

Step 7: Adding Blueprints 

We select the green trigger box and then on the same bar as the matinee icon we select the blueprints, then from the drop down select level blueprint.

Once you do click level blueprint a window should pop up.

Blueprints is the coding in UE4 that makes things work, for example a door opening and closing

With the trigger box selected we right click on the grid. From the drop down menu that appears, select add event for trigger box, under that open the collision folder and select begin overlap. Then right click and repeat the process but then select end overlap.

These pieces of coding will be the beginnings of our doors action

Next step is to select the matinee, in the below image it is located on the top right hand corner.

We can use the menu on the top right to select any objects that we have added into our level

With the matinee selected, we need to right click on the grid in the level blueprint and add a reference to the matinee. It is the fourth option on the pop up menu.

At this point, we are just getting ourselves organised to connect all of the necessary coding.

Next step, right click again and type ‘play’ into the search bar, you want to select the play option that is under the cinematic subheading. Then I drag a connection from begin overlap into the play and the same with the matinee reference.

To connect these pieces of code, just select the white arrow or blue dot and drag the mouse

Now we need to make the door close when we go away, for this right click, but this time untick context sensitive on the drop down menu and type in reverse. You need to select the one underneath the cinematic subheading.

Again I have connected all of the coding, you can drag two links from the reference node

Underneath file click compile, this saves you’re coding.

Compile to save the game

Now can hit play on the level and when you walk near our door it will work.
close
Banner iklan disini