Showing posts with label ue4 fps tutorial series. Show all posts

Saturday, February 13, 2016

UE4 Custom Static Meshes

This tutorial is the sixth in the 10 part series on how to create a first person shooter game using Unreal Engine 4. We recommend you read the previous articles first to get the maximum benefit from this tutorial.

Find a suitable mesh/model:

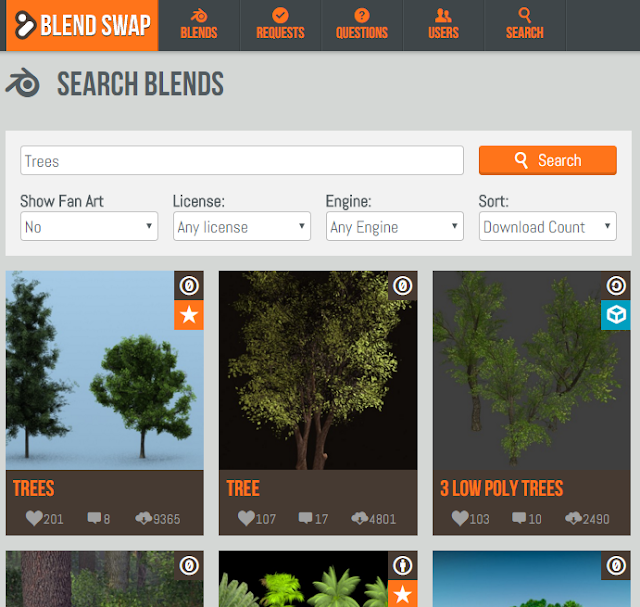
First off you need to find a suitable mesh or meshes for your game design project. We recommend www.blenndswap.com as the best place to find quality, free 3D models and meshes. The files are all compatible with blender (a free 3d modelling software) so it will be easy and free to edit/tweak them beforing exporting as an .fbx file to be compatible with Unreal Engine 4.

You need to create an account before you can download but it is all free, although there is an option to upgrade to a paid account you will hardly need it unless you are downloading a huge volume of models. The website has a huge collection of models all available under a variety of different creative commons licences. Just use the search function to find what you need then download it... simple!

Find free 3d models using Blendswap

Edit in Blender

Blender is a free software that can be downloaded from www.blender.org . If you are not familiar with it you can read and/or watch some of our tutorials here. Before you open the file in Blender be sure to unzip/extract the file as it will have downloaded as a .zip file from Blendswap.
The key thing in blender will be to unpack any textures that are used on the model. If you do this correctly the textures can then be imported automatically to UE4 along with the .fbx file and UE4 will even create the material automatically.

Blender windows

What you need to do is select the object in the outliner window, then select the material (there may be more than one) from the materials tab in the properties window and finally select the textures tab also in the properties window. In the textures section there may be more than one texture listed so you will need to unpack them all individually.

Blender Materials Tab Highlighted

Blender Textures Tab Highlighted

You can do this by going to the subsection title 'Image' and clicking on the little icon beside the file name. This will present you with 4 unpacking options - choose the first one. You will not notice any changes but what happens is a folder called 'textures' is automatically generated where the blender file is saved and the unpacked texture is place it in. This is an important file management step which  ensures the textures will import correctly to UE4.

Unpack a texture in blender

Repeat these step for objects in the scene outliner to ensure all textures get unpacked.

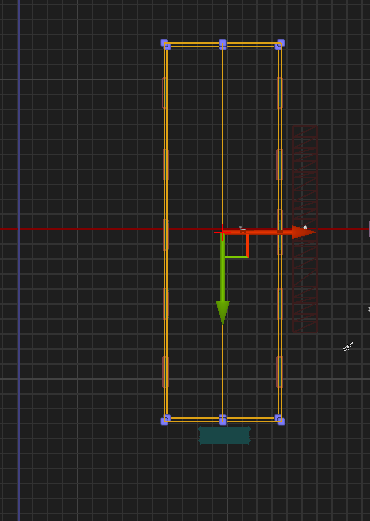
*In blender you may also want to, if necessary, remove any additional objects that you do not want to use in UE4. For example you might download a file which contains 3 trees but you might only want one of the 3. In cases like this simply select the object and press delete (or 'x') on your keyboard.


Export as an FBX

Once you have unpacked all the textures and made any other edits to the model that you want it is time to export it as an .fbx file so it can be imported to UE4. Simply click file > export > FBX (.fbx)

This will bring you to the export page. In the bottom left of the screen you will find the export options. There are a couple of key settings that you will want to change.

Firstly, in the main section, you only need to export the mesh so select only the mesh option. By default all options will be highlighted and will result in unwanted elements being imported as part of the mesh.

Select only the 'Mesh' option
Secondly, in the geometries sections, you will need to change the smoothing option to face, this is important for UE4 and will result in an import error if you do not do this step.

Set smoothing to 'Face'

Once you have completed these steps you can click the export button in the top right of the screen.

*Do not change the save location, the .fbx needs to be in the same folder as the original blender fil and beside the auto generated textures folder.


Import To UE4

Before importing the file to Unreal Engine you should first create a folder titled 'Meshes' or something similar and then inside it a sub-folder with a suitable title eg. 'Trees'.

Sample folder structure for Meshes

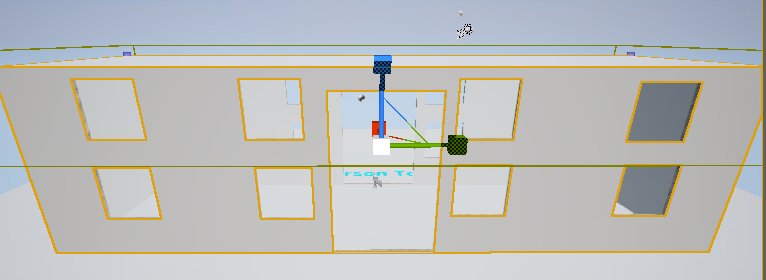
Once inside the folder click on the Import button and navigate to where you saved the .fbx file, select it and click open. This will bring up the Import options. Depending on the mesh you will choose different options but always be sure to select Import Materials and Import Textures. Choosing Auto Generate Collision is most likely something you will want but for meshes such as grass you should deselect it.

UE4 import settings

Once happy with your selected settings click 'Import All' and the mesh and textures will be imported and UE4 will automatically generate materials from the textures and apply to the mesh.

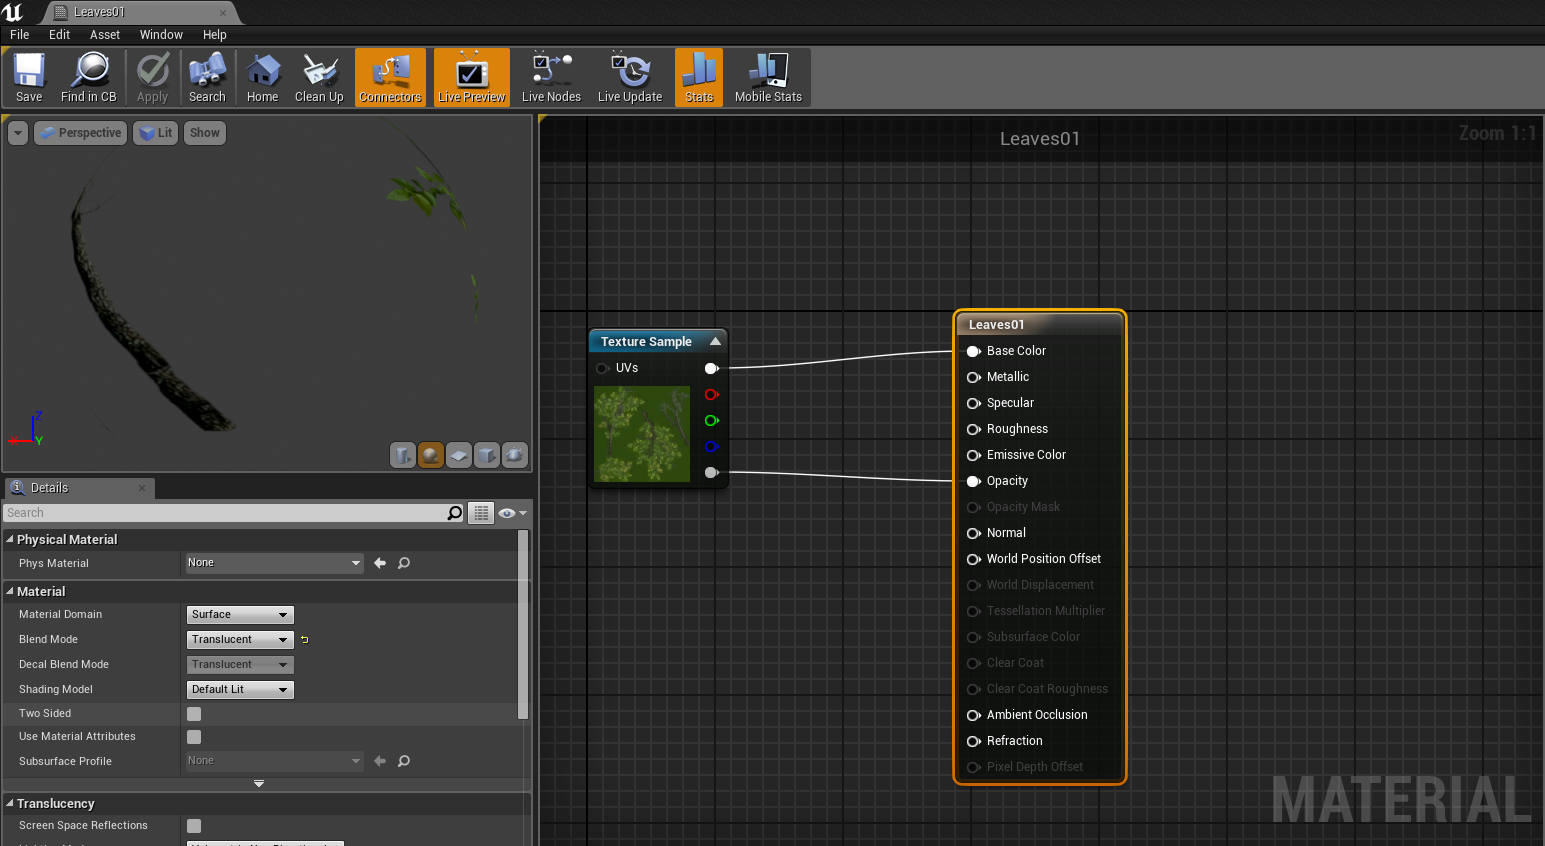
For textures that contain transparent or semi transparent areas you will need to edit the auto generated material in order for them to work correctly. To do this simply double click on the material to open the material editor. In the material editor select the large material node and in the details window on the left change the blend mode form opaque to translucent. This will activate the opacity channel on the material node. You can now plug in the alpha channel of the texture node to the opacity channel. Click save and this will update the material and the mesh to display correctly.

UE4 Material Editor
Click save and exit the material editor. Then click save all in the Content Browser to add the files to the project.

Add Using Foliage Mode (optional)

    All meshes can simply be dragged and dropped into the level but for meshes such as grass, trees, bushes etc. that may be used across a wide expanse of the level you should use the foliage editor.

    Select the foliage editor tab in the top left of your screen and then drag and drop your mesh or meshes into the area saying "Drag and Drop Foliage Meshes Here". You can then select a mesh and edit it's various settings so that it is applied in the way that you want. You can select and deselect a range of meshes to paint on the ones you want when you want.

    UE4 Foliage Editor Settings

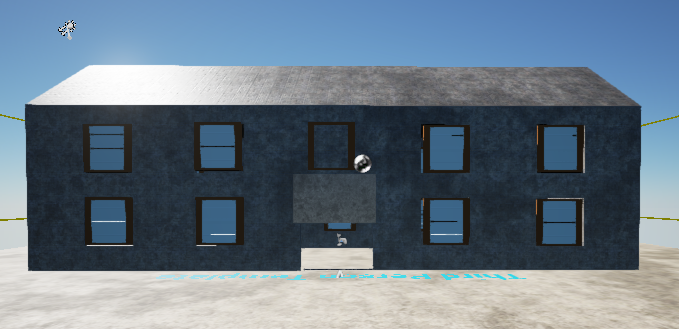
    To learn more about the foliage setting click on the graduation cap icon and follow the in-built UE4 tutorial. Once the foliage and other meshes are added your level will be much more detailed and interesting for the player. Here is how it looks like in our game when placed in map.

    Next Up

    Now it is time to give our player something to shoot at! We will download and set up our custom enemy character and animations.


    UE4 Pickups

    This tutorial is the fifth in the 10 part series on how to create a first person shooter game using Unreal Engine 4. We recommend you read the previous articles first to get the maximum benefit from this tutorial.

    Step 1: Creating A New Blueprint 

    UE4 Pickups

    The first thing we need to do is create a new blueprint, to do this in the content browser, open the blueprints folder then right click on empty space and select blueprint from the pop up menu.


    When you want to select blueprint, this window will pop up. We want to select actor.

    Step 2: Creating The Collision


    Now that we have our actor created double click on the thumbnail, this will open the editor for that blueprint. We need to add a collision, so in the top right, it will say add component. Click this and select sphere collision.

    If you are using a older version of Unreal Engine 4 you can select a sphere.
    Then we need to add a static mesh, to do this we need to see both the blue print editor and the props folder in the starter content select the material sphere and drag it into the blueprint editor and drop it in the grey space under the add component section.
    Scale widget 
    Use the scale widget to scale the sphere down. To do this, select the ball, press the space key twice and locate the widget you are looking for.


    We need to add a static mesh, to do this we need to be able to see both the blueprint editor and the props folder

    As we see from the above picture the sphere has swallowed the collision

    Step 3: Blueprints for rotation


    Event graph shows up


    The next thing we do is right click on the grid and search for event tick once this has been added, select the material sphere in the top left hand panel, then right click, open add event section, then select the collision drop down option and from there select begin overlap.


    Right click on the grid again, this time type actor location into the search bar, select the green option that says get actor location. The next thing that we will add is an emitter, for this drag from the white arrow on the begin overlap node, in the search bar type emitter.


    From the options you want to select spawn emitter at location. In the newly added node, under the emitter template drop down, select the explosion option.


    The next pieces of code we are going to add are brought out from the begin overlap node. In this node select the blue other actor circle, drag this out and type cast character select my character from the options menu. Once this has been added hit save.


    Then from the cast character node drag out the blue circle and search for character movement, you need to scroll down to the bottom of the results in order to find the variables section.

    There will only be one option here and that is the one that we need. This time we will add three pieces of coding that will complete the coding that we need to gather in order to create to the floating pickup, just grab it and put it into the grid.

    Next thing is to right click from the pop up scroll down to the bottom and select the timeline option, name this blueprint. The next piece is right click followed by a search for local offset add this beside the timeline. This piece is we are going to add in this section is a destroy actor node, right click search destroy and add to the grid.


    This time we are going to add three pieces of coding that will complete the coding process. We need to gather in order to create the floating pick up. Now we will just grab it all and put it into the grid. First thing to do is right click, from the pop up scroll down to the bottom and select the timeline option, name this blueprint


    The second piece is right click followed by a search for local offset add this beside the timeline. The last piece we are going to add in this section is a destroy actor node, right click search destroy actor and add it into the grid.

    The last piece of coding that needs to be added is a set max walk speed node. Drag out from the character movement reference, right click and search walk speed, you may need to turn off the context sensitive option in order to find it. Select the node that says set max walk speed. Once you have added this piece of code, change the value to 1500, then connect all of the coding up.


    Step 4: Creating The Hover Effect

    Vector track
    To add this select the timeline node in the blueprint and double click, this is the window that you will see, when this opens select the V option to add a vector track.

    Now we are going to be adding our key frames on the z axis, because we want our bell to go up and down in the air. To do this we need to click the lock symbol beside the green, and red boxes in the top corner of our vector track, this will only leave the z axis available to work on.

    Adding key frame to vector track 
    Adding more key frames to vector track 
    To add a key frame we go to the start of the animation on the blue line, where it says 0.00 hold down the shift key and left click in order to add a key frame.

    Next we make sure to have the z axis only unlocked, and we do another key frame, this time at the 0.50 point, the values this time are .5 and 5.The next key frame will be added at the 1.00 mark. The values this time will be 1.00 and then -0.05. The final key frame will be added at the 1.50 mark. The values this time are 1.50 followed by 0.00. we are also going to need to tick loop option.

    Now we can go back to the graph, we now have an extra option on our timeline node and this needs to be connected. Now that everything is connected and compiled.

    Step 5: Adding A Material To The Pickup

    To add a material to the sphere open the sphere in the blueprints folder.


    From here if you look at the above picture you can see, on the left side of the screen, static mesh, double click on the thumbnail and it will open a new window.


    Now we drag a material from the content browser into the section on the right side that the ball is in. The material will work once you save it,


    As you can see this are the 3 pick ups we have made in our finished game the heart is for health, the lighting bolt is for a speed up to get away and the boxes are ammo creates. 

    Next Up

    Now it is time to add detail to our FPS game by adding custom static meshes such as trees, grass, rocks, crates, etc.


    UE4 BSP & Geometry

    This tutorial is the fourth in the 10 part series on how to create a first person shooter game using Unreal Engine 4. We recommend you read the previous articles first to get the maximum benefit from this tutorial.

    Game BSP and Geometry

    In our game we will be creating just one main building, however you can use the same steps covered below to create multiple buildings if you wish.

    UE4 BSP & Geometry
    Basic Building Structure

    Step One

    To begin, in the place tab go to the BSP section and select a cube. Drag and drop it into your game.

    image above shows a cube you can get in your BSP folder
    With the cube still selected, in the details panel, select the hollow option as shown below. A wall thickness of 16 is also recommended.

    Make sure you select hollow its on the right side 
    You will also want to change the width and height of the cube. We have used values of 1024 on the X, 2048 on the Y and 1024 on the Z. Alternatively you can select the cube and press the space bar to toggle the widget to get to scale mode and manually scale the cube to whatever size you want.

    Step Two

    We will now create windows and a door. In order to do this you need to go back to the BSP section and select and drag out a cube again. After bringing your cube into your game you will then want to place it at the part of the building that you want your window to be and scale it using the values in the details panel or manually using the scale widget as we did earlier. When you have it lined up, in the details panel you will change the cubes brush type to subtractive.


    Set the brush type to subtractive in the details panel of the cube

    This will subtract a part of the wall out where the brush is positioned, as shown below. 

    when you select subtractive it will come up like this
    Simply repeat this process for the other windows and the door.


    The main building structure with the windows and door cut out.

    Step Three

    In this step you will be adding a material to cover your building in. In order to get a texture you will first have to go into your materials folder and search for a material that suits. You may choose to use the material that was created in the previous tutorial. Once you have selected the material you want, simply drag and drop it on the surface of the building.

    when the materialis placed down on the object it will look like this

    In the details panel of the building (BSP cube) you can select multiple surfaces at apply the material to them all at once. The material can also be scaled, nudged, rotated and positioned using the options in this panel.


    Step Four

    In this step we will be creating the pitched roof of the building. First select the building and then change from place mode to geometry mode in the modes section as shown below.

    Geometry Mode

    You will then need to select an edge (this can be difficult so be patient) on the side of the building. If you find this very difficult in perspective view you could switch to a top down view as shown below.

    A top down wire-frame view

    Once you have an edge selected the split option will become active in the geometry panel. After selecting split you will then see a line going down the centre of your building. Now simply select this line and bring it up on the Z axis (blue) to create the pitch for the building's roof as shown below.

    it is important top note that when you pull the top part of the roof the inside is still flat

    Step Five

    Now that the basic structure of the building is complete you can begin editing it or adding details such as a porch area, columns, steps and more all using the shapes from the BSP section. The image below shows the main building used in our First Person Shooter Game.


    Next Up

    In the next tutorial we will show you how to create a pick-up/collectable for the FPS game.


    UE4 Custom Textures & Materials

    This tutorial is the third in the 10 part series on how to create a first person shooter game using Unreal Engine 4. We recommend you read the previous articles first to get the maximum benefit from this tutorial.

    Step 1

    Download a Texture from www.textures.com. The texture needs to be a seamless texture.

    UE4 Custom Textures & Materials
    Sample textures available at www.textures.com

    Step 2

    Download the Nvidia textures tools plugin for Adobe Photoshop + install. :


    Step 3

    Open the texture in Photoshop and go to Image > Image Size and scale the texture to 512 x 512


    Then go to File > Save As and save as a .Targa file. Give it a name such as "brick_DIFF.tga". Finally you will get a pop up asking about the resolution to save at, choose 32 bit.

    Step 4

    In Photoshop use the NVIDIA plugin to create the Bump map/normal of the textures. You will find the plugin at Filters > NVIDIA.  In the pop up window that opens choose the "Biased RGB" option and select "Add Height to Normal Map" if not already selected. Then click OK


    The NVIDIA texture tools plugin

    This will change the look of the texture to a blueish, purple colour like in the image below.


    Open the NVIDIA plugin again and this time choose "Normalise only" and click OK.

    Next, you can increase the "bumpiness" of the texture normal by unlocking the layer, duplicating the layer and changing the blend mode of the duplicated layer to overlay. You will notice an increase in the bumpiness of the texture. This step can be repeated as many times as you feel is needed.


    Finally, go to File > Save As and save as a .TARGA file with a name like "brick_NRM.tga" and a resolution of 32 bits. You can now close the file and close Photoshop.

    Step 5

    Open up Unreal Engine 4 and in the Content Browser create a new folder, call the folder "Materials". Inside the Materials folder, create a new folder and call it "Brick" or something appropriate to the texture you are using.

    Inside the "Brick" folder click import. In the pop up window, navigate to where you saved the textures we created in the previous steps, select them both and click open. This will import them into the "Brick" folder.


    Step 6

    We now need to create the material itself. To do this click the green Add New button and choose Material. Name the material "Brick_M" or something appropriate to the material you are making.
    Double click on the material to open up the material editor. Next drag an drop the textures into the material editor and connect them up as shown in the image below.


    Now, save and close the material. It can now be applied to any geometry surface in the level. As in the picture below.


    Now that you know how to add textures to the game here are some examples that we have in our game. Some wooden texture and brick textures that we have put on the house.


    Next Up

    In the next tutorial we will create the main building in the FPS game using BSP brushes and geometry mode.


    close
    Banner iklan disini