Showing posts with label basics of 3d modelling. Show all posts

Wednesday, October 5, 2016

Read Blender Basics: The Beginners Guide to Using Blender Now

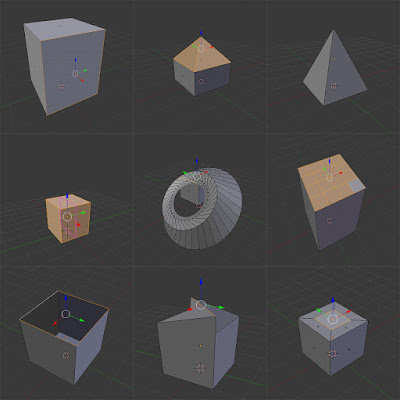
type of object you'll be able to make after this tutorial


Blender: Navigation, Basic Controls and Meshes

The controls in Blender can be a bit confusing at first. When you open up the programme you see so many different panels and options, it can be easy to think you’re out of your league, but after this tutorial, you will have a basic idea on how to use this programme, and will be ready to read more of our tutorials on how to use this software. Your skills in Blender after this tutorial will include being able to manipulate your view of the stage to give you the right angles on what you’re changing, how to transform meshes in multiple ways and how to add and remove meshes. I will also explain some basic facts like what different things on stage are, or what meshes are. The version of blender used for the tutorial is Blender 2.72


Part One: Navigation
When you first open blender this is what you’ll see:

startup file

All of this can be overwhelming so we’re just going to focus on the stage for now. That’s the dark grey box in the middle with the grid and cube in it. The stage is your main focus in blender, it’s where everything is added, removed or manipulated. The first thing we’re going to learn is how to zoom in and out of the stage. This is used to focus on something in more detail, or focus on more of the stage at once. To zoom in, roll your mouse wheel forward. This will bring you closer to the cube in the centre of the stage.

zoomed in

To zoom out, roll the mouse wheel backwards. This will bring your view away from the cube, showing more of the stage.

zoomed out

The next thing we’re going to do is learn how to rotate our view around the stage. In blender this is known as orbiting. To do this, you click and hold your mouse wheel in like a button and move your mouse in the direction you want to orbit. You can orbit the stage in every direction. The picture below is an example of a view where orbiting was used.

orbited view

Next, we are going to see how we can pan our view. This is like strafing in a video game. You move left or right, while remaining facing in the same direction. For example the picture below is zoomed in for better detail and is facing the right way, but the cube isn’t fully inside the picture.

before pan

We fix this by panning. To do this hold down the shift key, then the mouse wheel again and move the mouse in the direction you want to pan. I panned to the right in the picture below and got the whole cube in the picture.

after pan

The last thing you need to know about manipulating your view are the two different types of views and shortcuts you can use to put yourself in useful camera positions, The name of the two views are Perspective and Orthographic. By default it is set to perspective which can be seen in the top left hand corner of the stage (see previous pictures). To change to orthographic you press 5 on the numpad on your keyboard. The main difference is perspective is realistic in the sense that when you move stuff away from you they appear smaller. Orthographic shows everything in its proper size. Orthographic is much better for beginners to help them correctly judge the size and shape of their meshes and their placement.

side view

The picture above is a view from right orthographic view. It is a much simpler view for the Z and Y axis. The X axis can’t be used in this view, you have to go into front view to do this. To go into front view, press numpad 1. To go to right view press numpad 3. To go to top view press numpad 7. To do the opposite e.g. left view or back view, press the same numpad button but while holding CTRL.

top view

Part Two: How to Transform Objects

Now that you know how to manoeuvre your way around Blender’s stage, it’s time to learn how to transform objects. We’re going to be practising on the cube that’s already in the stage as we haven’t gone over meshes just yet. There are three basic transformations that we’re going to go over:
  • Translation
  • Rotation
  • Scale

We will also be talking about the red, green and blue arrows coming from the cube when it’s selected known as the “Gizmo”. If you can’t see these arrows on the cube this means it’s not selected and you will need to right click it to select it to continue this tutorial.
The first transformation is translation, which is just a fancy word used in Blender for moving the object. To do this you just press G for grab. This is an unpredictable way of moving the object as you can’t see how far it’s moving toward or away from you properly, so after you press the G key, you can then press either X, Y or Z on the keyboard, to move it along that axis only. When you use a key shortcut to make a transformation that you're not happy with, press the Esc key to cancel it. to confirm the transformation, left click.

translation

The second transformation is rotation. Like G for grab, the keyboard shortcut for this is pretty obvious. It’s R for rotate. This lets you tilt the object to give you more placement and perspective options. To rotate the object move your mouse around it in a circular fashion.

rotation

The final translation for this tutorial is Scale. This translation also has an obvious shortcut with S for scale. This translation lets you proportionally change the size of the cube between smaller and bigger. Make sure your mouse is a bit to the right of the object when you press S because if it’s too close it makes the scaling awkward. Move the mouse left to scale down and right to scale up.

scale

Now to talk about the gizmo. As you can see from the image above, the gizmo are the three arrows coming from the cube. They are colour co-ordinated with the axis they go along. Just like pressing the G Key then the key of the axis you want to move the object along, you can also left click, hold and drag any of the three arrows to move the object along the corresponding axis e.g. green is the Y axis, red is the X and blue is the Z.

translation gizmo

The gizmo is not just limited to the translation transformation. You can change the type of transformation the gizmo allows you to do by finding the little box to the left of global, under the stage 
gizmo options

and clicking whichever one you want to change it to. The arrow is translation, the curved line is rotation and the line with a square at the end is scale. The rotation gizmo looks like rings around the object. The best way to get the hang of using this gizmo is, whatever axis you’re rotating on, imagine that axis as a pole going through the object and you’re spinning it along the pole. 

rotation gizmo

The scale gizmo lets you scale the object along one axis e.g. to make it longer or taller, without affecting the other axes, so it won’t remain proportional. 

scale gizmo

Once you become more adept at using Blender its recommended you begin to use the G, R and S shortcuts rather than the gizmo to transform your object. To transform your object along a specific axis, after you press the shortcut you’re using, press the key of the axis you want to transform it on after. For example to scale along the z axis and make your object shorter, press S then Z and move the mouse down. If you feel comfortable enough, practise these shortcuts.

Part Three: How to Add/Remove Meshes

The final part of this tutorial is how you add and delete your own meshes and also how to choose where the mesh is placed when you add it. A mesh is basically just an object or shape, like the cube you have when you first start a new file.
 First of all, you may have noticed this cross hair in your stage and in previous pictures in the tutorial: 
3D Cursor

This is known as your 3D cursor. You can change where this is by left clicking your mouse anywhere on the stage. The 3D cursor decides where your meshes will be placed when you add them. If you accidentally place this somewhere you can’t find it, press shift+C. This will bring it back to the very centre of the stage at the Co-ordinates (0, 0, 0) as this is where it starts when you start up a new file.  

The other two things in your stage, besides the cube that you can see are a lamp and a camera. The camera is used for rendering images, and the lamp is used for lighting the stage for rendering. We go more in depth on these two items in separate tutorials you can find on the website.

3D cursor in centre

The best way to add a new mesh is by pressing shift+A while you’re over the stage. You will then be given a menu with multiple options including mesh. Hover over this option then choose which ever shape you want. Try them all to see what’s available for you to use. 

cylinder added

Finally to delete a mesh you no longer want, right click it to select it. You know it’s selected by a yellow highlight around it and the gizmo appearing on it. You then press X and click delete. Alternatively, you can press the delete button, not to be confused with the back button.

I hope that after this tutorial you have a basic understanding on how to use blender. Please find more of our tutorials on this website to find out how to improve your skills in blender.

cube added away from centre using 3D Cursor


Thursday, August 11, 2016

Polygon Modelling Techniques

Polygon Modelling Techniques

Polygon Modelling is a technique used to model objects in Blender, or other 3D modelling softwares, in a series of different ways ( Check here to find a free 3D Modelling Software to suit you).

It can be used in a lot of different ways, and is used in a lot of general modelling. Each of these techniques can only be used in edit mode (tab) in Blender.

Once you understand how to use these techniques and shortcuts, you'll have access to creating more objects by modelling them yourself, for example, turning a cube into a table, or a plane into a room, or a simple curve into a wine bottle.


In this tutorial, I'll be explain each polygon modelling technique, and show you an example of each technique. I'll also give you the shortcuts for the techniques that have them.

Polygon Modelling Basics

Polygon Modelling techniques are applied to the three different parts of an object in edit mode; Faces, Vertices, and Edges. These can be selected in Edit Mode (tab), and are located at the bottom of the screen (only when in edit mode) as shown below.

From Left: Vertex select, Edge select, Face select

Face: 

This is the surface between three or more Vertices.

Face Select

Vertex: 

These are the points that are located at the end of every Edge.

Vertex Select

Edge: 

These are the lines that connect two Vertices, and surround Faces.

Edge Select

Polygon Modelling Techniques

*Keyboard shortcuts are in brackets

Extrude (E):

This extracts a new edge, face or vertex from one that has already been selected. For example, you can extrude a face from a selected face, an edge from a selected face, and a vertex from a selected vertex.

Extruded Edge

Bevel (Ctrl + B):

Bevel can only be applied to the faces of objects. Its function is to create an additional face below the one that is selected, which in turn, angles the edges between the faces on the object.

Bevel Technique

Inset (i):

This technique can only be used on the faces of objects. Inset allows you to create another face inside the one that you had previously selected.

Inset Technique

Spin:

Spin is used to rotate a face or edge that is selected around an axis, based on where the placement of the 3D Cursor is on the project. There is no keyboard shortcut so just use the spin button and options in the toolbar.

Spin Technique on face

Merge (Alt + M):

This technique merges multiple  vertices, edges, or faces together. It is generally only used on vertices or edges.

Merge Technique

Subdivide:

Subdivide is used to divide the face of an object into separate segments, thus creating more faces upon the one that has been divided. There is no keyboard shortcut so just use the sub-divide button and options in the toolbar.

Subdivided Technique

Knife (K):

The knife technique allows you to manually cut through vertices and faces, creating new vertices, edges and faces.

Knife Technique used to cut surface of face

Loop, cut and slide (Ctrl + R): 

This is a process with three parts, as the name suggests - loop, cut, and slide. The first is to loop a selection around an object, choosing which axis to cut on. The second is cut, which cuts the object on the chosen axis. The final is slide, in which you can slide the cut along the edge or face, before clicking and finishing the cut.


Loop
Cut
Slide

Fill (F):

This allows the user to fill in a gap that may appear in an object in the scene.

Gap that may appear
Gap is filled in with Fill technique

Bisect:

This is used to split objects into separate sections. There is no keyboard shortcut so just use the bisect button and options in the tool bar.

Manual Bisection
Lifted Bisection to show properly

Try some of these techniques yourself. Once you familiarize yourself with them, you can go onto experiment and make a lot of high quality objects and scenes in Blender.

Sample scene created with Polygon Modelling techniques


Friday, January 29, 2016

Create Hair in Blender

In Blender, we'll be making hair by using the 'Particles' tab. You can use hair in a lot of different ways, whether it is for making a simply rug for a room scene, or designing your own 3D character for a game. As it can be used in a wide range of different ways to create different outcomes.
We'll also take a look at the tools we use to shape and change the hair in Blender, and I'll explain each so that you will have more control over how you want the hair to appear in it's final render.

Hair in Blender
Hair in Blender

Step 1: Open a new project

To begin, I'm going to open a new project and delete the default cube that appears. You can use this if you like, but for now I'll be using a UV Sphere, in order to create hair on a sample head shape.

New Project

UV Sample scaled up slightly on 'Z' axis

If you'd like to do the same as me, or perhaps use a different shape, use shift + A, and select a shape from the 'Mesh' dropdown. You can also 'scale' the shape to a different size by pressing the 'S' key, followed by whichever axis you want to scale it along (X, Y or Z), or just use your mouse to manually resize it.

Step 2: Vertex Groups 


In order for hair to be placed correctly on the head, there needs to be a section where we can apply it to directly, like how hair grows from the scalp on our heads. To do this, we need to create a 'Vertex Group'. To begin, select the 'Object Data' menu on the right hand side of the screen.

Select 'Object Data', which is highlighted

Before we do anything in this tab, we need to go into 'edit mode' (tab), and select whereabouts we want our 'scalp' to be. To do this quickly, once you are in edit mode, hit the 'C' key and use this to highlight the scalp on your head or object. If you wants to 'Deselect' any parts, use shift + click after hitting you 'C' key. Once you have finished selecting your scalp, it should appear something like this;

'Scalp' selected

Now that we've selected the area in which we want our hair to grow from, we need to go to the 'Vertex Group' dropdown in the 'Object Data' tab we had previously selected. It should look like this:

Vertex Group dropdown
Select the '+' symbol to add a new group, and double-click it to rename it 'Scalp'. With this group now created, and the scalp selected on the actual object, we can now press 'Assign'. This action will ensure that this section in particular can be selected as the origin of hair on our object.

Assign the selected vertices on the object to this group
You can now go back into object mode by hitting the tab key again.

Step 3: Particles and Adding Hair


Using the 'Particles' tab, we can now create the hair on the object. Go into the 'Particles' tab, which is located on the same bar as the 'Object Data' tab we had previously selected.

Select 'Particles', which is highlighted

Once inside this, select the 'New' button. Upon doing this, you should see the following menu show up:

After selecting 'New'

I began by renaming the particles system from 'ParticleSystem' to 'Hair'. I then also renamed the 'ParticleSettings' to 'Hair' as well.

Renamed 'Hair'
As you can see, underneath the 'Settings' is the 'Type' selection. Select the 'Emitter' selection and change it to 'Hair'. Immediately after you do this, you'll see that your object will suddenly sprout out hairs from all over itself, as opposed to the section we had previously assigned, such as shown below.

Hair appears from everywhere on object
To quickly change this so that it only on the 'Scalp' we had created earlier, scroll down on the Particles tab until you find the 'Vertex Groups' dropdown, and open it. Once you do this, you'll see a selection of groups. All we have to do here is select the 'Density' option, and select the group we had created earlier. My one was called 'Scalp'.

Vertex Group dropdown
As soon as you select your group on 'Density', the hair on your object will only originate from the scalp we had created earlier. 

Hair now only originates from selected scalp

Step 4: Editing the Hair

Personally speaking, I find that working with long hair to begin with is extremely hard. For this tutorial, We'll start by working with shorter hair than the default length we were given. To change the length, scroll up on the 'Particles' tab until you find the 'Emission' dropdown. Underneath this you'll see 'Number' and 'Hair Length'. The 'Number' is the amount of parent hairs on the hair so far, and it's default number is '1000'. I left it at '1000' and changed the 'Hair Length' down to '1'.

Hair length changed to 1
Once you have completed this, go to the 'Render' dropdown. You will see 'Steps' at the bottom of this dropdown. Bump up the number of steps to '6'.

Change steps to 6 in Render dropdown
Then, underneath the 'Display' dropdown, which should be located directly underneath the 'Render' dropdown, change the 'Steps' to '6' as well.

Change steps to 6 in Display dropdown

This next part is a vital part of creating your hair. In the 'Children' dropdown, you will find three options; 'None', 'Simple' and 'Interpolated'.

Children dropdown
If you select 'Simple' or 'Interpolated', you will find that the object produces a larger mass of hair from the '1000' parents hairs already present on the object. The 'Interpolated' selection takes longer to render, but is of a higher quality. Select 'Interpolated'.
Your object should look something like this;

Interpolated in 'Children' dropdown
Immediately underneath the three selections, after selecting 'Interpolated', change the 'Display' number to '25', and the 'Render' number to '25'.

Step 5: Tools

Once you've finished preparing the hair in the 'Particles' tab, we can now begin editing the hair to any sort of style or shape we like. To do this, we will need to go from 'Object Mode' to 'Particle Edit' by selecting the interaction at the bottom of the screen, and selecting 'Particle Edit'. Once you enter this, the hair should go back to only showing the 1000 parent hairs, as well as a tool menu on the left with the 'Brush' and 'Options' dropdowns.

Particle Edit mode
Before we begin editing the hair, we should go through each option in the 'Brush' dropdown.

Brush options

Comb:

The 'Comb' option allows us to literally comb the hair we have previously created, and place it in a huge variety of shapes and styles manually.

Comb tool

Smooth:

The 'Smooth' tool is used in order to neaten out a part of the hair, for example, if you wanted the hair to all go one way, however it is not, you would use the 'Smooth' tool over the section in order to smooth it out.

Smooth tool

Add:

The 'Add' tool is used to add more hairs in places where you may want more, or if there are blank patches on your object that you want filled in more.

Add tool

Length:

The 'Length' tool simply extends the length of selected hairs.

Length tool

Puff:

The 'Puff' tool would essentially give the hair more volume, and puff it up if you want it bigger.

Puff tool

Cut:

The 'Cut' tool simply cuts the hair shorter.

Cut tool

Weight:

The 'Weight' tool is used in animating the hair, and is used to weigh the hair down.

Weight tool

Step 6: Using the Tools

Now that you're well acquainted with the tools used to style your hair, you can start styling it. If you want a better idea of how the hair will look when it is rendered, you can check the 'Children' box under the 'Options' menu on the left. This will make the 'Children' hairs appear and allow you to have a better visual on how your hair will turn out in it's final render.

'Children' selected 

Step 7: Render

When you are finished styling your hair, you may want to render it. To gain a high quality final render, you simply hit the 'F12' key on your keyboard. This will render your scene through the view of your camera in your project. If it isn't in a place that you find particularly attractive, you can move it and rotate it to suit your final render. You can also adjust the lighting settings by selecting the lamp in the project and adjusting the type of light, intensity, etc.

Final Render


Once you have your final piece, you can use the tools you have learnt about to experiment with different shapes, or try adding materials to your object and hair.

Different shapes


close
Banner iklan disini