Showing posts with label scratch. Show all posts

Friday, September 30, 2016

Create A Pong Game

The classic game Pong is a great place to start your game design adventure

If you have an interest in gaming and would like to start making your own games then this little tutorial is an ideal place to start. I'll guide you step by step through the process of creating your very first game. And what better game to start with than the very first game ever made - Pong!

For this tutorial we will be using a free, online software called Scratch which is a great place to start creating games. Normally before we started out creating a 2d game I would direct you to our 5 part series on how to create a 2d game but this game is so simple that that process isn't really needed. So let's get started.

Step 1: Create an account


Go to scratch.mit.edu and create an account. It's free, easy and they don't use your email to send you junk.

Step 2: Enter The Editor


Once logged in, just click on the create link in the main menu. This automatically creates a blank project for you. That will bring you into the scratch editor. Here is a short PDF introduction to scratch. You can also watch this short video to get an idea of the scratch basics.


Step 3: Creating The Sprites

First off, lets delete the scratch cat, which is there by default as we won't be needing it for our game. To do this select the delete tool, which has a scissors icon, in the top toolbar and then click on the cat.

Now we have a clean slate from which to start our game. The first thing we will do is create the "sprites" that we will need for the game - these are a ball and two paddles. To create a new sprite ourselves we click on the paint brush icon in the new sprite section, as shown in the image below.


Now, in the sprite editor area on the right of the screen, you should switch to vector mode as it allows you to create vector graphics which are of a higher quality than bitmap graphics. Simply use the ellipse shape tool (highlighted in the image below) to make a ball shape and then click new sprite again and repeat the process, using the rectangular shape tool to make the paddles.


You should now have 3 separate sprites in your sprites area. You can click on the "i" icon on the corner of each sprite to name them appropriately.


Step 4: Adding The Variables

In programming terms a variable is quite simply something that can/will change and because of this needs to be treated differently from other values which remain constant. In order for us to create our Pong game we need at least 2 variables, one for the player score and one for the computers score.

To create a variable simply go to the Data section in the scripts options and click on create a variable. Choose the "for all sprites" option and call one variable "Player Score" and the other "Computer Score" or something similar. This will create the variables and give you extra programming blocks to work with, as shown below. We will be using these blocks in the next section.


Step 5: Programming The Sprites

In Scratch programming is done by dragging and dropping "blocks" of code from the various scripts section into the scripting window on the right of the screen. Below, I will illustrate the programming code required for each of our 3 sprites.

The Ball....

Click on the image to enlarge


The Player's Paddle...

Click on the image to enlarge


The Computer's Paddle...

Click on the image to enlarge

Step 6: Adding & Programming Sounds

In scratch there are a library of sounds available for you to use but you can also upload your own if you can't find one in the library that you like. For our game we are simply going to add the "pop" sound for when the ball hits a paddle and the "zoop" sound for when the ball hits either end resulting in a score. Simply select the ball sprite and in the Sounds tab click on the speaker icon to select a sound from the library.


To programme the sounds to activate at the right time simply change your ball sprite programming code as shown below. 

Click on the image to enlarge

And that completes the basic set up for your game. If you would like you can also add win or lose screens to you game as shown in the sample below. To see how to do that just click here.

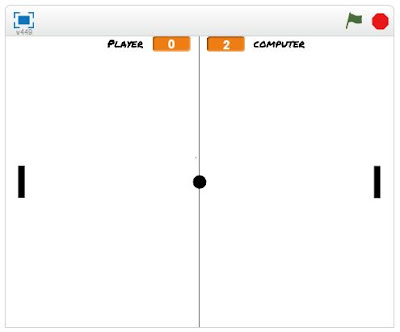
The Finished Game:

Click on the green flag to start the game. Have Fun!


Saturday, April 2, 2016

Create A 2D Game - Part 4: Programming


This is the fourth section of five on how to design and create a 2d game. Before reading this article you should ideally have read the 2D Game Concept, 2D Game Structure and 2D Game Graphics & Audio sections.

2D Game Programming

Programmers work at the heart of the game development process. They design and write the computer code that runs and controls the game, incorporating and adapting any ready-made code libraries and writing custom code as needed. They test the code and fix bugs, and they also develop customised tools for use by other members of the development team. Different platforms (games consoles, PCs, handhelds, mobiles, etc.) have particular programming requirements and there are also various specialisms within programming, such as physics programming, AI (artificial intelligence), 3D engine development, interface and control systems.

As mentioned in the earlier sections we are recommending you use Scratch to create your first 2D game. So in this section we will focus on the Scratch programming method and show you how to create your 2D game using their programming 'blocks'.

2d game programming with Scratch
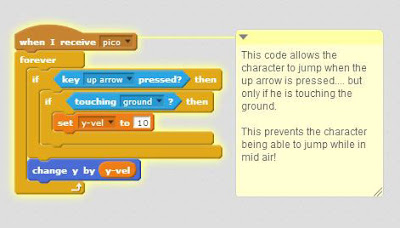
A sample snippet of scratch code with annotated explanation

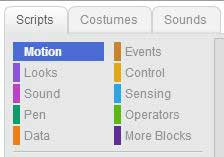
These drag and drop programming 'blocks' are colour keyed and split into easy to understand sections.

colour coded 2d game programming with Scratch
The colour coded sections make the programming easier

The scratch website can host your games and embed them into a website so that people can play them online, share them on Facebook or download them to be played on their own computers. Below is a selection of scratch resources, which I have either created or selected for you, including scratch programming demos, game templates and sample games.

You can use these resources to start creating your own games and/or animations. You do not need a scratch user account to play theses games and demos but you will need to create a scratch account to start making and remixing games, but don't worry, it's all free. Be sure to follow the onlinedesignteacher Scratch channel to be sure to get our latest releases.

5 Great Scratch Games To Inspire You ...

Sometimes we need a little inspiration to get our creative juices flowing so here are 5 great little 2D games, made using Scratch, to inspire you to get started.


2D Game Templates To Practice On ...

Even with our game graphics and audio already made in the previous section you should not jump straight into programming your own game without doing a little practice first. These are game templates which you can 'remix' into your own versions of them. This is a great way to get started with 2D game creation and programming and there is already a structure in place to help you. In order to understand the very basics which will allow you to do this then watch this short video.
  • Pong Game Template - the first game ever ready for you to re-invent it.
  • Top Down Game Template - the top down view is a clasic 2D game view, what can you create with it.
  • Shooter Game Template - shooter games were huge in the early years of gaming, have a go yourself and see why.
  • FPS Game Template - another shooter game template! just to give you some variety and options to play around with and practice on.
  • Sniper Game Template - this game template features a XY scrolling sniper view which you can edit and expand into a full 2D game.
  • Side Scrolling Platformer Template - side scrolling platformers like Mario and Sonic are game that we are all fmailiar with and now you can make your own using this template.
  • Catch/ Collect Game Template - ideal for a simple mobile style game, this template uses the Scratch 'cloning' feature to create multiple objects from the same game sprite.
  • Paint Programme Template - while not exactly a game template this paint program showcases more of the features of Scratch that you can utilise in your own 2D game.

Getting Started With Scratch... 

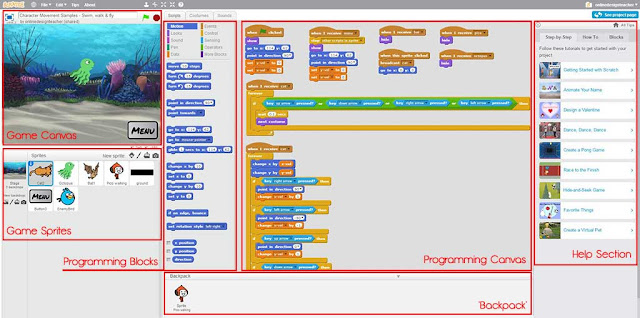
Scratch 2d game engine interface
The different sections of the Scratch User Interface are designed to give you the full range of tools to create your 2D game

The 2D game resources below are a must to help you get started with your own 2D games after you have practiced on the 2D game templates above.

2D Game Features To Use In Your Own Game...

These features are all very basic with simple place-holder graphics so just focus on the programming code and notes and take the bits you need for your own 2D games. You can copy programming code blocks or game sprites using the 'backpack' feature at the bottom of the game editor interface.
  • Game Timer - especially useful for racing games but can also be used to time your 2D game player when completing tasks or levels as well as for ranking players in the leader-board.
  • Ammo Counter - a must for any shooter or FPS game in which ammo is a key variable but can also be used in adventure or platformer games too.
  • Shooting & Scoring - these usually go hand in hand in 2D games so we decided to put them together in this demo which you can use to create your own 2D game scoring and/or shooting features.
  • Player Health Bar - a players health is a key variable in fighter games but health or lives are also an industry standard in most 2D games.
  • 2D Game User Interface - this template includes a score counter, ammo counter, timer and sniper sight and is ideal for shooter games but can be tweaked to suit any type of 2D game.
  • Game Menu  - before we begin any 2D game we first pass through the game menu so we have provided you with a ready made menu to get you started.

Next Up...

Once you have completed the programming stage of the 2D game you should move onto the final step which is the testing of your 2D Game.

Thursday, March 31, 2016

Create A 2D Game - Introduction

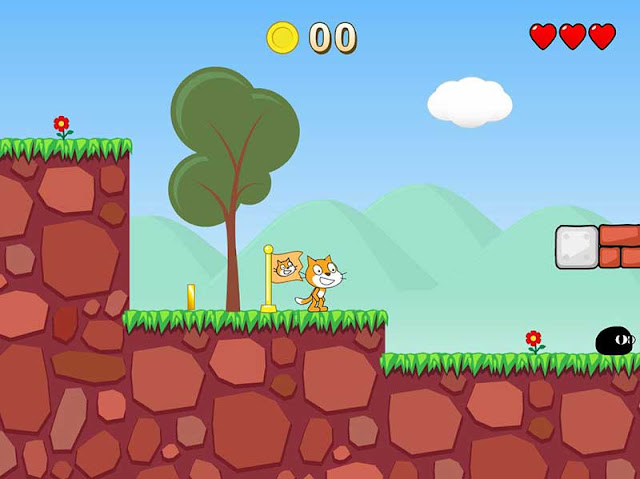
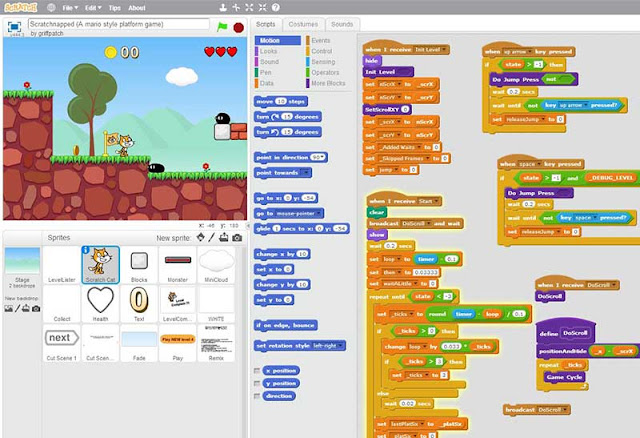
Screen shot from a 2D game made using scratch
This is a screen shot from a 2D game made using scratch by a user called GriffPatch

How To Design And Create A 2D Game

This 5 part series will guide you step by step through the stages of developing a 2D game. Two-dimensional games were most frequently developed in the early years of video games with the main reason for this being that the technical limitations of game hardware prevented the ease of creating three-dimensional graphics. When technology developed sufficiently to allow easier and more effective use of 3D graphics there was a temporary decline in 2D gaming. ( For more on games design history click here)

The wheel has now turned full circle however and the rise in popularity of mobile devices such as the iPad, iPhone and Android Phones are now mainly populated with easy to play 2D games. This renaissance in 2D gaming is partly due to the sentimental memories of early gamers joyously reliving their youth on their new gadgets. In reality though it is mainly a decision by developers to meet the demands of the consumers for quick, easy to play, fun games that they can pass 5 or 10 minutes with on the bus or train to work that 2d games are the ideal format.

These 2D games and Apps are made in a variety of ways including the Apple or Android SDK (Software Development Kit), Adobe Flash, HTML5 etc. However, if you are a games design student and are just starting out or you only want to make a game for fun or one to share with your friends then the best option is Scratch. Scratch is a simple, freeware game engine software that is easy to use, edit and publish so it can be easily shared with your friends.

The Scratch website hosts all the games made using it's editor and can sometimes put people off because of this as some of the games can appear childish or low quality (because they are made by children!). The reality is it is an excellent games engine for 2d game development and if you would like to see some examples of quality 2D games using Scratch then click here.

The Scratch 2D Game Engine Interface
The Scratch Game Engine Interface

Lets Get Started...

There are 5 main stages in the 2D games design process and this series will guide you through each one step by step. We will start with stage one - Game Concept Development.
close
Banner iklan disini