Showing posts with label interior. Show all posts

Monday, February 29, 2016

Interior Design Styles at a Glance

Interior Design Styles

At the start of any interior design project, you wonder what style should I choose? what style do I like? what style will look good in that space? what style will I feel comfortable with? Whether you're decorating a single room or a whole house, a bungalow or a mansion the style will change dependent on the existing space and what is appropriate for it.

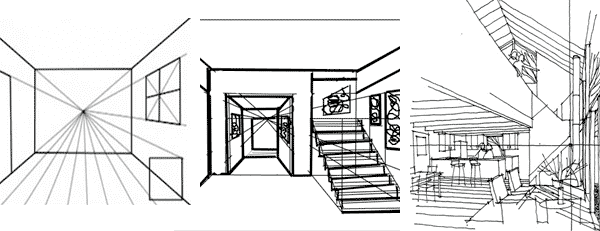
The above image of interior design styles is not a definitive list but rather a selection of some of the most common or popular interior design styles, more styles exist and more are being created all the time. If you want to learn more about any of the interior design styles shown above, read the full interior design styles article HERE.


Saturday, February 20, 2016

Interior Design Drawing Techniques

Interior designers develop their ideas from relationship diagrams into floor plans and then into perspective drawings to show clients. With 2D floor plans it can be difficult to visualise how they will look in reality so perspective drawings are ideal as they represent three-dimensional images on a two-dimensional picture plane.

According to Leonardo da Vinci there are three aspects to perspective. The first has to do with how the size of objects seems to diminish according to distance. The second, is the manner in which colors appear to change the farther away they are from the eye. The third defines how objects should to be finished less carefully (blur) the farther away they are.

There are numerous different techniques used to achieve perspective in drawings, of which, the main ones are listed below.


One point perspective drawing:

Interior Design Drawing Techniques
One Point Perspective Drawing Samples

One point perspective is so named because it uses a single vanishing point to draw an object. In one point perspective, perspective is created by showing the front and one side of an object with all the horizontal lines joining a single vanishing point. If more than two surfaces of an object need to be shown two point perspective can be used.

In one point perspective, the front and back planes of the box always remain parallel to the picture plane. Only their scale changes as they recede into the distance. To create a template of a room for a one point perspective, follows these steps...
  • First, using a pencil and a ruler, lightly make an X by connecting the right top corner to the left bottom corner of your paper and by connecting the top left corner to the bottom right. Where these lines intersect will be your point that all depth lines will 'move' toward.
  • Next, lightly make a rectangle on the X, be sure to make the vertical lines and horizontal lines of the rectangle parallel to the sides of the paper. This will represent the back wall of the room.
  • To assist in gauging depth for items in the room, draw a line diagonally from either bottom corner of the rectangle to the opposite front corner of the page.
  • To create lines for floor boards or floor tiles you can lightly draw lines from equally spaced points at the bottom of the page straight to the centre point.

Your room template should now look something like this...


One Point Perspective Template
Back To Top

Two point perspective drawing:

Two Point Perspective Drawing Samples
Two point perspective, as the name suggests, uses two vanishing points toward which all perspective lines (non vertical) are drawn. When an object is drawn in this way it is even more realistic than drawn with a single vanishing point. To achieve a two point perspective effect follow these steps...

  • First mark two vanishing points on the paper (closer to the edges will allow for larger drawings) and faintly draw a line between them, we will call this is called the horizon line 
  • Next draw a vertical line above, through or beneath the horizon line (depending on the angle and position of the drawing you want) and in the centre between the vanishing points, this represents one side/edge of the object you are drawing 
  • Now draw faint lines from the ends of the vertical line to the vanishing points, these are the perspective lines. 
  • Next draw two more vertical lines either side of your original vertical and between the perspectives lines to represent the othe edges of the object. This creates two sides of the object. 
  • Next draw faint guidelines from the ends of these new lines to either vanishing point which will create the top of the object. It will now look like a cube in perspective. 
  • For more detail continue to add lines remembering they always move toward the vanishing points


Oblique drawing:

Oblique Drawing Perspective Sample
Oblique drawing is a crude '3D' drawing method but it is the easiest to master. Oblique is not really a '3D' system but a 2 dimensional view of an object with 'forced depth'. When using oblique the side of the object you are looking at is drawn flat. The side views are drawn in at a 45 degree angle. Standard practice is to 'foreshorten' the side views to provide a more convincing view of an object. To foreshorten the side views, the objects side measurements are halved. For example, if the sides are 50 mm long, but they will be drawn in at 25 mm long. To achieve an oblique perspective effect follow these steps...

  • Draw the front of the object straight on as you would do in a front plan view. 
  • Now extend guide lines out from the top left, top right and bottom right corners ar 45 degrees. 
  • Measure along the bottom right guidline to the distance of the width/depth of the object you are drawing and mark that point 
  • From that point draw a perpendicular line up until you meet the top right guide line you drew earlier. This perpendicular line should be parallel to the left and right edges of your front face. 
  • Now, from where this line intersected the top right guide line draw a straight line across towards the top left guide line parellel to the top edge of your front face. Stop when you touch the top left guide line. 
  • This should complete the basic shape in oblique view. If there are angles/areas of the shape additional to the basic shape or removed from this shape, as with the chair image above, then continue to block them out using the base shape as a guide.


Isometric drawing:

Isometric Perspective Drawing Samples


Isometric projection is another form of graphical projection use for the visual representation of three-dimensional objects in two dimensions. The term isometric comes from the Greek for "equal measure", reflecting that the scale along each axis of the projection is the same In any isometric representation, all measurements are to scale, no matter how far close or how far in the distance they are in view. In an isometric perspective, you have a 3D view where, no matter where you are in that space, the object scaling retains its value and doesn't change.

Isometric projection can be visualized by considering the view of a cubical room from an upper corner, looking towards the opposite lower corner. The x-axis is diagonally down and right, the y-axis is diagonally down and left, and the z-axis is straight up. Depth is also shown by height on the image. Lines drawn along the axes are at 120 degrees to one another (diagonal lines will therefore be at 30 degrees to the horizontal and at 60 degrees to the vertical).

Back To Top

Axonometric drawing:

Axonometric Perspective Drawing Samples


Axonometric, or planometric as it is sometimes known, is a method of drawing a plan view with a third dimension. It is used by interior designers, architects and landscape gardeners. Axonometric works by drawing a plan view at a 45 degree angle with the depth added vertically. All lengths are drawn as their true lengths unlike when you use oblique. This gives the impression that you are viewing the objects from above. One advantage of axonometric is that circles drawn on the top faces of objects can be drawn as a normal circle.

Back To Top

*If you enjoyed this article you may also find our Interior Design Tips and Interior Design Styles articles useful.

Interior Design Materials & Finishes

A selection of different materials and finishes
Interior Design Materials and finishes are those things that make up the finished design of a project. Choosing the right ones will mean the difference between an ordinary look and one that is unique and stylish. Some examples of Interior Design materials and finishes, and which are discussed in this article include...
  • Painting Techniques and Finishes
  • Floor Coverings
  • Fabrics and Fibres

Interior Design Painting Techniques & Finishes:

Faux painting with its eloquent styles and numerous techniques can transform the entire ambience of a space. As the name suggests, faux painting techniques are made to resemble something else. Faux finishes have many benefits, which even a good wallpaper, panelling, or application of an elegant paint can't match. The major benefit of a faux painting is its versatility of use. Faux painting last longer than any wallpaper and unlike wallpapers, faux painted walls have no seams and it won't ever peel off. Every home has some wall that just doesn't look good, and one or more walls have holes, cracks and depressions at places that these paint techniques can improve, hiding these imperfections and adding style and uniqueness at the same. The condition and the nature of the surface will determine which technique to use. If the wall is rough and old the use of the rag rolling technique will make any imperfection in the wall disappear.
Chalkboard Paint:

Chalkboard paint is a type of paint which dries to a finish resembling that of a chalkboard. Once chalkboard paint has been applied to a surface, it can be used just like a regular chalkboard. For people feeling creative this paint can also be made at home. One of the advantages of homemade chalkboard paint is that it allows people to create their own colours. With homemade chalkboard paint a layer of primer should be applied to the surface beforehand. For every 250 ml (approx) of paint, two tablespoons of powdered tile grout can be added before the mixture is thoroughly stirred and then applied.

Colour Washing:

Colour Washing is a popular technique in faux painting using paint thinned out with glaze to create a wash of colour over walls. Colour washing is an easy to create form of faux finishing as there is no set outcome it is hard to go wrong. Colour washing can be done in any colour of paint and is generally applied with a soft cloth or sponge over a solid paint color, using long circular motions, as if you were washing the wall (hence the name), to blend the glaze colors together. Continue this wiping technique until the entire surface is covered.

Dry-Brushing:

Dry-Brushing is a painting technique in which a paint brush that is relatively dry, but still holds paint, is used. The resulting brush strokes have a characteristic scratchy or linear look that adds depth and texture to the wall surfaces in contrast to the more common smooth appearance that washes or blended paint commonly have. The technique is often used as part of a colour layering decorative process and in model painting to apply highlights to miniatures.

Crackle Effect:

Crackle Effect painting is a technique used to age a surface so that it looks older or antique in style. It can be used on walls, or on furniture or porcelain to give them an antique appearance. When used on walls it is often used alongside other paint techniques such as colour washing to enhance the worn look. First you apply the base coat of paint, the colour that you want to show through the cracks. After it has dried, apply two coats of crackle glaze. The last coat should be applied in vertical strokes if it is a wall, or should go with the wood grain if on wooden furniture. On top of this apply the final coat, this should be a flat interior paint, not glossy. The colour is once again your choice.

Ragging:

Ragging or ragrolling is a decorative painting technique created by rolling a point covered rag over the still moist surface to leave a random and unique patterned effect which can replicate the appearance of marble or crushed velvet. The subtle and rich finish achieved mimics that associated with the most expensive wallcoverings. Firstly Apply your base paint colour to the walls and allow it to dry. Next cover a rag completely with the paint of your secondary colour, squeezing out any excess paint. Finally squeeze the rag into a rough ball and dab and roll the rag ball over the wall to create the desired textured pattern.

Sponging:

Sponging adds the look of texture and depth to walls by dabbing or rolling a natural sea sponge to dab or roll onto the wall in a r andom pattern, leaving a thin coat of glaze on the surface of the under coat of paint. Always choose a base coat and glaze colour that are close in tone as too much contrast will result in a splotchy, spotted look which you obviously will not want. Also don't forget to wear plastic or rubber gloves, as you'll get the glaze all over your hands. Tip: Use the corners of the sponge to gently dab the paint into the corners of the wall or ceiling.

Striae:

Striae is a striped effect that can help make ceilings look higher and rooms look larger. It can be done in any colour, using two tones of the same colour or a single colour alongside an off-white colour. You will require a specialist stria brush to achieve this effect. Firstly paint the desired undercoat colour on the wall, giving it two coats, applying the second only after the first has dried. Next pour latex glaze into a mixing bucket and add the darker shade of paint with a ratio of five parts glaze to one part paint ensuring to mix the paint thoroughly. Now paint the darker shade on in vertical strokes if you are painting vertical striae or horizontally for horizontal striae. Finally, while the paint is still wet, put the striae brush flat against the wall and pull down the paint in a single motion, from the ceiling to the floor. As the paint is still wet, you will need to wipe off the striae brush between each run..

Back To Top


Interior Design Floor Coverings:

Floor covering is a term to generically describe any finish material applied over a floor structure to provide a walking surface. Materials almost always classified as floor covering include carpet, area rugs, linoleum, vinyl flooring, wood flooring, ceramic tile, stone, terrazzo, and various seamless chemical floor coatings. The choice of material for floor covering is affected by factors such as cost, endurance, noise insulation, comfort and cleaning effort. Some types of flooring must not be installed below ground level, and laminate or hardwood should be avoided where moisture or condensation is present in the air.


Natural Wood:

Natural Wood is wear-resistant, long-lasting, provides a warm natural look which may darken with age but can be refinished or retouched as your needs change. However it is vulnerable to water, damp and moisture while softer woods, such as pine, may dent easily and are difficult to repair. When putting down a wood floor be aware that it may shrink and expand, creating gaps or warping so it is advisable to remove skirting boards first and leave room for expansion or shrinking that can be covered by the skirting boards afterwards. To keep wooden floors at their best place mats at entrances to catch dirt and put protective pads on the bottoms of chair and table legs to prevent scratches when moving furniture.

Engineered Wood:

Engineered Wood is artificially manufactured but still consists almost entirely of real wood. It shrinks and expands less than solid wood and is designed for quicker installation time often using the 'tongue and groove' approach. It generally comes prefinished so the stain and protective finishes are already completed and will be more consistent and resistant to wear and tear than natural wood. As with natural wood though, it is recommended that you place mats at entrances to catch dirt and put protective pads on the bottoms of chair and table legs to prevent scratches when moving furniture around the room.

Linoleum:

Linoleum, commonly called lino, is an artificial material but is made of natural raw materials. It it usually made to mimic other materials such as tiles to offer a more affordable solution to a customer's needs. It is more durable than vinyl and unlike vinyl its colour penetrates through the entire material. As it is a softer material it is easier to cut which is good for DIY installations. This soft nature means it needs to be resealed on an annual basis and it cannot be left wet. Therefore to keep it at its best clean up all spills immediately and only damp-mop when needed using clean, warm water.

Tiles:

Tiles are a durable, hard wearing, long lasting, water and stain resistant material. As a sensually cold material they are best suited to kitchens or bathrooms. Tiles are also a very commonly used material and therefore there is high demand for them which means they can be obtained at a relatively low cost and selected from a wide range of colours, textures, and shapes. On the flip side grout lines and textured tiles can be hard to clean and low-quality tiles are liable to chip while fragile items dropped on high quality tiles will probably break. Tip: Always keep some spare tiles after installations as if a tile gets chipped it is easier to replace one rather than try to repair one.

Carpet:

Carpet is a soft, quiet and warm underfoot and is best used in bedrooms and living spaces. Carpet is the easiest and most cost-effective floor covering to replace and upgrade which is just as well as most carpet types are not very durable and will age, wear and stain more easily than any other floor covering (although there are stain-resistant fibres available). The warmth, comfort and texture that a carpet brings to a space cannot be achieved by other floor coverings even is wood, tile or stone covered floors carpet mats are often used to add some of these qualities to the space. To keep a carpet at its best it is recommended that you clean any spills immediately, vacuum regularly and use a deep-cleaning hot water extraction cleaning system every 18 months.

Stone:

Stone is the most durable of all floor materials (Some varieties, such as marble and limestone, actually absorb stains and dirt). It is a timeless and classic design choice which can add a beautiful and natural aesthetic to a space. Although it has a higher cost than many flooring materials it will outlast them all, especially if sealed. Sealing the floor essentially involves painting it with a protective glue based coating which prevents dust from the stone rising and reduces the natural be slippiness of some glossy stones. Despite its hard wearing nature avoid cleaners that are abrasive or contain vinegar, lemon juice, or harsh chemicals as they can stain the stone.


Back To Top


Interior Design Fabrics & Fibres

Natural fabrics are made of natural supplements and can be expensive to purchase. However, as its name suggests natural fabric is more durable, soft, luxurious and resilient. Some of the common used natural fibres used to make fabric are linen, cotton, silk, hemp, jute, wool, horsehair, cashmere, mohair and camelhair. Artificial fibres are obtained from different engineered processes or alterations of existing natural fibres. The market of artificial fibres has widened due to modern techniques. Some of the popular artificial fibres used to create fabrics are acetate, rayon, triacetate and modified rayon, some of which are also explained below. Synthetic fibre is again man-made fibre that is used to improve the quality of natural and artificial fibres. Some of the improved synthetic fibres are acrylic, nylon and polyester.


Linen:

Linen is a natural fibre derived from the flax plant which provides tough yarn that is slight glossy and smooth in appearance. The fabric made from linen fibre is moth resistant and hard wearing. It can be easily washable and is also strong when wet. Linen tends to crease quite easily yet it makes a good choice for homeowners when it comes to a fabric for curtains. The collective term "linens" is still often used generically to describe a class of woven and even knitted bed, bath, table and kitchen textiles. The name linens is retained because traditionally, linen was used for many of these items.

Silk:

Silk is also a natural fibre and it is obtained from the cocoon of the silkworm moth. Silk is prized for its fragility and luxury and can be very expensive. Silk is popular among the luxury items due to its unique texture and lustrous appearance. It requires frequent dry cleaning and hand washing is strictly prohibited for silk. It also gets creased and can be damaged if exposed in sunlight. Thus silk must be carefully handled. Silk's absorbency makes it comfortable to wear in warm weather. Its low conductivity keeps warm air close to the skin during cold weather. It is often used for clothing such as shirts, ties, blouses, formal dresses, high fashion clothes, lingerie, pyjamas, robes, dress suits and sun dresses.

Wool:

Wool is another natural fibre, it is fleeced from sheep and further processed through various refinements. Wool comes in natural colours but it can be dyed any other colour. It is considered to be a good insulator and is used in clothing in colder areas to protect against cold winds. In addition to clothing, wool has been used for blankets, horse rugs, saddle cloths, carpeting, felt, wool insulation and upholstery. Wool is used to absorb odours and noise in heavy machinery and stereo speakers. Wool is very versatile and can be blended with synthetics to create an improved fabric.

Cotton:

Cotton is obtained from the plant of the same name and is a very strong and tough fabric. Cotton is preferred by homeowners for its numerous properties as it is durable, economical and airy. These properties also serve it well as a commonly used clothing fabric, although it can shrink when wet. Cotton is used to make a number of textile products which include highly absorbent bath towels and robes, denim for blue jeans and corduroy, bed sheets, socks, underwear, and most T-shirts are made from cotton. Cotton is also widely used for decorative fabrics as it doesn't fade away easily.

Rayon:

Rayon is produced from processed wood pulp and is valued for its hardness, strength and high absorbency although it does lose its strength when wet and can shrink more than cotton. It is also more prone to burning and can rapidly catch fire. Some major rayon fibre uses include blouses, dresses, jackets, lingerie, linings, scarves, suits, neckties, hats, socks, bedspreads, bedsheets, blankets, window treatments, upholstery, slipcovers, medical surgery products, non-woven products, tire cord, feminine hygiene products, diapers and towels. Rayon is widely used because it is economical and has excellent drapery properties and is a common substitute for a variety of natural fibres.

Acetate:

Acetate also known as Cellulose acetate fibre, is also obtained from wood pulp but is low in absorbency and strength. As a very valuable manufactured fibre that is low in cost and the properties of acetate have promoted it as the 'beauty fibre' as satins, brocades, and taffetas to accentuate lustre, body, drape and beauty. It is moth resistant and is therefore widely used for drapery. After rayon, acetate is common substitute for a variety of natural fibres as it is versatile and inexpensive. It is further used in the making of satins and other fibres.

Acrylic:

Acrylic is made from the polymerization of free radicals and is lightweight, soft and warm. Acrylic doesn't crease easily, is shrink resistant and highly resilient. This fibre is also moth resistant but is sensitive when exposed to sunlight. Acrylic can also be made to mimic other fibres, such as cotton, when spun on short staple equipment. Its fibres are very resilient compared to other synthetics and natural fibres. Some acrylic is used in clothing as a less expensive alternative to cashmere, due to the similar feeling of the materials. Some acrylic fabrics may also fuzz easily. Acrylic takes dying and colouring well, is washable, and is generally hypoallergenic. Uses include socks, hats, gloves, scarves, sweaters, home furnishing fabrics, and awnings.

Polyester:

Polyester is a byproduct of petroleum, it is considered to be very strong and can be hand washed. Other characteristic of this synthetic fibre are that it is shrink resistant, moth resistant, crease resistant and it retains its shape well. Polyester is often mixed with natural fibres in order to create more improved fibres which are extremely strong and durable for use in furnishing and upholstery. Fabric balls knitted from polyester thread or yarn are used extensively from shirts and pants to jackets and hats, bed sheets, blankets and computer mouse mats. Industrial polyester fibres, yarns and ropes are used in tyre reinforcements, fabrics for conveyor belts, safety belts, coated fabrics and plastic reinforcements with high-energy absorption.

Nylon (Polyamide):

Nylon (Polyamide) is formed with tar, coal and petroleum. Nylon, nicknamed as it was created by scientists from new york and london, is tough, resilient fibre with high elasticity. Nylon is non-shrinkable, crease resistant and easily washable. Nylon is valued for all these characteristics and has proved to be the most durable synthetic fibre available. Nylon fibres are used in many applications, including fabrics, bridal veils, carpets, musical strings, and rope. Nylon was intended to be a synthetic replacement for silk and it was substituted for many different products after silk became scarce during World War II. It replaced silk in military applications such as parachutes and flak vests, and was used in many types of vehicle tires.


Of course, this is by no means an exhaustive list of Interior Design materials and finishes as there are many more materials and finishes out there, so go explore!

*If you enjoyed this article you may also find our Interior Design Tips and Interior Design Styles articles useful.


close
Banner iklan disini