Showing posts with label html. Show all posts

Thursday, January 5, 2017

Top Web Design Trends for 2017

web design trends 2017
What web design trends will merge in 2017? Find out here.

2017 is here and it’s bringing more technological breakthroughs and surprising web design trends than the world has ever seen. With each passing day, the modern world hits a new record for digital advancement. The future of web design looks bright for those ready to embrace positive changes.

In this article we shine some light on the web design trends that we think will be big in 2017, so here they are, our tips for the big web design trends of 2017 ...

Touch...

We think haptic technology will be a big deal in 2017
The mobile-first approach has been around for a few years now, but with mobile-phones now officially named as the primary devices used for browsing the web, more companies are realising the importance of having a site that effectively delivers content on a smaller screen. Furthermore, engaging users on mobile devices is becoming more difficult as the 'scroll' and 'swipe' design approach  used in many apps has led to users having a very short attention span when using their mobile device. This is where haptic technology comes in.

There are three sensory systems related to sense of touch in humans: cutaneous, kinesthetic and haptic. All perceptions mediated by cutaneous and/or kinesthetic sensibility are referred to as tactual perception.

The sense of touch may be classified as passive and active, and the term "haptic" is often associated with active touch to communicate or recognize objects.

Haptic communication recreates the sense of touch by applying forces, vibrations, or motions to the user through their mobile device.  Currently the Samsung Anycall Haptic enables users to feel clicks, vibrations and other tactile input. In all, it provides the user with 22 kinds of touch sensations in response to various user actions.

But how does all this relate to web design? Well, for example a strong vibration could be activated to discourage users when exiting a website or app. On the flip side a relaxing, pulsing sensation could be output from a meditation app on your mobile device. There are, of course, numerous other possibilities and I think 2017 is the year when we will see haptic technology emerge as a major feature in web and app design for mobile devices.

Back To Top

Big...

This website utilises big text and big images to dominate the screen
Images, Text and Video are all set to be big in 2017, and I mean that literally.

With the rise in mobile usage, users are reading less, scrolling more and browsing quicker so designers are having to go big to grab attention.

Full screen background images were popular in 2016 and we also saw the introduction of full screen video backgrounds too on websites such as pay-pal, more on that later though. This trend is expected to continue and become more widespread in 2017 as websites try to get their point across quickly and visually.

Large custom typography is also set to be used more to create personality, evoke emotion and set tone. As device resolutions become sharper and type becomes more easy to read on-screen, companies will look to push the limits of typography even further in 2017 to appeal to their target audience.

So expect to see an increase in over-sized and full screen type this year, hopefully it'll be of the beautiful, unique and hand-rendered type and not the bold, blocky and in your face type. We'll have more on the benefits of a custom approach later.


Back To Top

Space...

This website makes good use of space in 2 ways!

The right amount of empty space can make or break a design. Whether it is white space, a background color or image, “empty” space in a design can have a huge effect on the content that is there. if done correctly it will draw the user to the content you want them to focus on, and as mentioned earlier this is not easy nowadays!

Think about it from the user perspective. They will likely be drawn immediately to the open part of the design (whether they think about it consciously or not). From there, the eye will hop to the more populated part of the design. This simple two step process grabs users’ attention and almost shows them where to look. 


Open space is an extension of minimal styles
For this reason we think exaggerated use of space is one of those design trends that will be utilised a lot in 2017. Open space is an extension of minimal styles that have been popular for some time but, this year, rather than a symmetrical outline with space all around, web designs will balance images and text with space in a more asymmetrical format.

This simple balancing act is also visually interesting and great for making a strong impact, another reason we think it'll trend in 2017.

Back To Top

Original...

Expect to see more illustrations like this in 2017

As discussed above, the rise of mobile device and UI patterns now places UX as the most important aspect of design, meaning that many sites now look and work in similar ways. This is fine for users as they now know, instinctively, how to navigate around a website that they have never visited but it's not fine for a company who wants to stand out from the crowd.

In order for a brand to really stand out and strike a connection with it’s audience, while still using a design users can manage, they’ll need carefully considered and completely bespoke visuals which are more representative of who they really are. We can see this being a big web design trend in 2017 and is one that we really look forward to seeing.

Original illustrations are fantastic, versatile mediums for creating playful and friendly visuals which add an element of fun to a site. 

Talented illustrators are able to create illustrations which are full of personality and tailored to match the tone of the brand, something which brands will be striving for more than an ever in 2017.

A custom, purpose taken photograph is the main feature of this website

With a unique style of illustration established, brands are then able to roll that out through their entire identity, for use in large header images, custom iconography and beautifully animated visuals. Dropbox, is a great example of a brand who uses illustration to create beautiful, friendly and totally unique visuals which are full of character to appeal to their users.

This demand for originality will hopefully lead to the death of the dreaded stock imagery that we see everyday across the web and lead to a rise in more authentic photography in 2017. Brands and designers will now be thinking more carefully about the imagery they use on site, hiring professional photographers to take their shots which frame them in the way they want to be seen.

Unfortunately, it’ll probably be a long time before much of the cheesy stock photography completely disappears, but expect to see it disappear a little in 2017.

Back To Top

Video...

This website utilises a full screen video background to epic effect

One trend that grew quickly the past year is video content and we expect to see it grow further in 2017 especially as video content is now increasingly cost-effective to produce, with apps that enable quick and easy live video recording and professional-grade productions. The combination of decreasing costs of video and growing popularity of this medium is the perfect storm for video to overtake written content as king in 2017.

They say a picture paints a thousand words, but a video does that tenfold,

Video, although by no means new, is long-established and versatile medium, useful for story-telling, marketing and vlogging alike, and has several advantages over traditional photography. Where static imagery is flat and motionless, video is altogether more dynamic, using sound and movement to appeal to the senses and hold attention for longer.


Watch the video image above for a few seconds and see how encapsulating it can be. Much like with animation, a moving image on a page instantly captures the users attention, drawing them in so brands are able to get across their carefully constructed narrative and message.

Video is quickly taking over the internet, and the above reasons are testament to how successful it is as a means for content delivery. As well as using video for marketing purposes, it’s becoming more widespread in social media, with the recent releases of live-streaming services Periscope, and Meerkat illustrating the demand people have to not only view video content, but produce their own.

The benefits of video outlined above are reason enough for brands to want to incorporate it, but they are also great reasons for any freelance web designer to start using more video as a feature in their designs.

Back To Top

Custom...

Top Web Design Trends for 2017
Unique and personalised online user experiences are increasing sought after
It’s no secret that responsive web design has taken the web dev community by storm. In 2017, however, we think responsive design will reach a whole new level. Instead of simply adapting based on device, websites will adapt based on each user to give them an entirely custom experience. For example a website’s content, color scheme, font sizes, and spacing could respond to accommodate a user based on their age.

If you're a marketer today you probably know that targeted emails are effective. But what happens when someone clicks through that targeted email only to end up on a static, generic website? The natural progression of personalized emails should lead to a personalized website, but limitations in technology and strategy have delayed this realization so far. There are signs, however, that the time for more personalization across the online experience has come.

A 2013 Monetate/eConsultancy Study found that in-house marketers who are personalizing their web experiences see on average a 19% uplift in sales.

When it comes to shopping online, experiences tend to fall into two categories: The almost seamless experience offered by major retailers such as Amazon or the clunky too-many clicks to checkout experience that is common among small shops. In 2017 a third could emerge, a fully cutomised web experience to suit your exact and specific needs and desires - now doesn't that sound great!

Back To Top

Voice...

Web Design Trends for 2017

Consumers are drawn to systems like Siri, Cortana and Alexa, who respond to voice commands and spoken questions. Voice search developments have made this the preferred search method for many consumers, who now ask their devices questions such as “Where are the nearest shops to me?” In 2017 businesses must consider these voice searches when creating content for their websites by making it more conversational and using natural phrases instead of generic keywords.

But it's not just the content creators that need to pay attention, the web developers and programmers have a bit of homework to do too. Although there are not a lot of studies and data currently available on the subject,you can be sure that users are likely to use different language when creating a search query by speaking, rather than typing.

Here are a few simple steps that web developers can take to ensure that their websites are making the most of their potential voice search opportunities...

  • Schema is a markup language that works alongside HTML to provide information to search engines and other services that want to use the data that you provide to learn about your website. The information that you provide through schema already has an affect on your search optimization, but becomes even more important when targeting users that are using voice search. The more information that you are able to provide to search engines, the better that they will be able to understand the content on your website and connect relevant to voice searches that are performed by users.
  • A website might provide search engines with a large number of feeds that provide data and information to help them properly categorize their listings. For instance, XML sitemaps and location data are integral for helping Google to crawl the entirety of your website and help to provide information that can help your business to rank in local search engine pages. Ensure that you are providing all data that is relevant to your company in the feeds so that search engines can correctly classify and detect when your content is appropriate for voice commands and search.
  • Often, users that are using voice search are looking for very quick answers to their question. They want to know the answer and have it read back to them as quickly as possible. For this reason, you should try to ensure that the answers to common questions that users might have about your company, product, or industry are answered clearly on your pages. Frequently Asked Questions pages are an excellent way to provide quick, relevant answers to questions that voice searchers might have.


Back To Top

Animation...
Design Trends for 2017
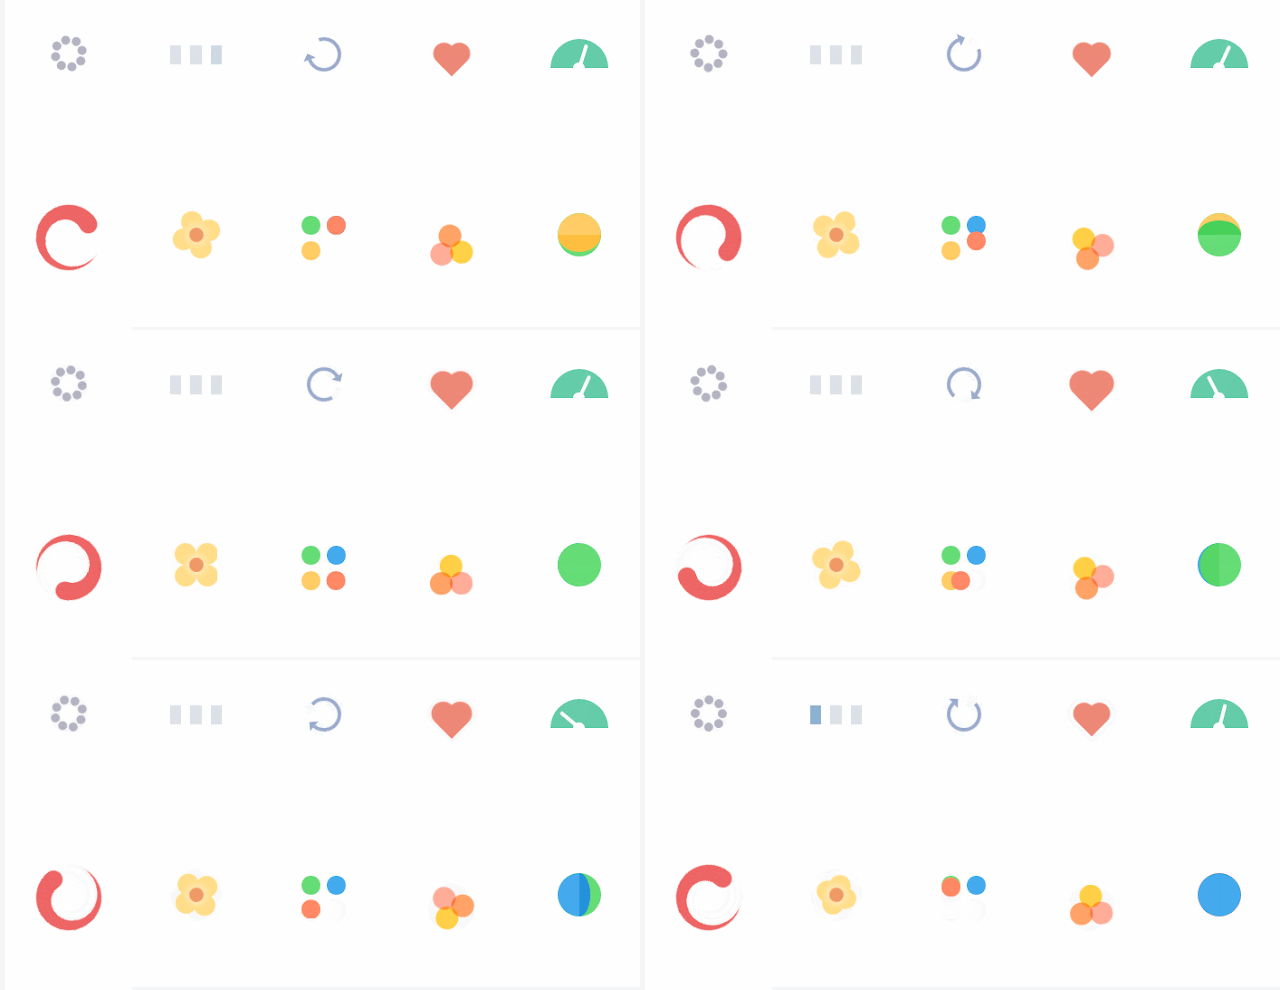
css animation loading icons
As browsers and languages become more advanced, we’re seeing more websites move away from the use of static imagery and finding new ways to engage users and be unique in their approach to communicating. Animation is one of the main ways to do this and having seen many brands start the trend in 2016 we think 2017 is going to see that trend grow further.

Animations  can come in all different shapes, sizes and styles; and can serve different purposes. For example animations can range from tiny loading-devices (see above) which entertains the user while waiting for content to load, to an interesting hover-state used as a UX device to show a user they’re hovering over a link.

They can also be used on a much larger scale, as rich, full-screen animations, which can integrated to work with scrolling, navigation or be used as the focal point of the entire site. Animation is another useful mechanic for brand’s to create meaningful micro-interactions between themselves and their users.

With such a broad array of internet capable devices ‘the fold’ is now harder to define, as users are viewing content of screens of all different sizes and resolutions. Scrolling, once reserved for getting from top of a page to the bottom, is being used in more creative capacities to deliver content online. Apple is a high profile brand making great use of scroll within their site.

Animated scrolling (as used on this website) and parallax scrolling are versatile mechanics which, when executed well, can work great with all varieties of content delivery. It works with video based content, where large full screen videos play and pause as the user scrolls, as well as static content, which can animate, move, or change depending on the users input.

With content creation happening at a far greater pace than ever seen before, and companies finding more innovative solutions for delivering their content to users, we expect the clever use of scroll and parallax effects to be big in 2017.

So web animation has many applications, but if abused, or executed badly can be disastrous to usability. However, as with most developments, we expect that as more designers experiment and gain feedback from users, it’ll be something which gets better and better, adding more functionality and additional levels of interaction.

Back To Top

Conclusion...

There are 100’s of ‘trends’ going on in any creativity industry at any one time, and it’s hard to pin-point every single one, but we believe that the above are some of the more core ones to be focusing on in 2017 and beyond.

As with all trends, the above points have come about for good reason; as creatives and clever-thinkers across the globe have all learnt and borrowed from one another to form similar patterns which we see emerge online today. Not all of these trends may be relevant to you and your content, but it’s always beneficial to know what’s happening in the industry and to see where you’re able to improve in order to develop and progress.

With all this said, they should only be used sparingly, and carefully, to enhance the user’s experience and not detract from it. No-one wants to wait forever for content to load because of unnecessary design 'features' holding it up.

Thursday, August 11, 2016

5 Different Approaches To Creating a Website

5 Different Approaches To Creating a Website

It is important to state before we start that the creation of your website is just one of the steps in the web design process and it's not the first one! So I would really recommend reviewing the web design process first to make sure you are adequately prepared for this stage. So many people jump straight in at this stage and waste a lot of their time because they have not completed the previous steps in the process so don't say you weren't warned. Now with that little rant over, lets look at your options for creating the website.

There are 5 main ways to create a website and although not all of them require knowledge of HTML and CSS it is definitely better if you have at least a basic understanding of them.

The 5 ways to create a website are...

  • programme it yourself
  • get a website template
  • use a website builder
  • utilise a CMS
  • hire a web designer
Now that we know each of our website creation options, let's explore each of them in more detail.

Programme it from scratch 


If you already have good HTML and CSS skills or perhaps you are a web design or multimedia student in the process of learning HTML and CSS then this is a good option for you. Programming a website from scratch is also the most cost effective of the 5 options discussed in this article however it is also the most time consuming option. 

To help with this approach there are a number of very good code editor programmes available online such as Komodo Edit, which is an excellent free code editor which you can use to make programming your own website a little easier.


Start with a template


If you really want to program the website yourself but need a little bit of a helping hand getting started then perhaps a website template is the way to go, just be sure to get a responsive template to ensure your website is as user friendly as possible. This is also a great option if your programming skills are better than your design skills as you can keep the templates design features and use your programming skills to edit the content to suit your website needs.

You can choose from an amazing 100 free responsive website templates here. So a website template is definitely a great idea, especially for new web designers, just be sure to customise it as, a bit like a stock photograph being used in a poster, it can appear stale and without character in it's raw, template state.


Use a website builder


Website builders advertise themselves as the easiest and quickest method to create a website. Companies like SquareSpaceWix and Weebly are the best options for this approach and they both offer a starter package where you can get online with a free sub-domain name and free hosting. Although on the surface it may seem like a good choice, in my opinion, this is not a good option.

Website builders always seem to result in very rigid web designs, the free domain name is not a full domain and they tend to overcharge you for a full domain name. You often need to upgrade to a paid account to get a custom domain too and the monthly or yearly pricing structure is usually quite expensive. Bandwidth restriction, custom ads and extra storage space are other things that often need to be paid to unlock. In summary, this wouldn't be a choice I'd recommend.


Utilise a Content Management System


This would be my recommended option. CMS for short, content management systems are similar to, and often confused with, website builders. The difference being a CMS website design and structure is often created by a web designer first before being handed over to a client who only has access to a front end to make any required updates.

However, if you have learned some HTML and CSS, you can take charge and create the website design and structure yourself using systems like Blogger and WordPress. Which one of these is better is constantly being debated online with my personal preference being Blogger (read why). 

Whichever you choose, there are many others available too, this is a great option which offers you templates to get started, widgets to drag and drop in while still having access to the HTML and CSS to make advanced or specific changes and tweaks.

Hire a web designer


If you don't have the time to learn how to build a website or you need to have complex functions or a very specific look for your website and you have a budget, then you will want to outsource the work.

Be careful who you hire, though. A poorly developed website can cost you money, drive away customers, and hurt your reputation. Following a few basic steps will increase your odds of hiring a creative, technically savvy, and cost-effective design firm or freelancer.

Much of your choice of designers depends on whether you want to work locally with someone, or whether you are willing to work remotely with them over the phone. Here are some things to think and ask about when hiring a website designer. If you would like to hire a web designer then we can proudly recommend Opus Web Design.


Monday, March 14, 2016

HTML Video and Audio

HTML Multimedia - Video and Audio
HTML can also be used to add video and audio files to your webpage

HTML Video

Videos can be easily hosted online embedded into your web pages using html with the <video> tag to display your media file. It works in a similar way to the image tag in that a 'src' attribute must be defined in order for the video file to be located. However with video and audio files the player details as well as the file details need to be specified. Here is a look at a sample,


Lets explain the above video code a little more...

  • The video element specifies that a video player is needed
  • The controls attribute adds video controls, like play, pause, and volume.
  • It is a good idea to always include width and height attributes for quicker loading. If height and width are not set, the browser does not know the size of the video. The effect will be that the page will change (or flicker) while the video loads.
  • The <source> element along with the src attribute locates the file and specifies the file type.
  • Currently .mp4 video files are the only file type supported across all browsers.

Something to consider...

Videos are large files and hosting your videos directly on your own website hosting space will take up a lot of space so if you have a lot of videos a good idea would be to consider hosting them on an external video hosting websites. YouTube and Vimeo are excellent places to host your videos, you can then use the embed code that they provide you to place the video on your website.

HTML Audio:

Like videos and images there are many audio file types. MP3 files are the only audio files that are currently supported across all browsers.The <audio> tag works in a very similar way to the <video> tag shown above.

Here is a sample piece of HTML code for adding an audio file to your page...


Lets explain the above audio code a little more...

  • The video element specifies that a video player is needed
  • The controls attribute adds video controls, like play, pause, and volume.
  • It is a good idea to always include width and height attributes for quicker loading. If height and width are not set, the browser does not know the size of the video. The effect will be that the page will change (or flicker) while the video loads.
  • The <source> element along with the src attribute locates the file and specifies the file type.
  • Currently .mp3 video files are the only file type supported across all browsers.

HTML Audio/Video Properties

  • audioTracks Returns an AudioTrackList object representing available audio tracks
  • autoplay Sets or returns whether the audio/video should start playing as soon as it is loaded
  • buffered Returns a TimeRanges object representing the buffered parts of the audio/video
  • controller Returns the MediaController object representing the current media controller of the audio/video
  • controls Sets or returns whether the audio/video should display controls (like play/pause etc.)
  • crossOrigin Sets or returns the CORS settings of the audio/video
  • currentSrc Returns the URL of the current audio/video
  • currentTime Sets or returns the current playback position in the audio/video (in seconds)
  • defaultMuted Sets or returns whether the audio/video should be muted by default
  • defaultPlaybackRate Sets or returns the default speed of the audio/video playback
  • duration Returns the length of the current audio/video (in seconds)
  • ended Returns whether the playback of the audio/video has ended or not
  • error Returns a MediaError object representing the error state of the audio/video
  • loop Sets or returns whether the audio/video should start over again when finished
  • mediaGroup Sets or returns the group the audio/video belongs to (used to link multiple audio/video elements)
  • muted Sets or returns whether the audio/video is muted or not
  • networkState Returns the current network state of the audio/video
  • paused Returns whether the audio/video is paused or not
  • playbackRate Sets or returns the speed of the audio/video playback
  • played Returns a TimeRanges object representing the played parts of the audio/video
  • preload Sets or returns whether the audio/video should be loaded when the page loads
  • readyState Returns the current ready state of the audio/video
  • seekable Returns a TimeRanges object representing the seekable parts of the audio/video
  • seeking Returns whether the user is currently seeking in the audio/video
  • src Sets or returns the current source of the audio/video element
  • startDate Returns a Date object representing the current time offset
  • textTracks Returns a TextTrackList object representing the available text tracks
  • videoTracks Returns a VideoTrackList object representing the available video tracks
  • volume Sets or returns the volume of the audio/video

Next Up

The last part of our 10 steps to learning HTML is a treat. We provide you with all the web design resources you will need to take you from HTML novice to industry ready web developer.


HTML Images

HTML Images
Images are very powerful tools in web design and help convey the message and style of a business instantly

HTML Images work in a similar way to links in that they require a single element but also only work together with one specific attribute. So with links the element <a> always uses the attribute 'href', with images the element <img> (for image) always uses the attribute 'src' (for source).

The <img> Element

The element <img> tells the computer you placing an image in the web page and the attribute 'src' tells the computer where to find the image. Like with links the image can be an existing online image that you link to or an image saved on your own hosting space. For example,


The code above links to a file called 'html' which is a .gif file (more on file types in a moment) and is save in a subfolder called images. Note the attribute title can also be used with images. Also note how the element does not need a closing tag, this is because there is now content, the image is stand alone.

The image would appear in the browser like this...

The HTML5 logo


There are three main types of image files that you can insert into your web pages, gif, jpeg and png. For a more in depth look at file types, see the section on common graphic design file types.

HTML Image Attributes

You always need to use the attribute 'src', which tells the browser where the image is located but there are a number of other attributes which can be useful when inserting images. Another attribute you should always use is 'alt', this allows you to set a value which describes the image. This value will appear if the user hovers over the image (try the image above) while also helping search engines to correctly index the image. Two other attributes to the 'img' element are width and height, for example,


The above code results in a 64 x 64 pixel sized representation of the original image, as seen below.

The onlinedesignteacher logo

With images it is also recommended that you always use the 'alt' attribute to describe what the image shows. This is valuable for 4 reasons...
  • The alt attribute helps search engines understand the content of the image.
  • The alt description will be displayed as text if the image fails to load.
  • Text readers will read the alt attribute for the blind or visually impaired using your website.
  • When you hover over an image the alt attribute will be displayed.
The example below shows the html code for an image with the alt attribute in use.


The above code will result in the image below and if you hover over it the alt text will display.

The html5 logo

Image Sizes and Resolution

Pixels are the units of measurement used to measure the resolution of screens. (The most common screen resolutions are 1024 x 768 and 1366 x 768 pixels). Unlike centimetres, pixels are relative units of measurement which depend on the resolution of the screen. To a user with a high screen resolution, 25 pixels may correspond to 1 centimetre, while the same 25 pixel in a low screen resolution may correspond to 1.5 centimetres on the screen. If you do not set the width and height, the image will simply be inserted in its actual size. 

However, it is worth keeping in mind that the actual size in kilobytes of the image file will remain the same so it will take the same time to load the image as it did before, even though it appears smaller on the screen. Therefore, ideally you should never decrease the image size by using the width and height attributes but instead, you should resize and optimise your images in an image editing program to make your pages lighter and faster.

That said, it is still a good idea to use the width and height attributes, even if you are not changing them, because the browser will then be able to detect how much space the image will need in the final page layout before the image is fully downloaded. This allows your browser to set up the page nicely in a quicker way. Another article you may be interested in is How to get your images up the Google rankings.

Next Up


HTML Links

HTML Links
HTML links are what makes the web ... a web!

HTML Links are clickable text or images that connect one webpage to another. To make links, we use what we always use when coding HTML, an element. A simple element <a> used with one attribute 'href' and you will be able to link to anything and everything. The element 'a' stands for anchor and the attribute 'href' is short for "hypertext reference", which specifies where the link leads to, typically another web page on the internet but it can also lead to a file of any type.

External HTML Link

Here is an example of a standard external html link to www.google.com


The html5 code above would look like this in the browser,

Here is a link to Google


In the above example the attribute 'href' has the value "http://www.google.com/", which is the full address of google.com and is called a URL which stands for Uniform Resource Locator. Note that "http://" must always be included in URLs.

The sentence "Here is a link to Google" is the text that is shown in the browser as the clickable link, it does not really matter what this text is but for the sake of visitors to your website try to use relevant text. As always remember to close the element with an </a>.

Link To Your Own Webpages

If you want to make a link between pages on the same website, you do not need to spell out the entire address (URL) for the document. For example, if you have made two pages, let's call them page1.html and page2.html, and saved them in the same folder you can make a link from one page to the other by only typing the name of the file in the link. Under such circumstances a link from page1.html to page2.html would look like this,


If page 2 were placed in a subfolder (named "subfolder"), the link would look like this:


If it was the other way around, a link from page 2, in the subfolder, out to page 1 would look like this:


In this case '../' points to the folder one level up from position of the file from which the link is made. Following the same system, you can also point two (or more) folders up by writing '../../'. If you find this hard to follow or understand the best thing is to try out creating some links yourself, practice makes perfect!

Link Within A Webpage

You can also create internal links within a page - for example create a table of contents at the top of the page which has links to each chapter below. All you need to use is a very useful attribute called 'id' (identification) and the symbol "#". Use the id attribute to mark the element to which you want to link to. For example,


You can now create a link to that element by using "#" in the link attribute. The "#" tells the browser to stay on the same page. The "#" must be followed by the id of the tag you want to link to. For example,


As always, try it out yourself but remember that if the content you are linking to is within the same screen view, i.e. you don't have to scroll down to it, then the link may appear not to be working when it actually is. This is because the link and the area you are linking to are too close to each other.

Link To A Document

You can also make a link to any type of file, such as a word document or PDF. It is done in almost the same way as all other links.


In this example the file is a PDF called info and it is located in a subfolder called 'documents'.

Link Titles

In addition to the 'href' attribute, you can also use the attribute title put a title on your link which appears when you hover the mouse cursor over the link. This can be used to provide extra information to the user about where the link leads to. For SEO purposes it is also recommended that you add a title attribute to all links. For example,


The code above would appear in the browser like this, (Hover over it to see the title).

Google

Next Up

Next up we explain how to add images to your webpages using HTML.


HTML Tables

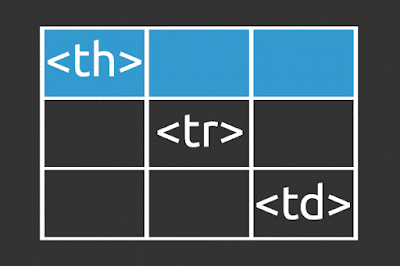
HTML Tables using the <table>, <th>, <tr> and <td> elements
HTML can be used to structure tabular data
HTML Tables are used when you need to show 'tabular data', in other words information that is logically presented in rows and columns. NOTE: Do not attempt to use tables to arrange the layout of an entire webpage or website with tables, that is what CSS is for. But more on that later.

Building tables in HTML works in a similar way to lists although at first they may seem more complicated. However if you take it step by step it is actually strictly logical - just like everything else in HTML. Tables use three main elements, <table> for table, <tr> for table row and <td> for table data
  • The opening tag <table> and the closing tag </table> starts and ends the table. Logical. 
  • <tr> stands for "table row" and starts and ends horizontal rows. Still logical. 
  • <th> stands for "table header" and is used within the first table row to set the table headings. Still logical. 
  • <td> is short for "table data". This tag starts and ends each cell in the rows of your table. All simple and logical. 

See the example below.


The html code above will create a table like this in the browser,

Heading 1Heading 2
Cell 1 Cell 2
Cell 3 Cell 4


This is a very basic example, but tables can be made more interesting by using attributes. For now lets focus on two attributes commonly used with tables are border and cellpadding, see the example below.


The html code above will create a table in the browser like this...

Heading 1 Heading 2
Cell 1 Cell 2
Info 3 Info 4

Other attributes such as 'height', 'width', 'bgcolor', 'align' and 'valign' can also be used to edit the appearance of your table.


The html code above will create a table like this in the browser ...

Heading 1 Heading 2
Cell 1 Cell 2
Info 3 Info 4

Try it yourself and experiment with different attributes to see what kinds of tables you can create using HTML.

Next Up

Once you have mastered the basics of HTML tables the next step is how to create web links using HTML.


HTML Lists

HTML Lists with <ol>, <ul> and <li>
HTML can be used to create structure lists

HTML Lists Elements

Now it is time to learn some new HTML elements <ul>, <ol> and <li> which are used to create lists. What better way to display and describe them than in their very own list!

  • <ul> is short for "unordered list" and inserts bullets for each list item. 
  • <ol> is short for "ordered list" and numbers each list item. 
  • To make items in the list you must use the <li> tag ("list item"). 

As well as their obvious use, lists are also commonly used for structuring data to create website menus and drop down menus. First things first though, let's look at some basic list examples.

Ordered HTML Lists


The html code above will create a list like this in the browser...
  1. First list item 
  2. Second list item 

Unordered HTML Lists


The html code above will create a list like this in the browser...
  • A list item 
  • Another list item 

HTML List Types

By default the unordered list displays the bullet points as circles and the ordered list uses numbers as its default. You can also create different types of lists, such as a,b,c lists or Roman numeral lists, using the attribute 'type' and setting a relevant value, see the options below.


  • 1  -  (Default) List using decimal numbers (1, 2, 3, 4) 
  • a  -  Alphabetically ordered list, lowercase (a, b, c, d) 
  • i  -   Roman numerals list, lowercase (i, ii, iii, iv)


  • Disc  -  (Default) Filled in circle bullet point list
  • Circle  -  An unfilled circle or circle outline bullet point list
  • Square  -  A filled in square bullet point list

Practice and experiment by creating your own lists using html and add them into your web pages.

Next Up

Learn how to create and display data in tables using HTML.


The HTML Template

The basic structure of a html document
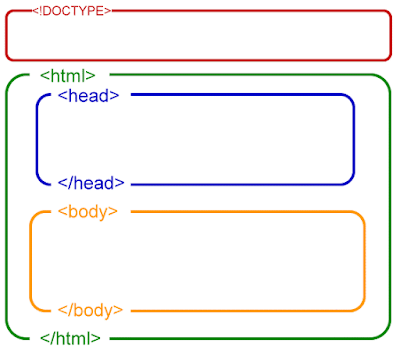
A visual reference of the a HTML page structure

Start With A DOCTYPE...

The doctype declaration must be the very first thing in your HTML document, before the html tag. The declaration is not an HTML tag; it is an instruction to the web browser about what version of HTML the page is written in. In HTML5, the latest version of HTML, there is only one declaration, and it is very simple:


Note:
  • The tag does not have an end tag.
  • The declaration is NOT case sensitive.
  • Always add the declaration to your HTML documents, so that the browser knows what type of document to expect.

The HTML Page Structure

The two main sections within a HTML document are the 'head' and the 'body' sections. The 'head' section will contain information about your page, none of which appears in the browser, and the 'body' contains all the content which will be displayed in the browser. Since HTML is nothing if not logical, the head (<head> and </head>) is on top of the body (<body> and </body>).

An empty HTML document is structure as shown below.


Note how we structured the tags with new lines (using the Enter key). In principle, it does not matter how you structure your HTML document, other than keeping elements in order, but to help you, and others reading your code it is strongly recommended that you structure your HTML in a neat way with line breaks and indents. If you type the above code and save the file with the extension .html, believe it or not you have just created a website! A single page, empty website but a website nonetheless and what you have made can be used as the basic template for all your future HTML documents. If you are using Context simply save the file as a HTML but if you are using Notepad or Simple text choose File- Save As then select all files from the file type drop down and save the document with the .html file extension, for example pagename.html. You can now open click on the file and it will open in your default browser.

HTML <Head> and <Body> Sections

As you learnt earlier, your HTML document has two parts: a head and a body. Remember in the head section you write information about the page, while the body contains the information that constitutes the page. For example, if you want to give the page a title which will appear in the top bar or tab of the browser window, it should be done in the 'head' section. The element used for a title is title. So write the title of the page between the opening tag <title> and the closing tag </title>. The title is especially important because it is used by search engines, such as Google, to index your website and is shown in the search results.


Note that this title will not appear on the page itself. Anything you want to appear on the page is content and must therefore be added between the 'body' tags. To add some content to the page, type the following in between the 'body' tags.


The html code above will appear in the browser as

Hurrah! This is my first website

Try to create a few pages yourself. For instance, make a page with a title, a heading, some text, a subhead and some more text. It is perfectly okay to look in the tutorial while you make your first pages. But later, see if you can do it on your own, without looking. If you're having trouble, here is an example:


Next Up

Understanding the different element that make up a HTML webpage. Read On >>>


HTML Elements

HTML elements
The structure on a HTML element


What are elements in HTML?

The foundations of HTML are elements. Elements give structure to a HTML document and tell the browser how you want your website to be presented. In this section we will learn what elements are, how they work and use a small sample of basic elements. Throughout this series of HTML notes we will be introduced to new elements in each section until we have an understanding of all the main HTML elements.

In general, elements consist of a start tag, some content, and an end tag. Tags are labels you use to mark up the beginning and end of an element. All tags have the same format: they begin with a less-than sign '<' and end with a greater-than sign '>'.

Generally speaking, there are two kinds of tags - opening tags such <html> and closing tags like </html>. Notice that the only difference between an opening tag and a closing tag is the forward slash '/'. You label content by putting it between an opening tag and a closing tag. To learn HTML is to learn and use different elements and tags.

Sample HTML Elements

Let's look at some examples. For example the element b is used to markup bold letters so all text between the opening tag <b> and the closing tag </b> is written in bold letters in the browser. ('b' being short for 'bold'.)

So the html code below...


Will look like this in the browser...

This text must be bold.

Other basic elements include <p> for paragraph, <i> for italics and <u> for underline. Headings are created using one from a set of six elements, h1, h2, h3, h4, h5 and h6, where h1 is the largest text, h2 is the second and slightly smaller text, and so on right down to h6.


Will look like this in the browser...

This is a heading

This is a subheading

Now lets try out some other elements and see what we can do. The best way to learn HTML is by trial and error but don't worry, there is no way you can break your computer or the Internet by making mistakes. So keep experimenting, that is the best way to gain experience. Some other elements are <p> for paragraph, <i> for italics, <u> for underline and <b> for bold. Multiple elements can also be at the one time, but they must be closed in reverse order, for example


Will appear in the browser as...

This text is in bold and italics

You can also use elements within elements like this.


Will appear in the browser as...

This word is in bold and this word is in italics.

As they say, there's an exception to every rule and in HTML the exception is that there are a few elements which open and close in the same tag. These so-called empty elements are not connected to a specific passage in the text but rather are isolated labels, for example, a line break which is created with <br /> or a horizontal rule (line) which is created using <hr> do not need to be closed.

Effectively when writing your html code you are giving instructions to a computer so HTML is simple and logical. The browser reads HTML like you read yourself, from the top down and from left to right. Thus, a HTML document begins with what should come first on your page and ends with what should come last and your elements should be arranged accordingly. The first thing you will need to do is to tell the browser that you will 'talk' to it in the language of HTML. This is done with the tag <html>. So directly after your !Doctype, type <html>.

Throughout the next lessons we will learn numerous more elements and attributes but if you cant wait just click here for a full list of all HTML elements and their associated attributes.

Next Up

Learn about HTML Attributes and what you can use them for.


HTML Attributes


HTML Syntax showing element, attribute and value
A HTML attribute can be part of a HTML element and is always followed by a value
HTML Attributes are effectively additional information for the html elements. Every attribute will also define a value to go with it. You will often use attributes in tags such as the body tag while you will rarely/never use attributes in, for example, a <br /> tag since a line break normally is a line break without any parameters to adjust.

Just as there are many different elements, so there are many different attributes. Some attributes are tailor made for one particular element while others can be used for many different elements. It also works the other way as some elements can only contain one kind of attribute while others can contain many. It may sound a bit confusing but once you get acquainted with the different attributes it is actually very logical and you will soon see how easy they are to use and how many possibilities they provide. See the example below.


The html code above will create text aligned to the right in the browser like this...

Text text text text text text.


Attributes are always written within a start tag and are followed by an equals sign and the attribute value is written between inverted commas. Tables, for example, can be made more interesting using attributes (don't worry about the table code as we will come to that soon).

For now lets focus on two attributes commonly used with tables are border and cellpadding, see the example below.


This html code will create a table in the browser like this...

Cell 1 Cell 2
Cell 3 Cell 4

Tip: Don't forget to always close the inverted commas after an attribute.

Throughout the next lessons we will learn numerous more elements and attributes but if you cant wait just click here for a full list of all HTML elements and their associated attributes.

Next Up

Learn how to create lists using HTML.


Introduction To HTML

An introduction to HTML5
What is HTML? Who invented it? What is it used for? How can I learn it? 

Who Invented HTML?

HTML was invented in 1990 by a scientist called Tim Berners-Lee. HTML is an abbreviation of 'HyperText Mark-up Language' although that probably doesn't help you much so let's explain that a little more.
  • Hyper is the opposite of linear. Computer programs used to run linearly, i.e. when the program had executed one action it went to the next line and after that, the next line and so on. But HTML is different - you can go wherever you want and whenever you want. 
  • Text is text, that's self-explanatory
  • Mark-up is what you do with the text, similar to formatting. You are marking up the text the same way you do in a text editing program with headings, bullets and bold text and so on.  
  • Language is what HTML is. It is a computer language but written using many English words or abbreviations of English words. 

What is HTML Used For?

The purpose was to make it easier for scientists at different universities to gain access to each other's research documents. By inventing HTML he laid the foundation for the web as we know it today. HTML is a language, which makes it possible to present information on the Internet. What you see when you view a page on the Internet is your browser's interpretation of HTML. To the untrained eye, HTML code looks complicated but this tutorial will help you make sense of it all.

If you want to make websites, there is no way around HTML. Even if you're using a program to create websites, such as Dreamweaver, a basic knowledge of HTML can make life a lot simpler and your website a lot better. The good news is that HTML is easy to learn and you can even use any basic text editor, such as 'Notepad', 'Simple text' or 'Pico' to write your HTML and save it as a web page by giving it the .html file extension. You can then open it in any browser to see as a web page. It is not important which browser you use. The most common is Microsoft Internet Explorer. But there are others such as Chrome, Opera and Mozilla Firefox and Safari.

How Can You Code HTML?

HTML is mainly English words, as already mentioned, but these words need to be 'Marked Up' or 'Tagged'. The way in which they are tagged and the order in which they are marked up needs to follow particular rules. Here are a few basic rules...

  • HTML tags are keywords (tag names) surrounded by angle brackets:
  • HTML tags normally come in pairs like <p> and </p>
  • The first tag in a pair is the start tag, the second tag is the end tag
  • The end tag is written like the start tag, but with a slash before the tag name

Basic text editors such as Notepad are excellent for coding HTML because they do not interfere with what you are typing by highlighting what it perceives as errors. It gives you complete control. The problem with many of the programs that claim they can create websites is that they have a lot of standard functions, which you can choose from. The downside is that, everything needs to fit into these standard functions. Therefore, these types of programs often cannot create a website exactly as you want it or, even more annoyingly; they make changes to your hand-written code.

With Notepad or other simple text editors, you only have yourself to thank for your successes and errors although they can be difficult to use when you have a lot of code and don't offer any features or functions to make your coding life any easier. A happy medium between the likes of Dreamweaver and Notepad are FREE programs like Context and Komodo Edit which describe themselves as small, fast and powerful freeware text editors. However, whatever program you decide to use HTML will still be the cornerstone of creating your website. Although this series of notes is focussed on HTML programming it is also important to mention that the overall aim is to create a website and that the web design process should also be something you learn and utilise.

What Next?

Now that you have an understanding of what HTML is all about why not continue reading and learn how to make your own websites using HTML. A HTML website must follow a structure or template so that it  is 'read' correctly by the browser. Let's look at that structure now.


close
Banner iklan disini