Showing posts with label 2d game development. Show all posts

Monday, April 4, 2016

Create A 2D Game - Part 5: Game Testing

This is the fifth and final section on how to design and create a 2D game. Before reading this article you should ideally have read the 2D Game Concept, 2D Game Structure2D Game Graphics & Audio and 2D Game Programming sections.

2D Game QA Testing

2d game QA tester
The life of a game tester is a lot more difficult than people think...
Quality Assurance (Q.A.) technicians, or testers, perform a vital role, testing, tuning, debugging, and suggesting the detailed refinements that ensure the quality and playability of the finished game. Their job involves play-testing the game in a systematic way, analysing the game's performance against the designer's intentions, identifying problems and suggesting improvements. They test for bugs in the software, from complete crashes to minor glitches in the programme. They also act as the game's first audience, reporting on its playability, and identifying any aspects which could be improved.

Testers work in teams, sometimes playing together on a multi-player game, and a team might 'own' part of a game. Testing involves playing a game over and over again, testing different levels and builds (incomplete 'development versions' of a game, sometimes with various features missing). The work can be repetitive and tedious, but Testers have to test long after the novelty and fun factor may have worn off.

So 2D game testing is effectively the equivalent of quality assurance for the game. There are two main types of game testing, 'in progress testing' and 'in situ testing'. 'In progress' testing should be conducted throughout the programming stage while the development of the game is still in progress. While 'in situ' testing should be conducted once the game is deemed to be complete and has been published in its final form, whether that be online, on CD or DVD for a console, as an app or on a mobile device.
TIP: It is vital to keep notes while testing to ensure that an identified glitch or suggestion is not later overlooked or forgotten.
Each type of testing will check a variety of different things as shown in the lists below...

'In Progress' Testing will check...

  • Whether the style and size of game graphics are suitable
  • That charcter costumes portray smooth movements
  • Whether game audio and sound effects are suitable
  • If Programmed actions are occurring as they should
  • That in game controls are working correctly
  • Any changes or updates in graphics or programming

'In Situ' Testing will check...

  • If the game loads correctly on its selected platform
  • That the game plays correctly from start to finish
  • All possible game-play scenarios - this may be very tedious
  • How long it takes to play the game
  • What the re-playability level is
  • The learning curve and overall game difficulty
  • The quality of graphics and audio
  • If there are glitches of any kind - are there any jumpy parts/missing elements etc.
  • If the game is interesting or fun

Test Your Testing...

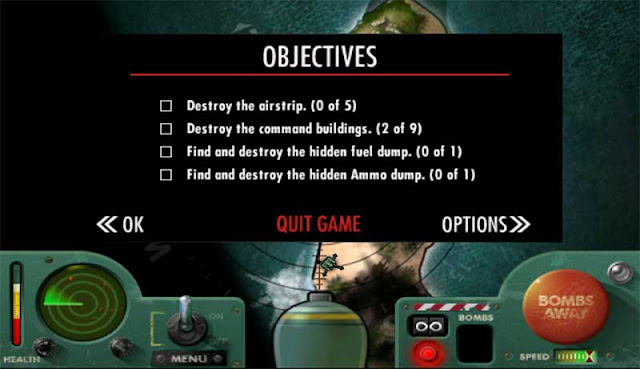
Test out your testing skills on the sample games below (which do have errors/glitches/areas for improvements). When your done write your results in a notepad and then remix the game yourself to improve  or fix it based on your testing notes.


You can also test out a world of games on the Scratch website and especially the OnlineDesignTeacher Scratch Channel. Once testing is complete upgrades to graphics or audio, repairs/changes to the programming code or even an overhaul of the general game structure may be necessary.

That brings to an end our 5 part series on how to create a 2D game. We hope you found it useful and that you managed to use the guide to create a 2D game of your own. You might now be interested in creating a 3D game.


Thursday, March 31, 2016

Create A 2D Game - Part 2: Game Objectives and Structure

Once you have settled on all the details of your 2D game idea you should next look to map out how the game will work. This will include listing the game objectives, identifying game controls, game menus and options, user interface layout, number of level, level maps, enemy A.I. and more.

All of these things must be clearly identified in order to be aware of the graphics you will require, the variety of sound effects you will want and the programming elements that will be needed in the next stages.

Main Game Objective:

Game Objectives Screen
You need to settle on the game's objectives as they are the driving force for the player in the game

First clearly and definitively write down the main objective of the game - you may already have done this using the worksheets in the previous section - and then outline how the player can achieve these objectives.

For example if the aim of the game is to collect coins, a la Sonic, then you also need to map out the location of these coins, the amount of coins, the number of coin types or costumes (for graphics), will there be a coin counting system, where will the counter be displayed, will that require a graphic, will there be a sound effect...? There are lots of questions to be answered so I recommend the use of quick annotated sketches to help make this process easier and faster.

Game Structure:

With the main objective of the game now fully explained and planned you can begin mapping out the structure of the game (how it will progress). The list below outlines a possible game structure....
  • Intro Scene  ↓
  • Game Menu  ↓
  • User Interface Layout - Health, Score, Timer, Inventory etc.  ↓
  • Level 1  ↓
  • Level 1 Boss Battle  ↓
  • Cut Scene  ↓
  • Level 2  ↓
  • Level 2 Boss Battle  ↓
  • End Scene  ↓
  • Game Credits

Note: Within your game structure certain sections will require more detail, planning and/or mapping out.

Game Menu:

2D game menu screen
A sample 2D game menu screen

The game menu will be the first point of contact for your players, it is important to provide them with all the information they need about the game in order to begin playing. This should involve creating a section in the menu where the game controls are explained. A section explaining the game story/plot is also recommended to help the player relate to the character they are playing as. A page in which the game options can be altered is also advisable to allow for things such as editing difficulty level, turning sound on/off or choosing a character to play as.

From a design point of view you should also identify the menu graphics and sound effects you will need. For example will you need a different background image for each menu section? How many buttons will you need? Will they have mouse over effects or sound effects? How will the game name/title be displayed?

From a programming point of view any editable options your menu allows for will have to be programmed into the game, this may involve the creation of extra variables or a different programming approach so they need to be decided upon at the outset as they may be very difficult, time consuming or even impossible to add into the game at a later stage.

For now you only need to sketch out possible layouts/designs for your game menu. The creation of and programming of it will be covered in the next sections.

User Interface:

2D game interface for a shooter game
A sample 2D game interface for a shooter game

After the game menu the next point of contact for the player is the game itself. At all points during the game the G.U.I. (Graphic User Interface) should be visible to allow the player to view important information associated with their status in the game. You must decide what this information should be and how it will be represented. For example the players health could be represented numerically, as a value between 0 and 100, or graphically ,through a health bar where red and green represent health or damage amounts. Below is a mock up of a possible user interface layout alongside a list of information which could be displayed on a User Interface...
  • Player Lives
  • Enemy Lives
  • Health
  • Score
  • Collected Items
  • High-score
  • Time
  • Ammunition
  • Selected Weapon
  • Inventory Items/Pack
  • Position/Map
As with the game menu, for now you only need to sketch out possible layouts/designs for your game's user interface. The creation of and programming of it will be covered in the next sections.

Level Map:

Once created the level map is a very useful document to have at your side throughout the rest of the 2D game design process. Your level map should be a detailed outline of your level including the 'landscape' of the level in terms of platforms, terrain or basically whatever the player is standing on or flying through. The position of enemies and obstacles and hazards should also be outlined on the level map to see potential impossible areas or to ensure there are no areas too hard/easy/boring. It should be possible to view the potential route the player will need to take or the actions the player will need to complete. It may be necessary to create 2 or 3 versions of your level map until you are happy that what you have created is interesting, appropriate and achievable.

The two examples below are from http://www.flickr.com/photos/dexteryy

Sample Level Map Version 1.0


Sample Level Map Version 2.0


Next Up...

Once you have completed the 2d game objectives and structure you should move onto the next step - 2D Game Graphics & Audio


close
Banner iklan disini